


MT4/MT5: Create indicator
EA, indicators & objects (PC)
EA, indicators & objects (PC)

This article was :
published
updated
If you wish to create an indicator on MetaTrader4 (MT4) / MetaTrader5 (MT5), you can do so by using a tool called MetaEditor, which uses a special programming language for MT4/MT5 called MQL4/MQL5.
Here we will look at how to create an indicator on MT4/MT5.
Switch between MT4/MT5 tabs to check the steps for each.
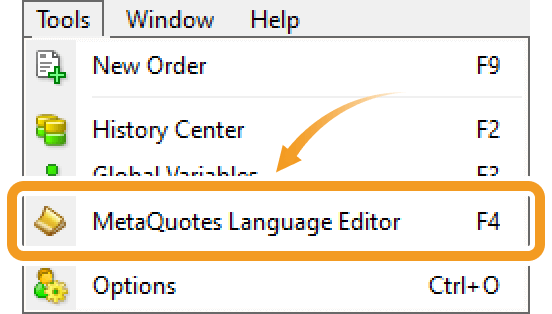
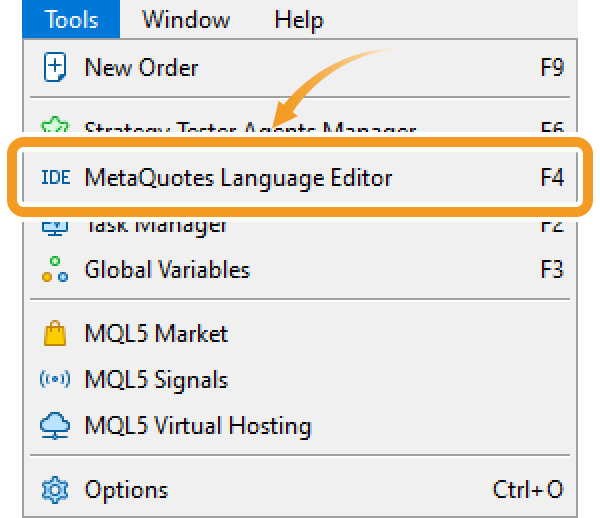
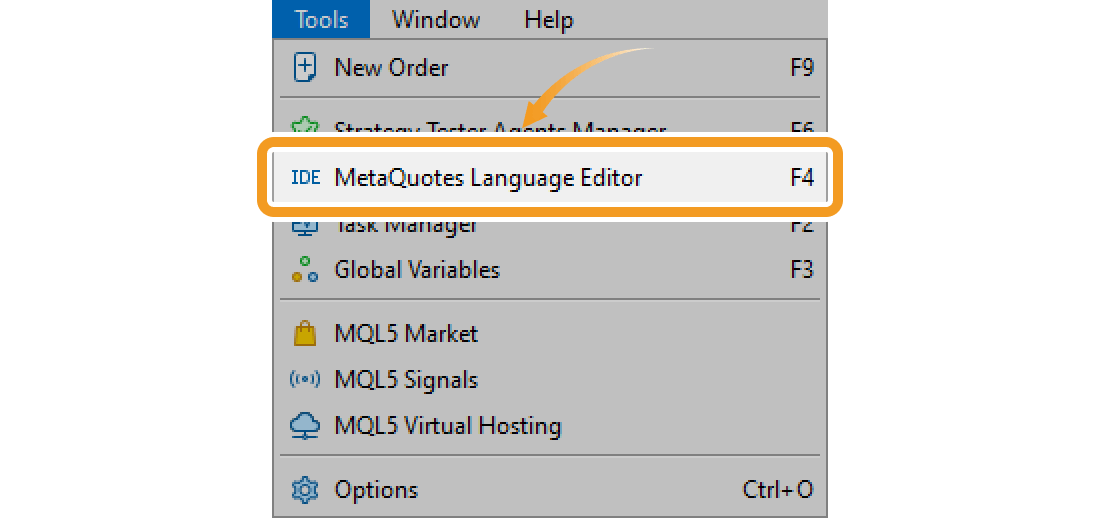
Click "Tools" in the menu and select "MetaQuotes Language Editor".
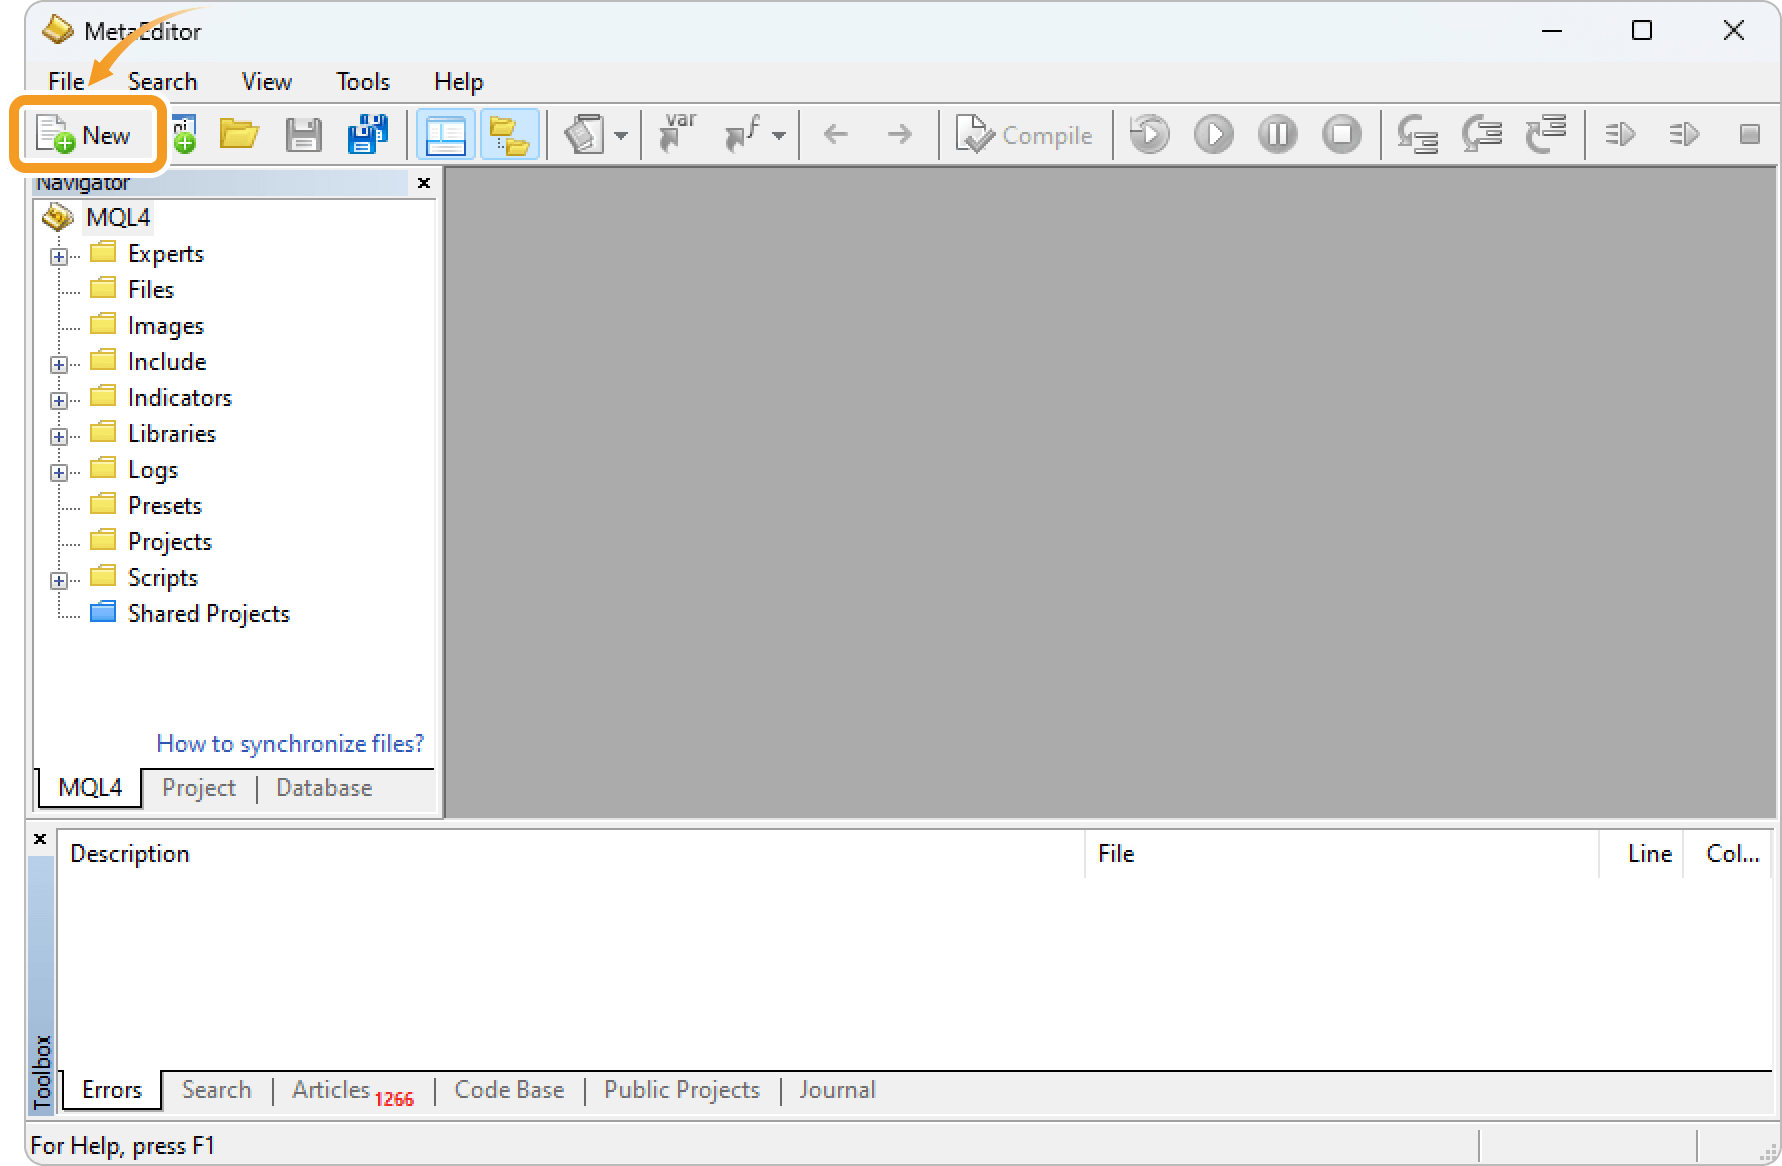
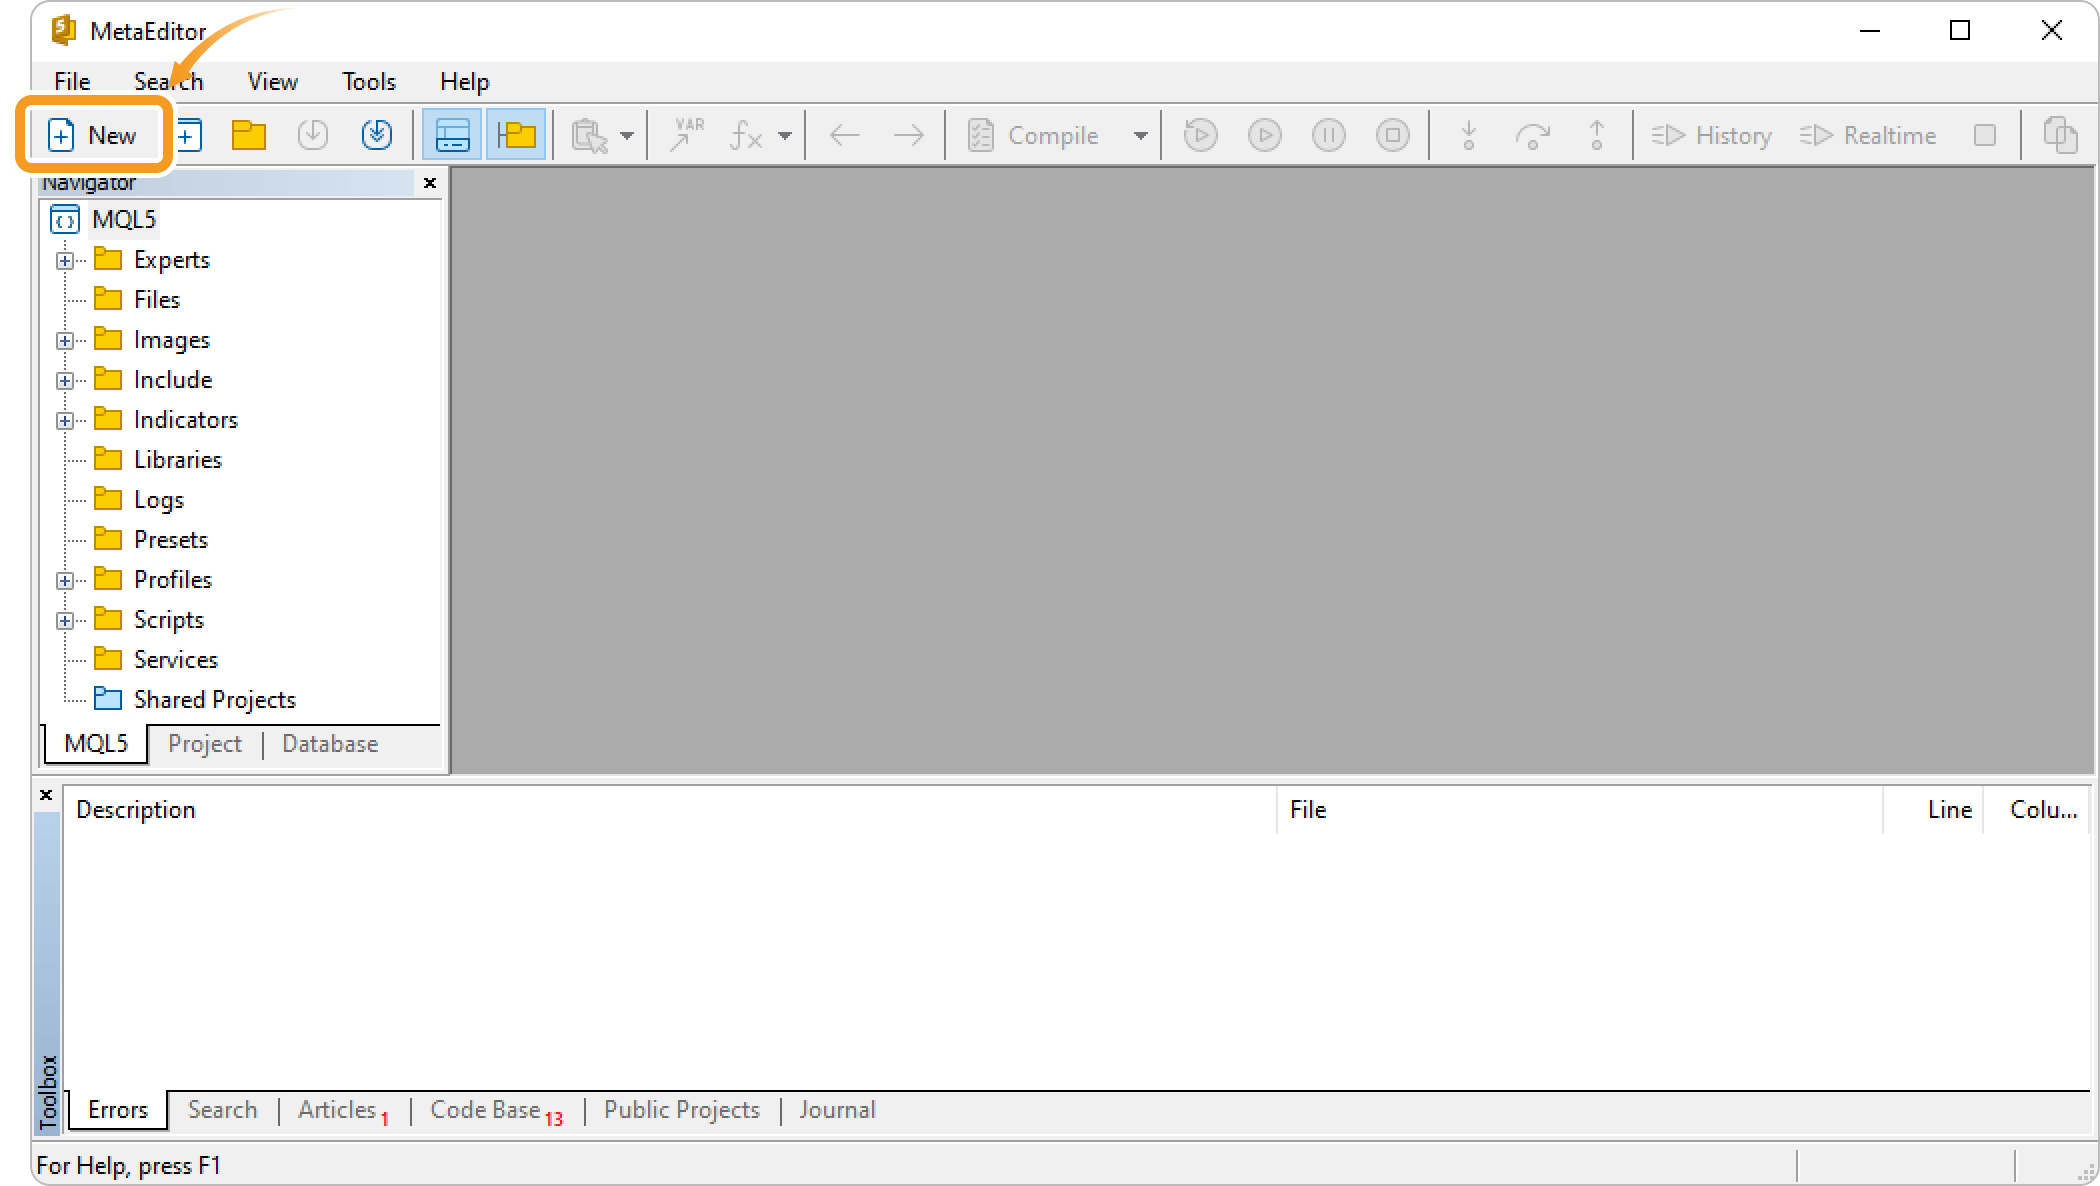
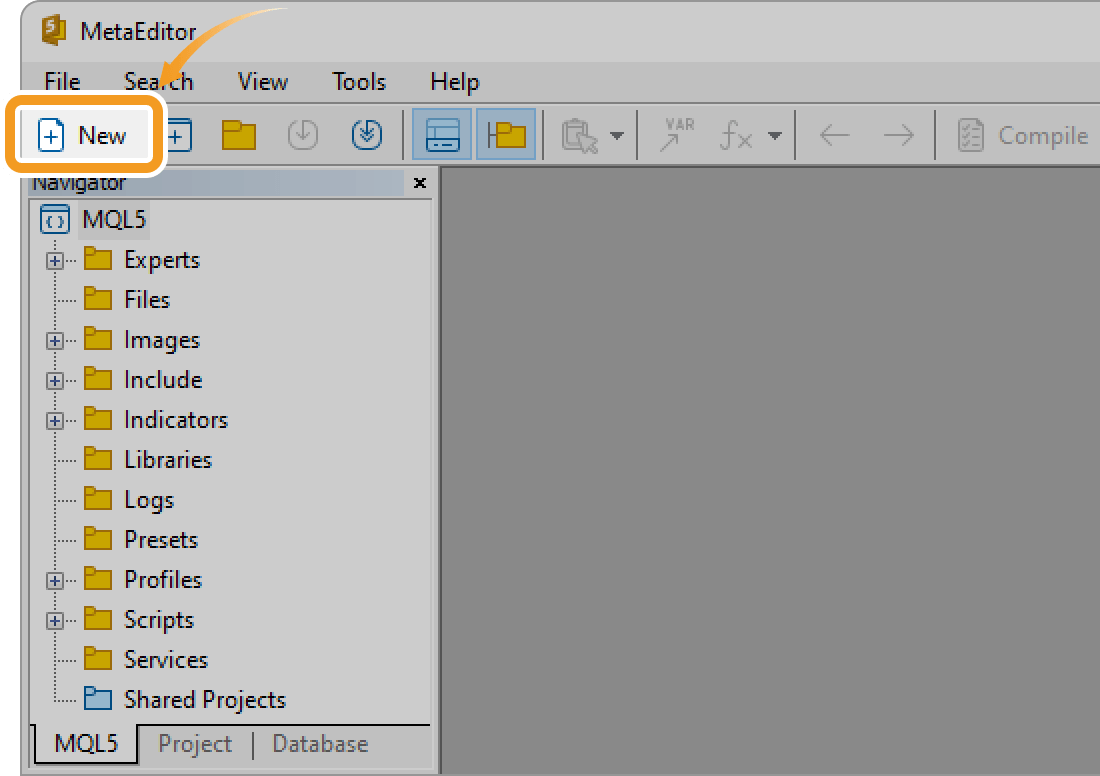
MetaEditor will be launched. Click the "New" button in the menu.
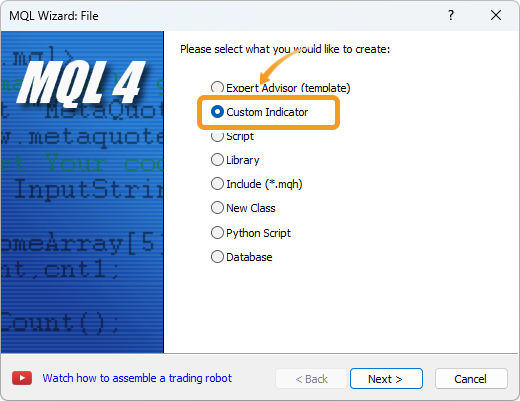
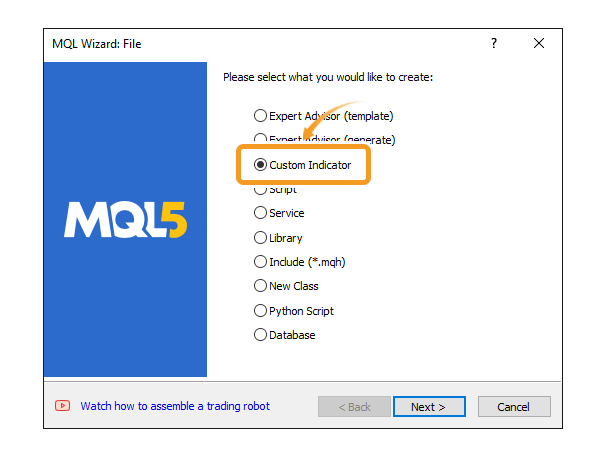
Select "Custom Indicator" and click "Next".

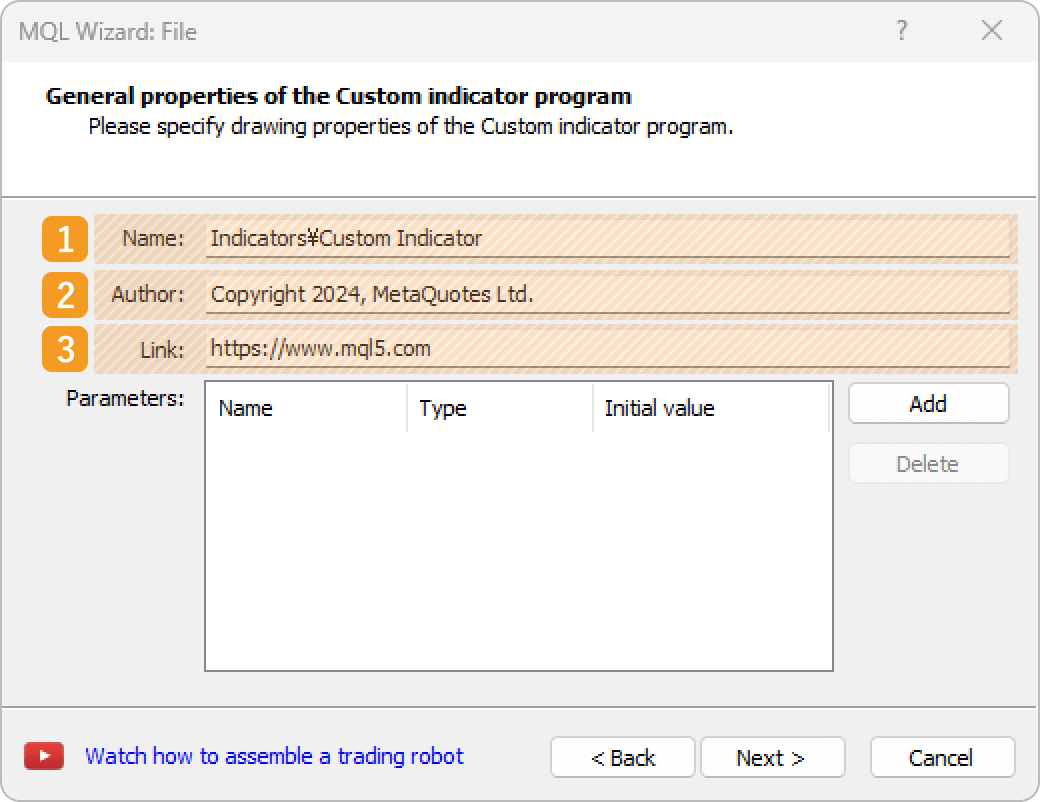
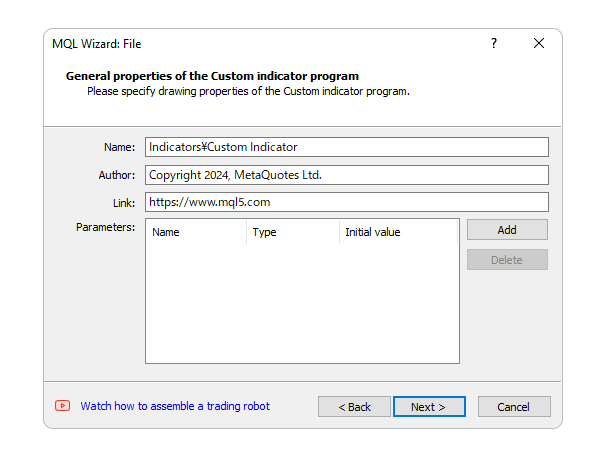
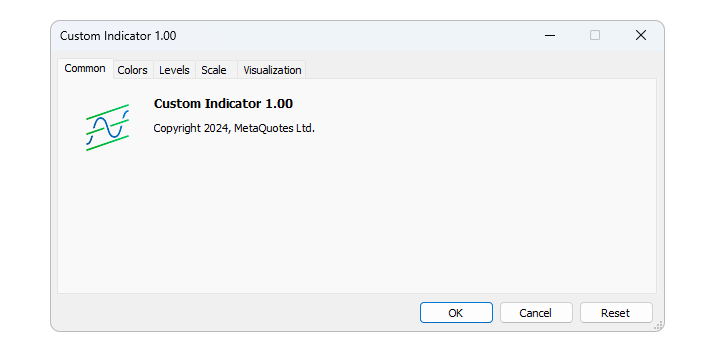
Enter the indicator name, author, and link to display. Configure the parameters as necessary and click "Next". All fields, except for the indicator name, can be left blank.
Other parameters can be adjusted directly in the code, including adding, modifying, or removing them.
|
Number |
Item name |
Descriptions |
|---|---|---|
|
1 |
Name |
The name of the indicator that you create. |
|
2 |
Author |
The author of the indicator. |
|
3 |
Link |
Enter the link of the indicator to display. |
The registered name, author, and link information will be displayed on the indicator settings window.
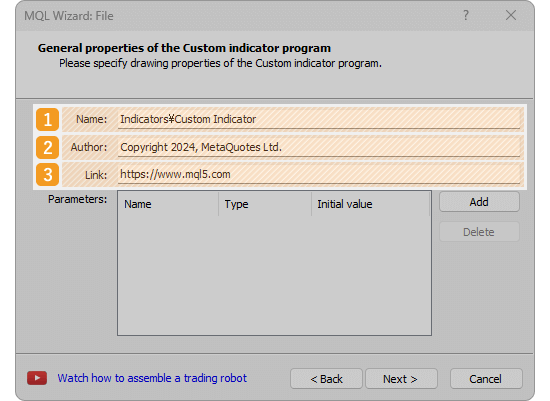
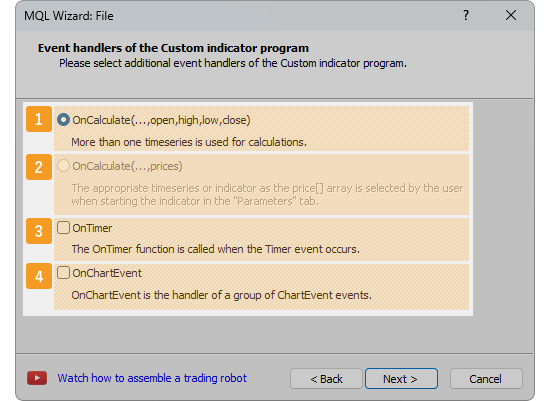
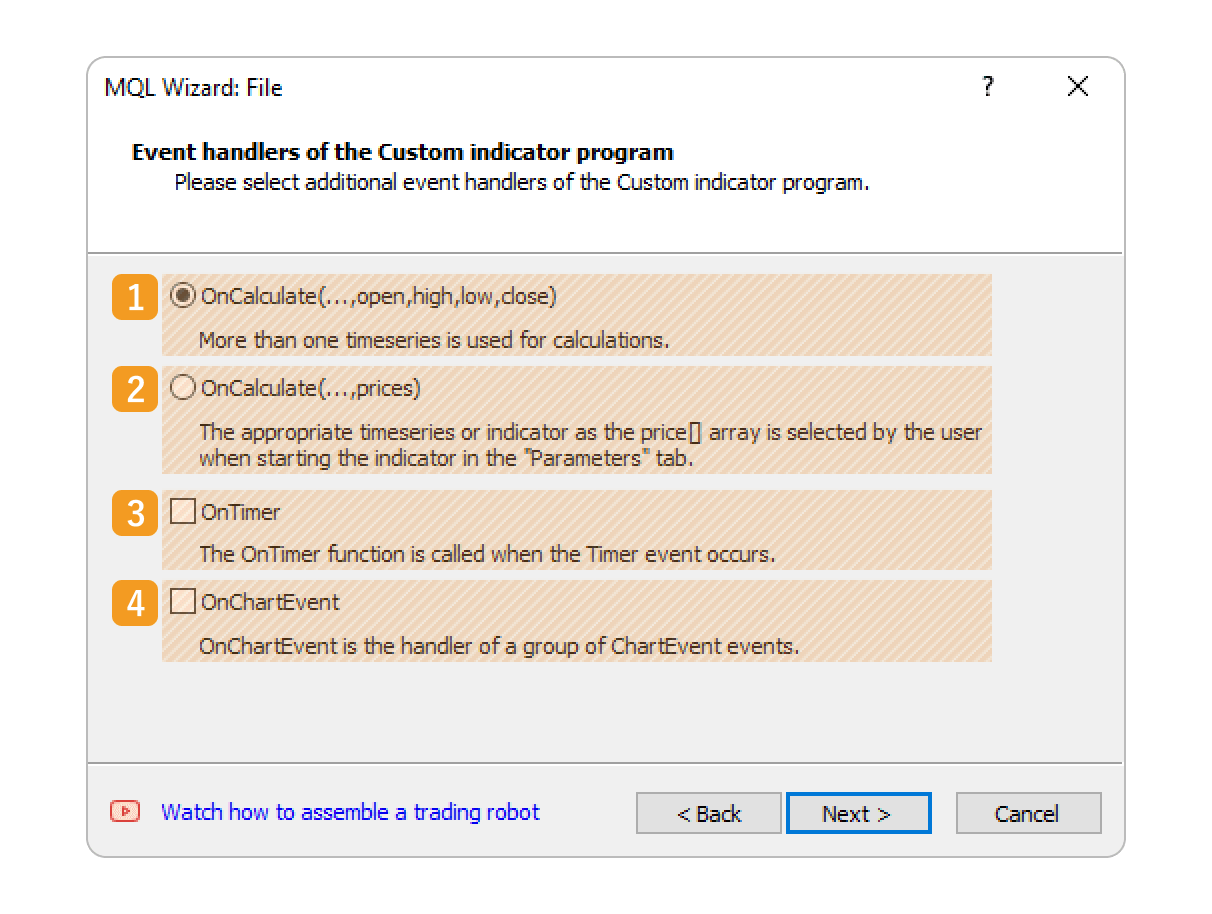
Set event handlers, which are the functions that are called if certain conditions are met.
|
Number |
Item name |
Descriptions |
|---|---|---|
|
1 |
OnCalculate |
OnCalculate(...,open,high,low,close) is a function that is executed when ticks are updated. It retrieves open, high, low, and close prices, time, tick volume, volume, and spread necessary to calculate the indicator. |
|
2 |
OnCalculate |
OnCalculate(prices) is a function that is executed when ticks are updated. It calculates the indicator using the applied price data selected in the parameter. |
|
3 |
OnTimer |
OnTimer is a function that runs at a specified time interval. |
|
4 |
OnChartEvent |
OnChartEvent is a function that handles events on a chart. It is executed when an event occurs on a chart, such as creating, deleting, moving, or editing an object. |
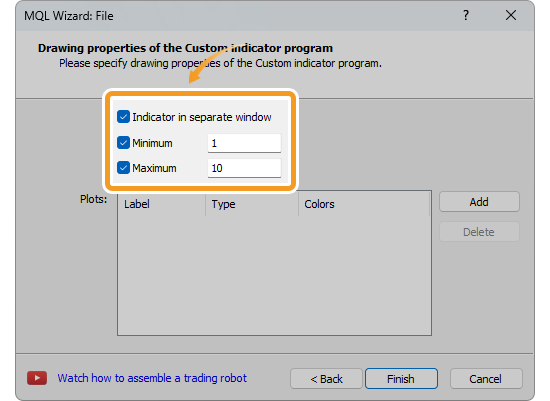
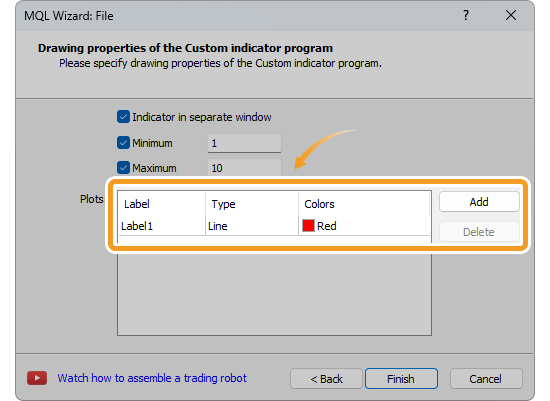
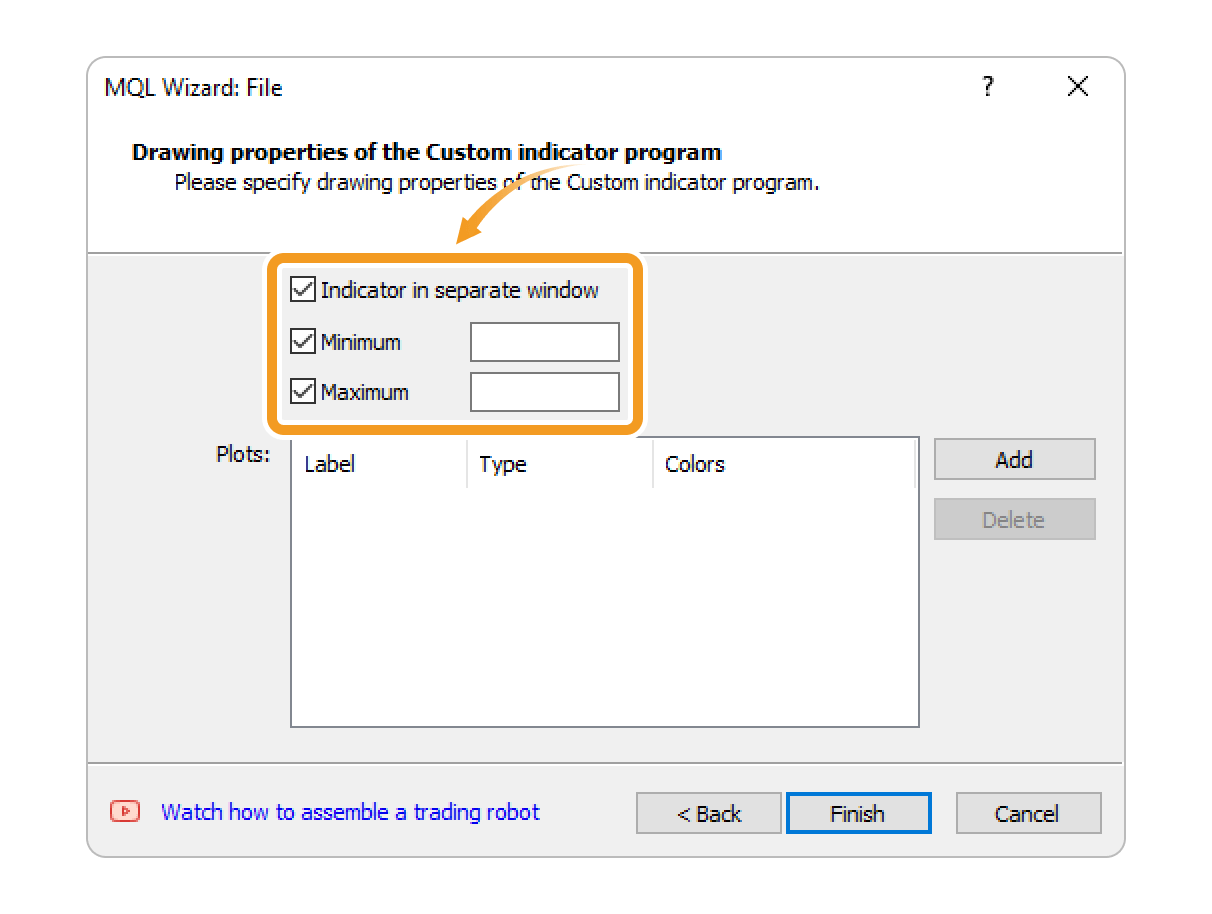
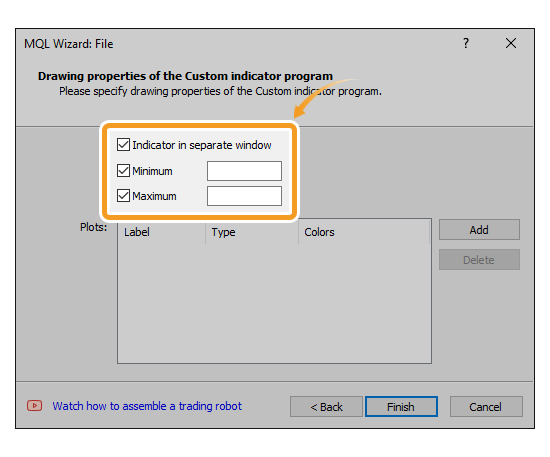
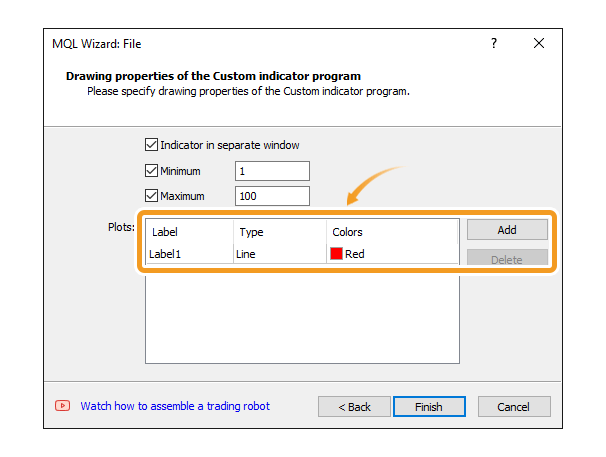
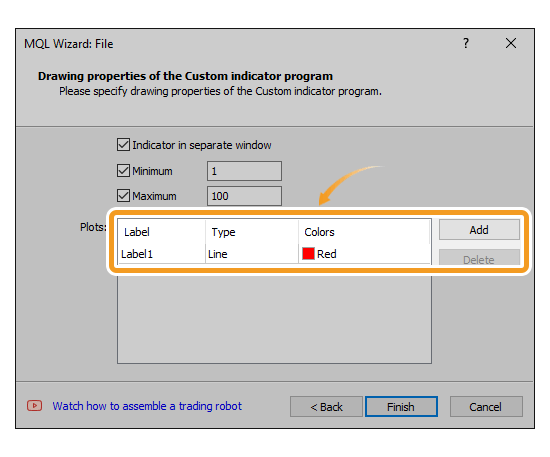
To display it in a sub-window, check the "Indicator in separate window" box. To set the minimum/maximum values for the sub-window, check the "Minimum" and "Maximum" boxes and enter the values.
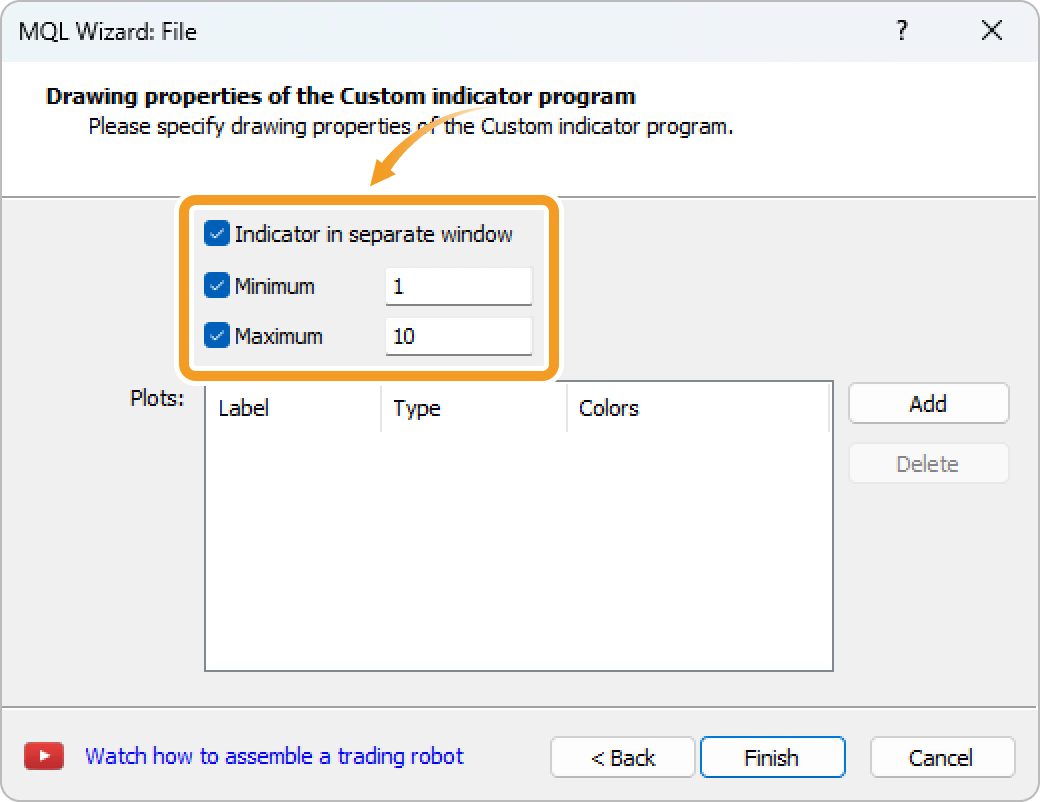
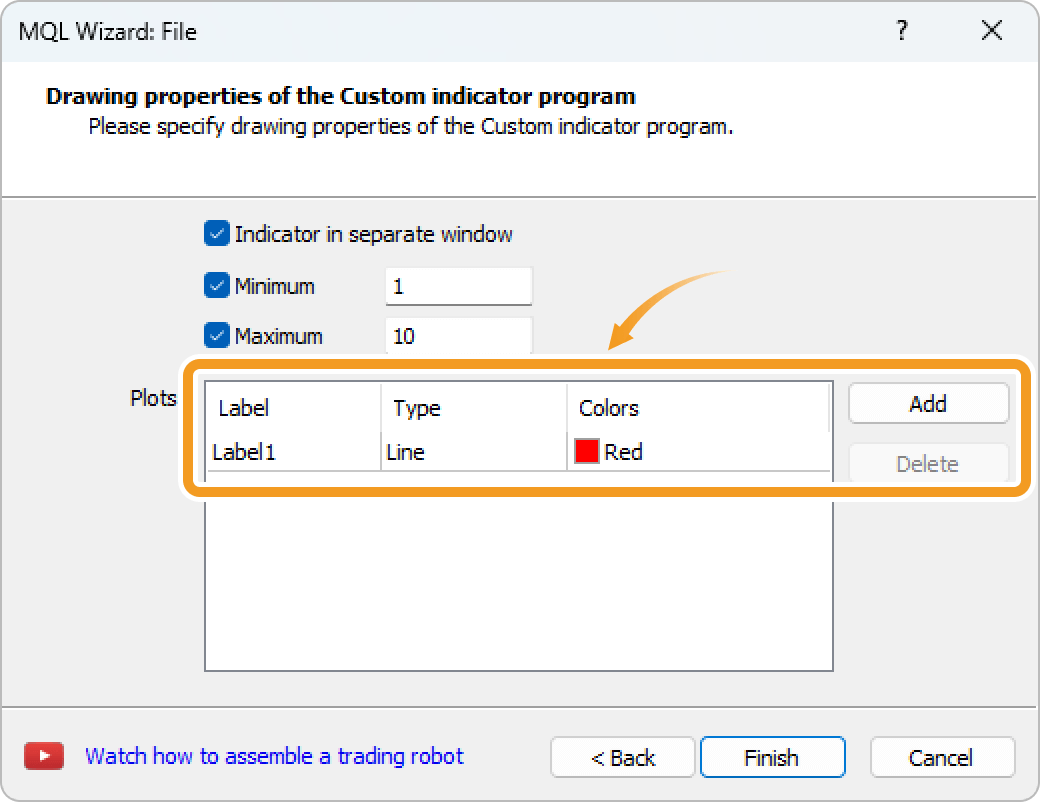
To use an object in the indicator, click "Add". After specifying the name in the "Label" field, type in "Type", and color in "Colors", click "Finish".
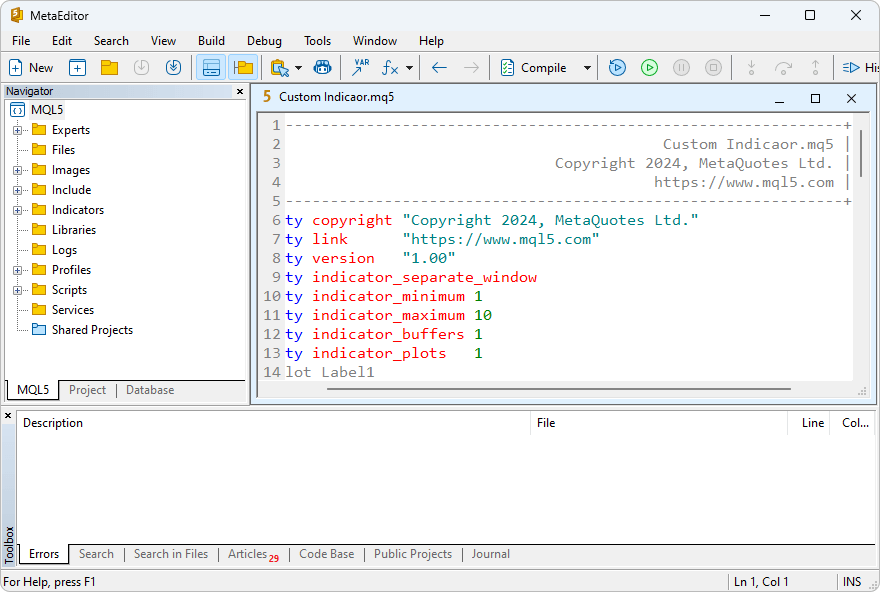
Write an MQL4 program.

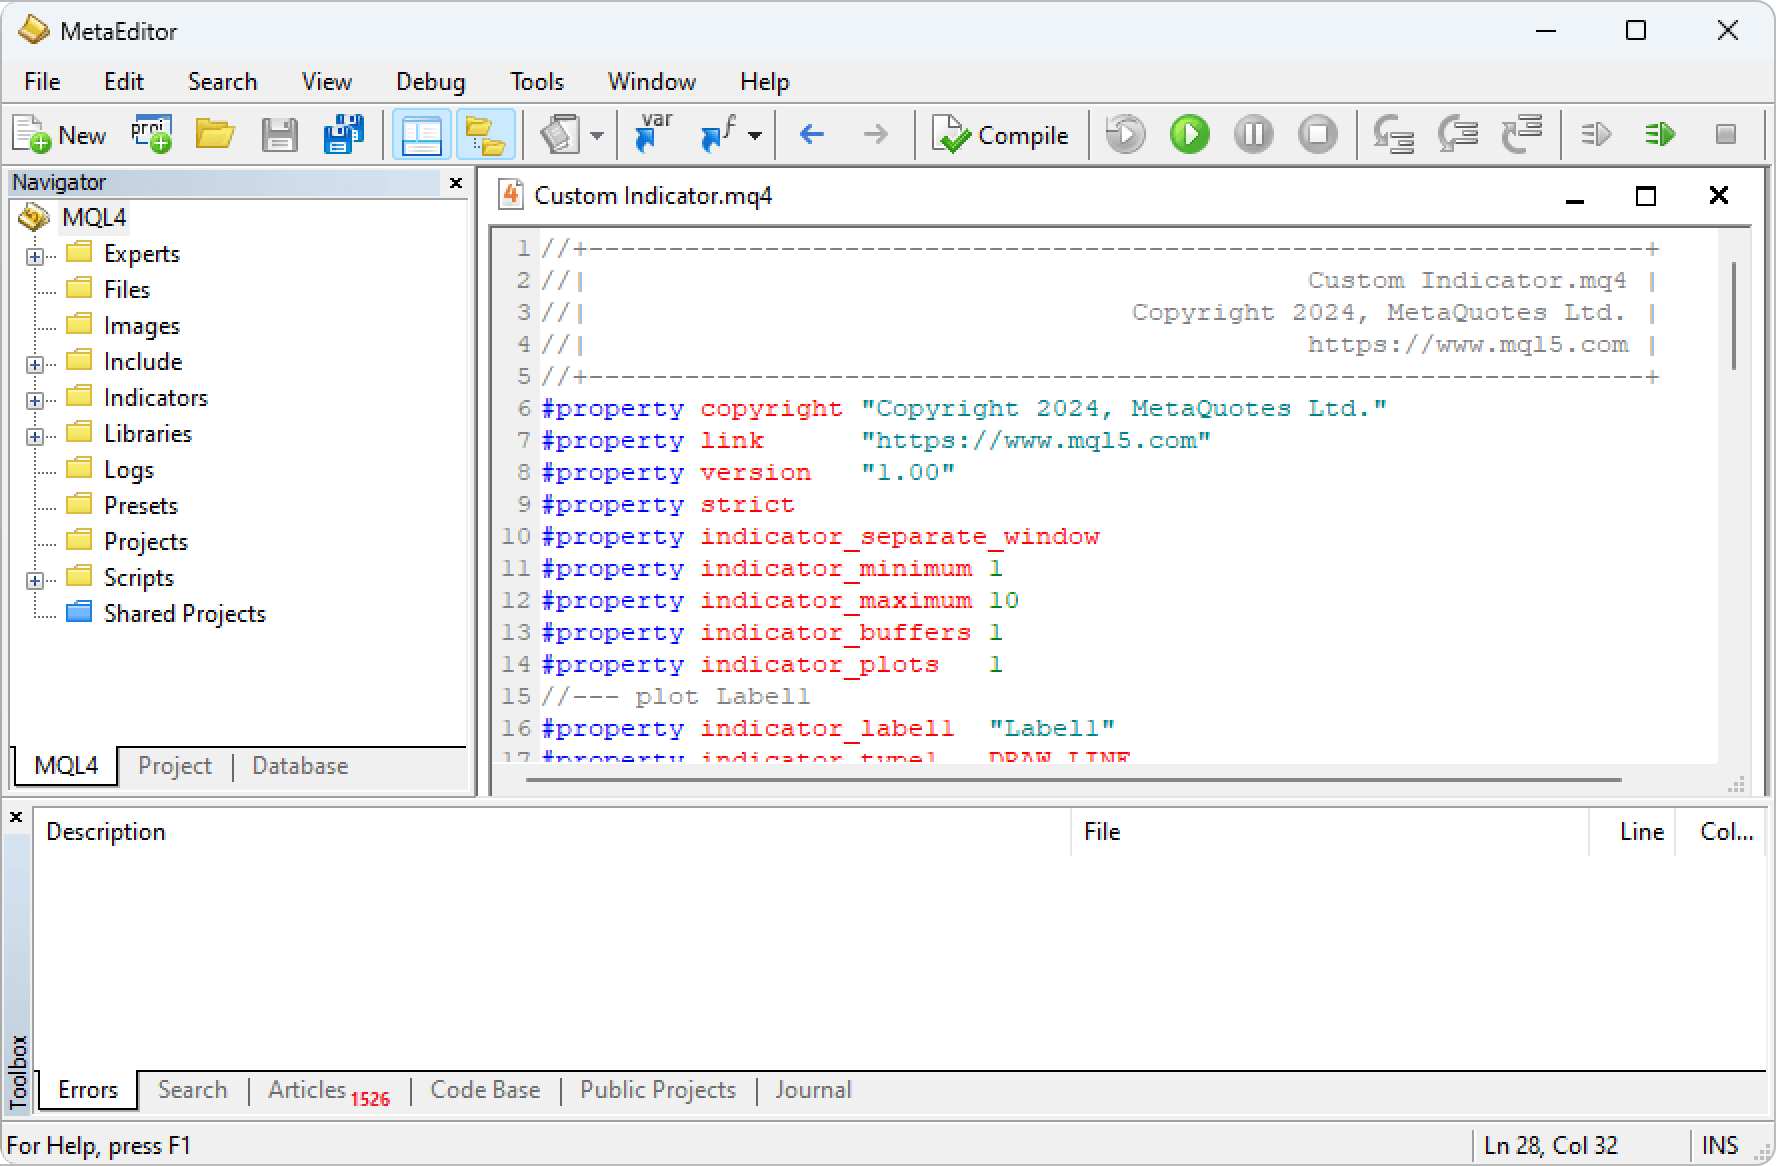
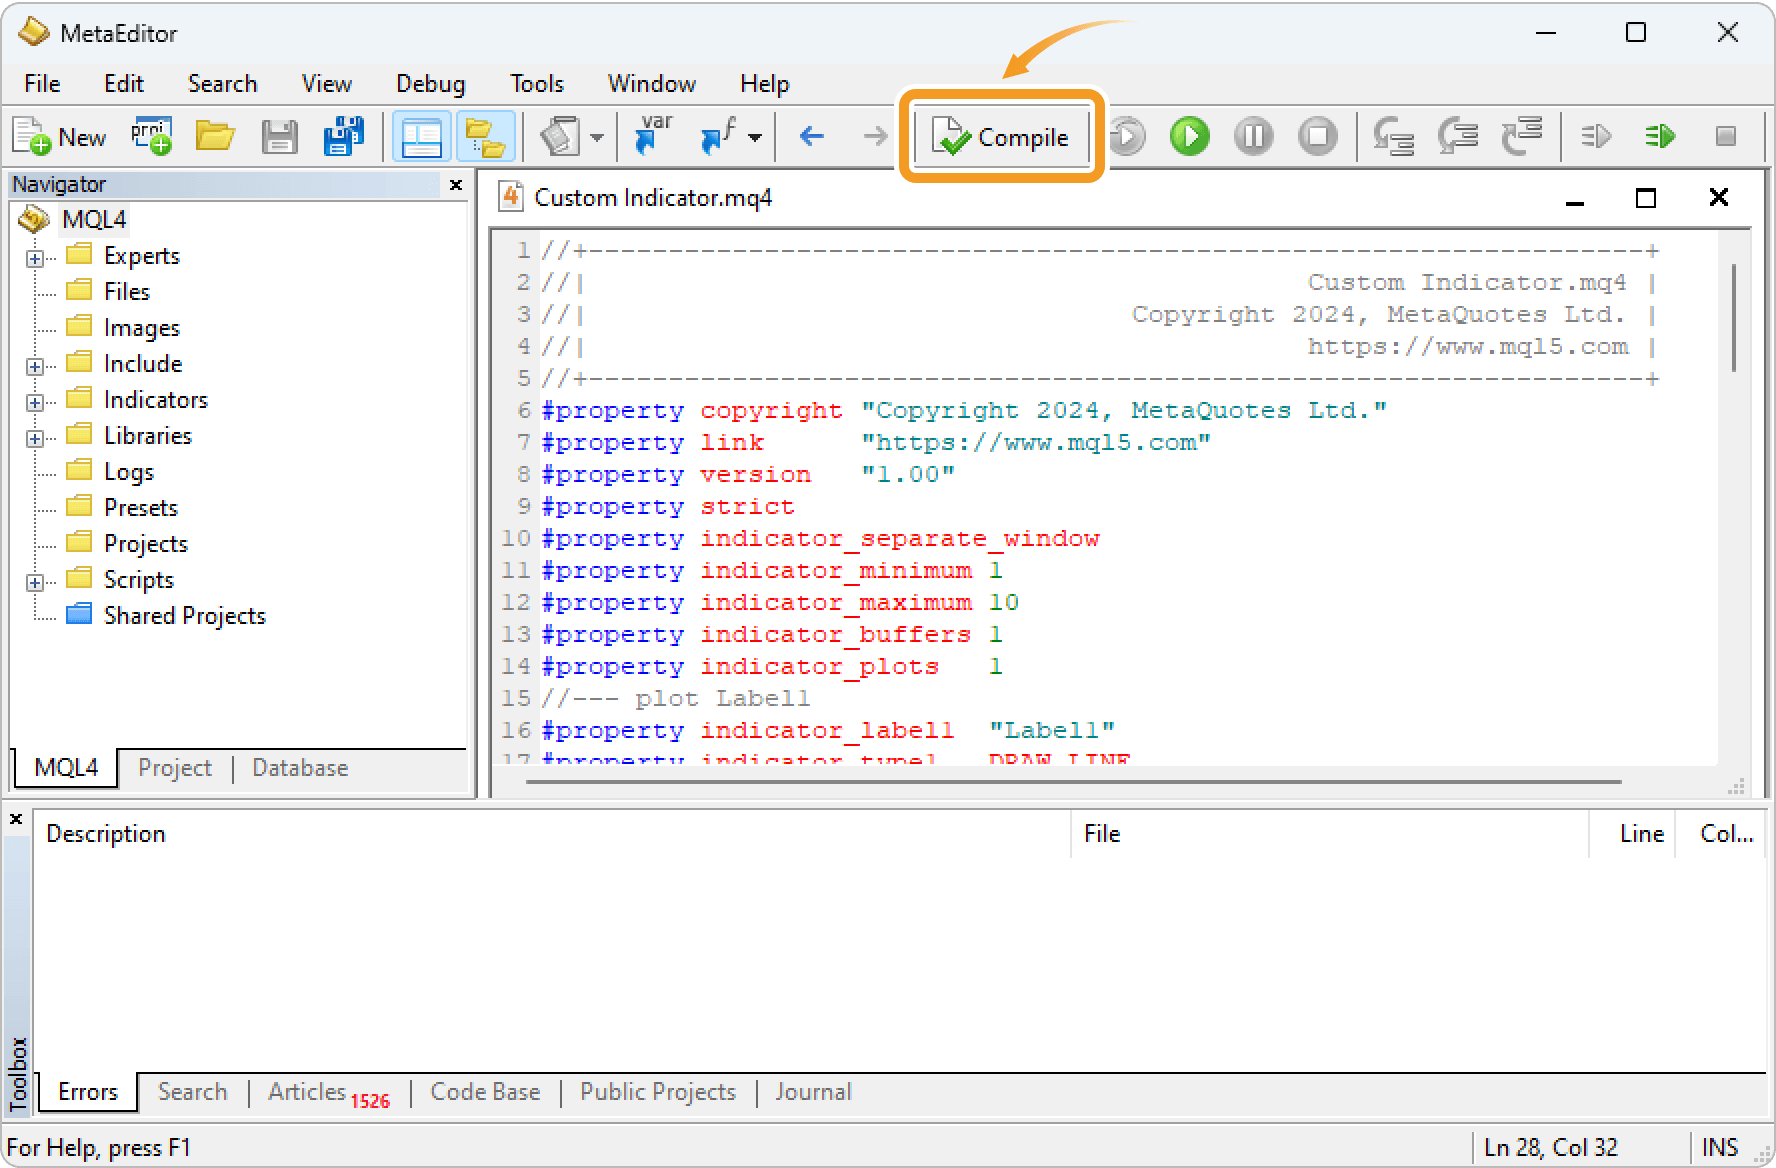
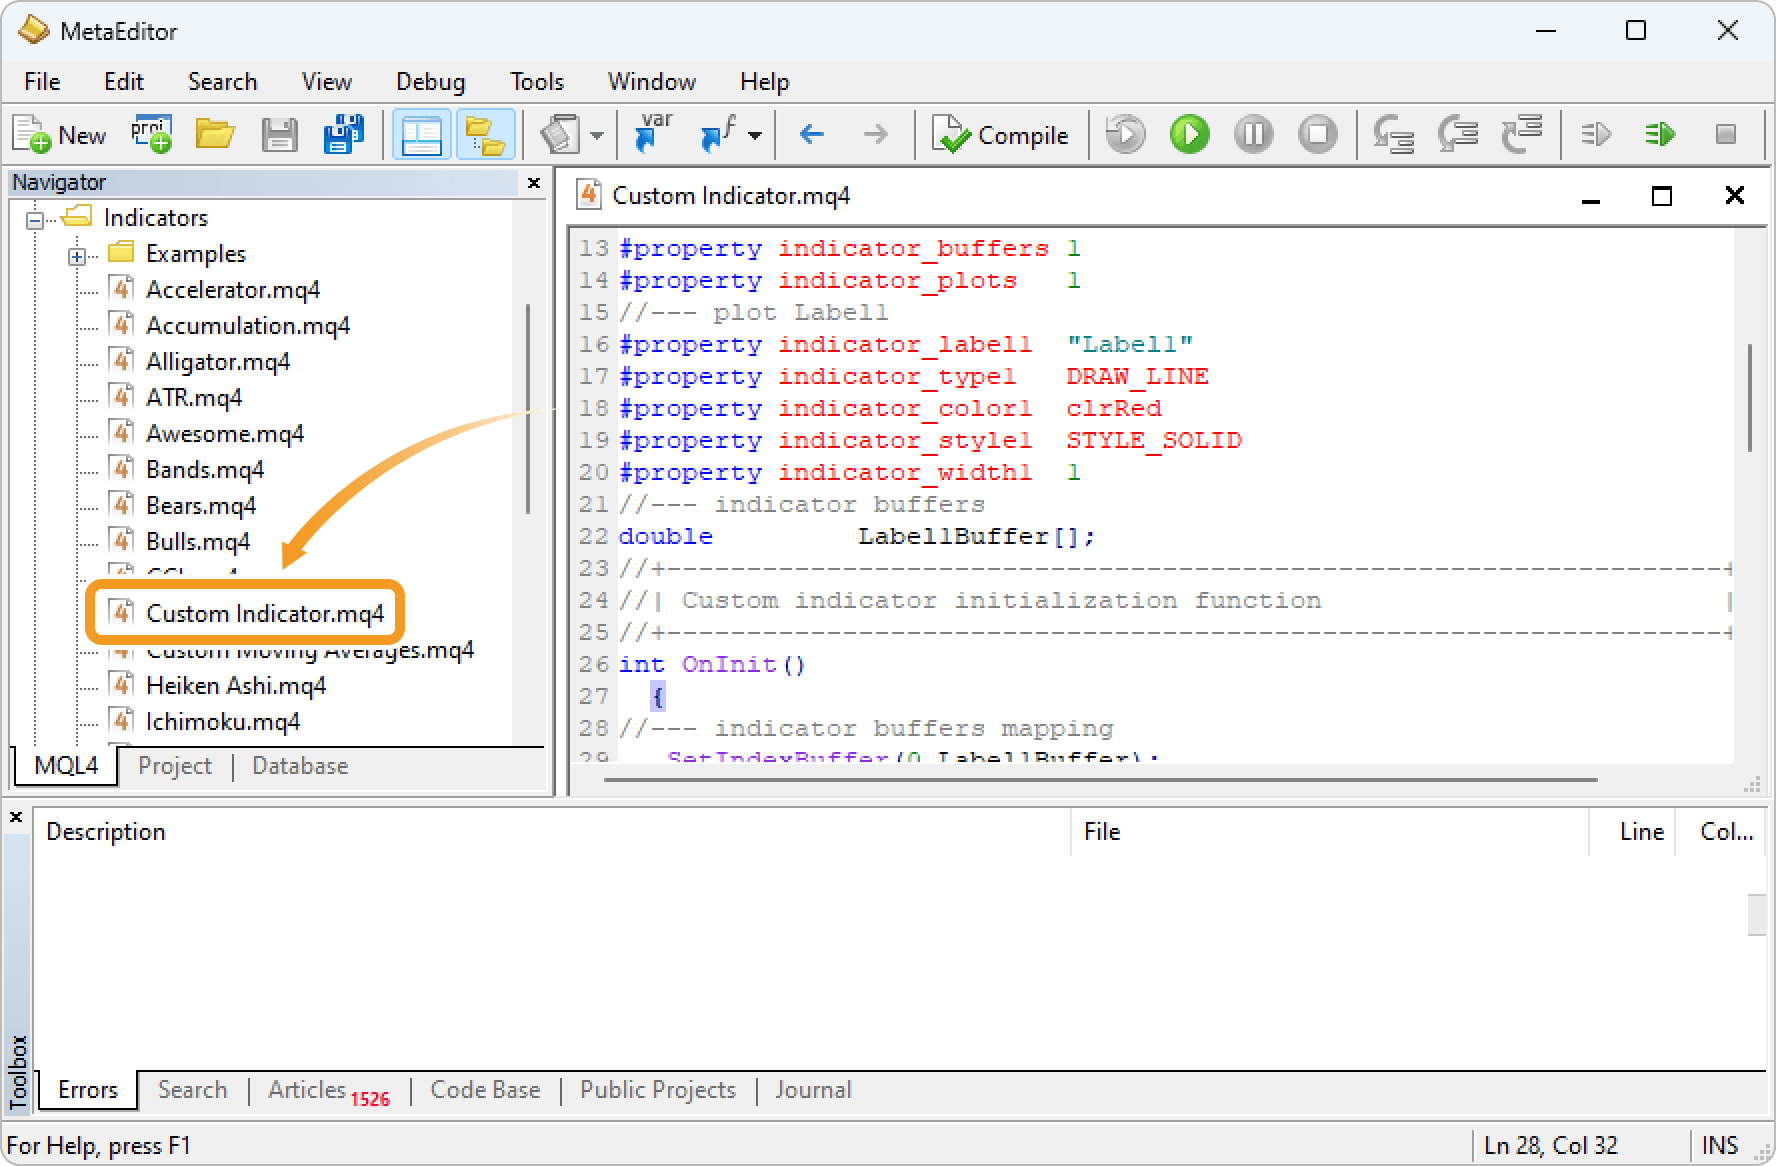
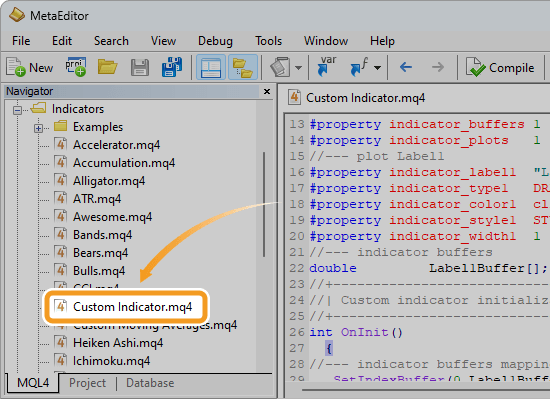
After writing the MQL4 program, click the "Compile" button on the menu.
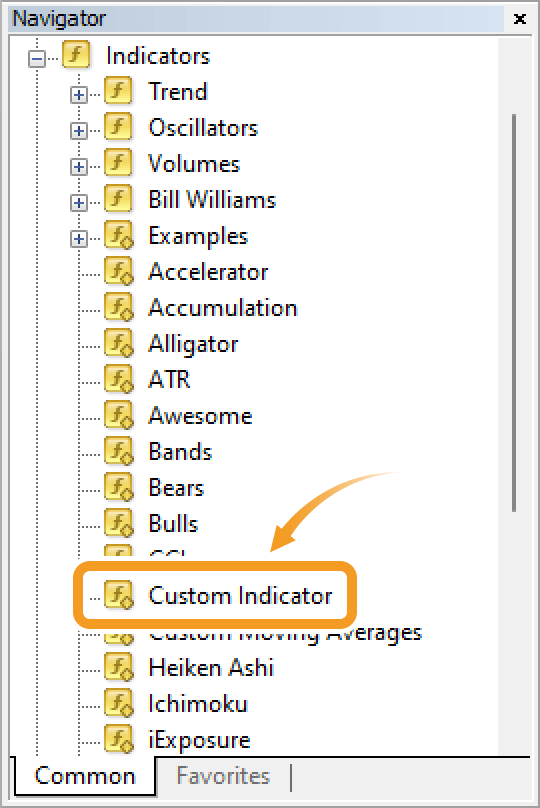
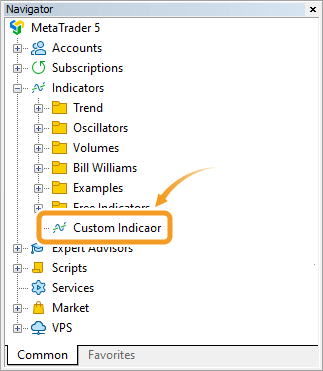
After the compilation, the indicator created will appear in the designated folder in the Navigator.
Close the MetaEditor and go back to MT4. Check that the indicator created is in the Navigator on MT4.
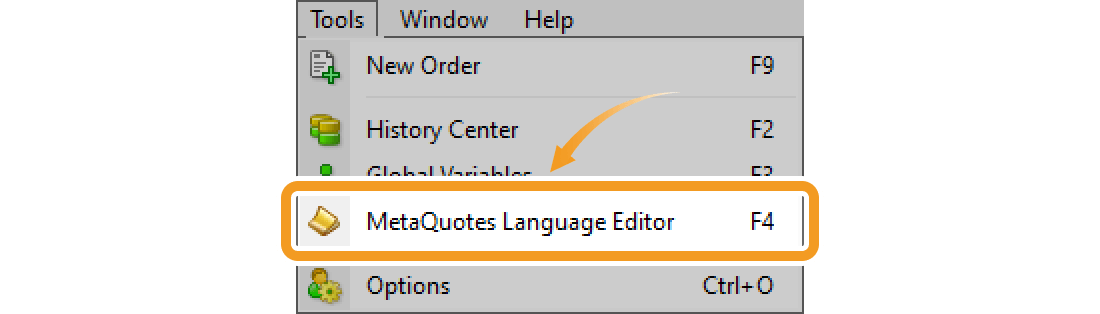
Click the "Tools" in the menu and select the "MetaQuotes Language Editor".
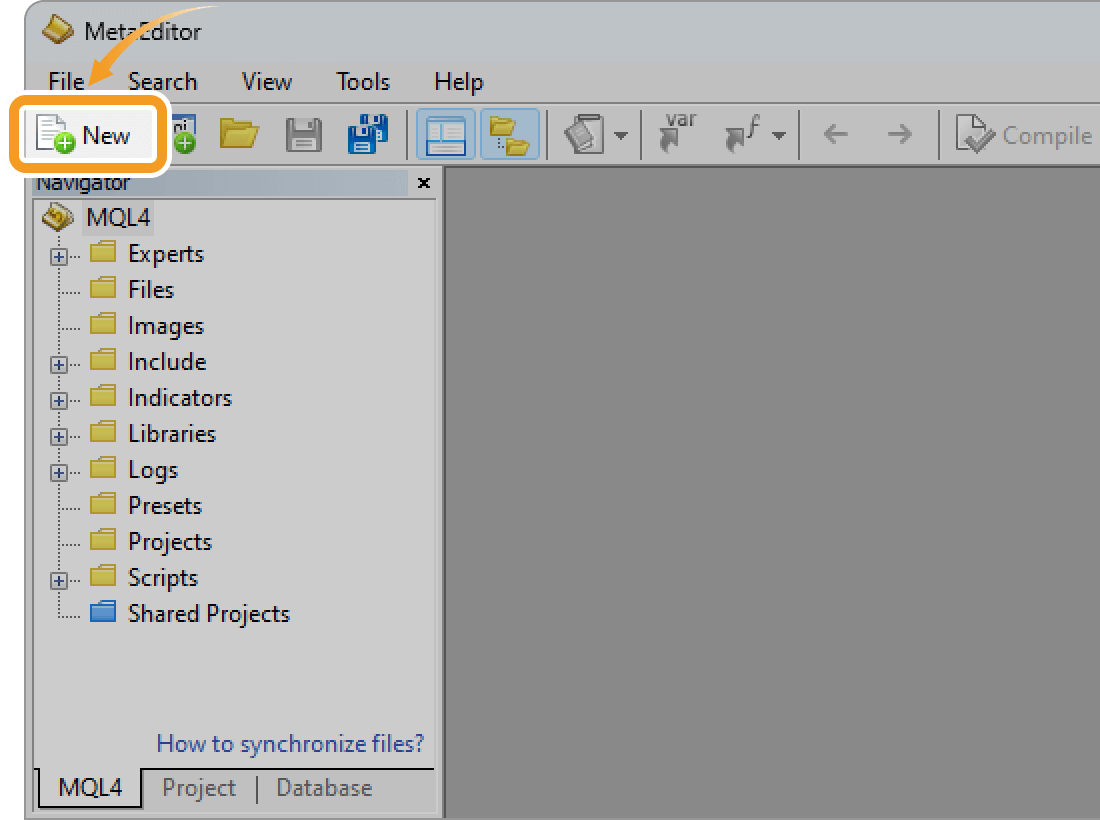
The MetaEditor will be launched. Click the "New" button in the menu.
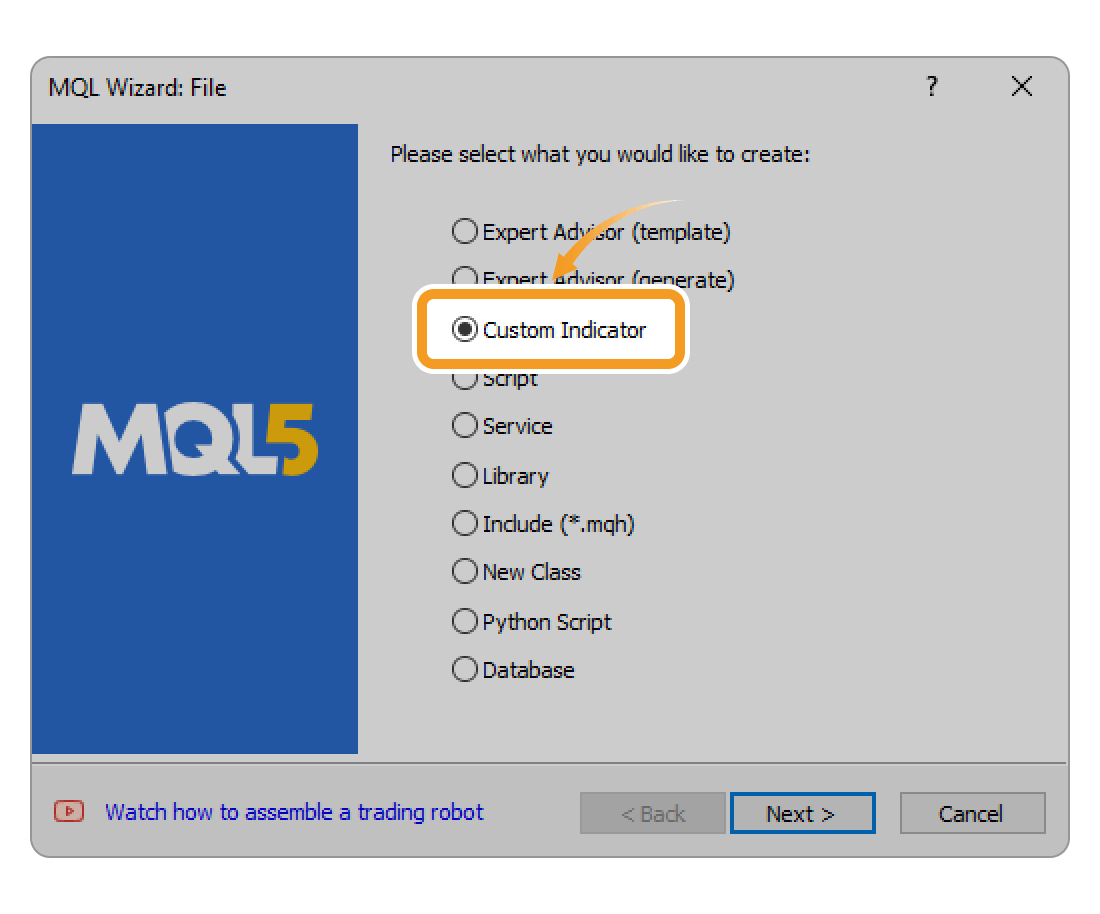
Select "Custom Indicator" and click "Next".
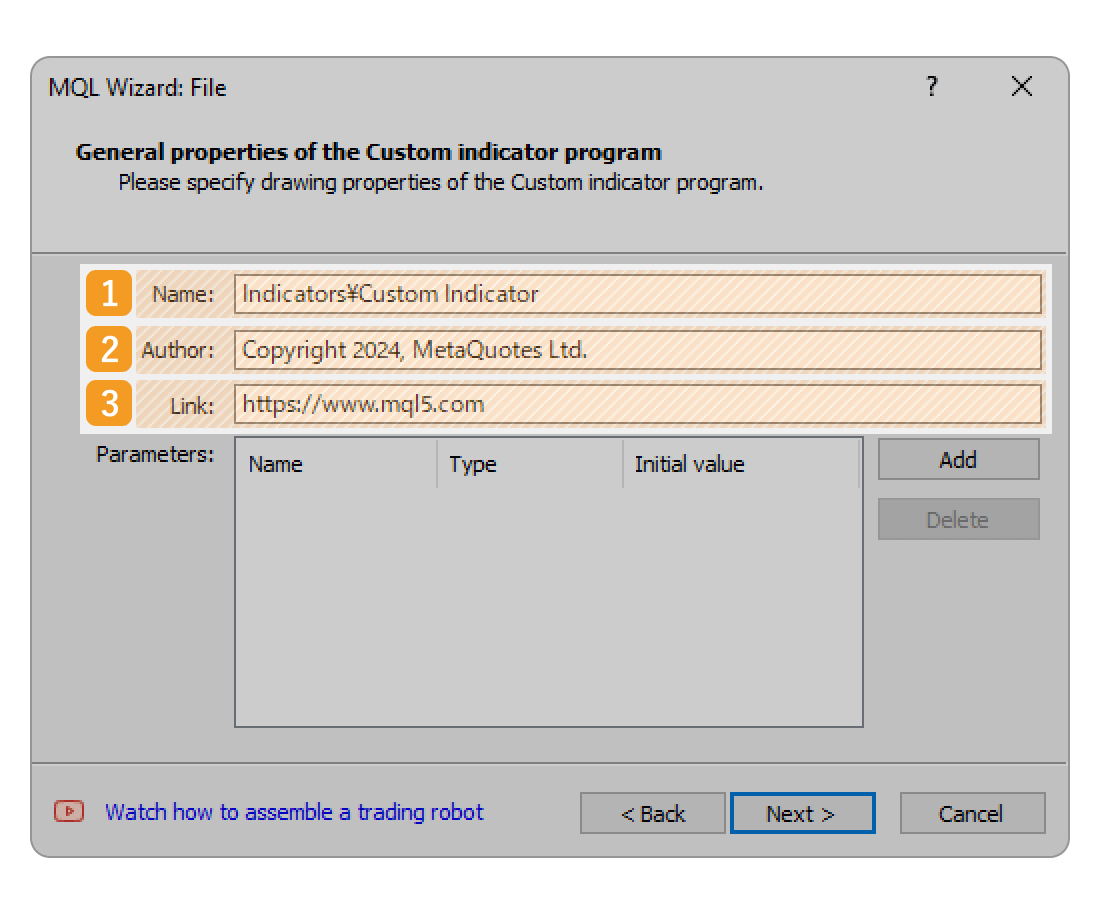
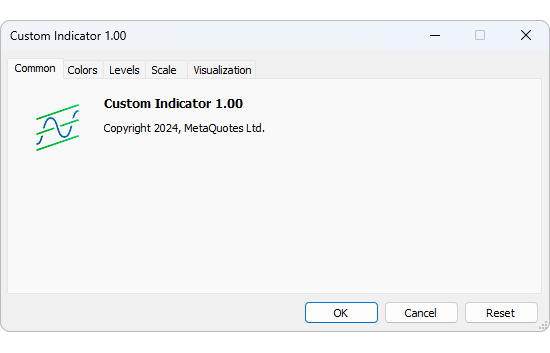
Enter the indicator name, author, and link to display. Configure the parameters as necessary and click "Next". All fields, except for the indicator name, can be left blank.
Other parameters can be adjusted directly in the code, including adding, modifying, or removing them.
|
Number |
Item name |
Descriptions |
|---|---|---|
|
1 |
Name |
The name of the indicator that you create. |
|
2 |
Author |
The author of the indicator. |
|
3 |
Link |
Enter the link of the indicator to display. |
The registered name, author, and link information will be displayed on the indicator settings window.
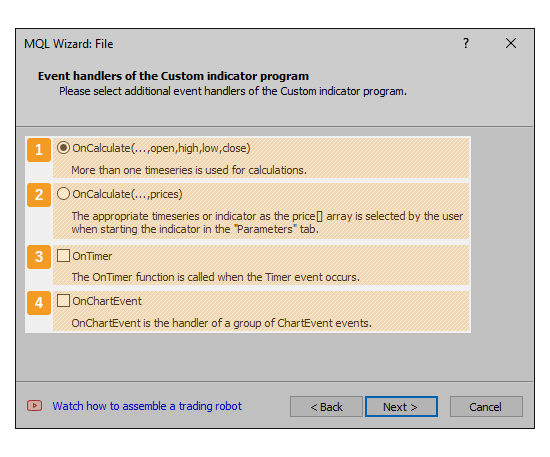
Set event handlers, which are the functions that are called if certain conditions are met.
|
Number |
Item name |
Descriptions |
|---|---|---|
|
1 |
OnCalculate(...,open,high,low,close) |
OnCalculate(...,open,high,low,close) is a function that is executed when ticks are updated. It retrieves open, high, low, and close prices, time, tick volume, volume, and spread necessary to calculate the indicator. |
|
2 |
OnCalculate(...,prices) |
OnCalculate(prices) is a function that is executed when ticks are updated. It calculates the indicator using the applied price data selected in the parameter. |
|
3 |
OnTimer |
OnTimer is a function that runs at a specified time interval. |
|
4 |
OnChartEvent |
OnChartEvent is a function that handles events on a chart. It is executed when an event occurs on a chart, such as creating, deleting, moving, or editing an object. |
To display it in a sub-window, check the "Indicator in separate window" box. To set the minimum/maximum values for the sub-window, check the "Minimum" and "Maximum" boxes and enter the values.
To use an object in the indicator, click "Add". After specifying the name in the "Label" field, type in "Type", and color in "Colors", click "Finish".
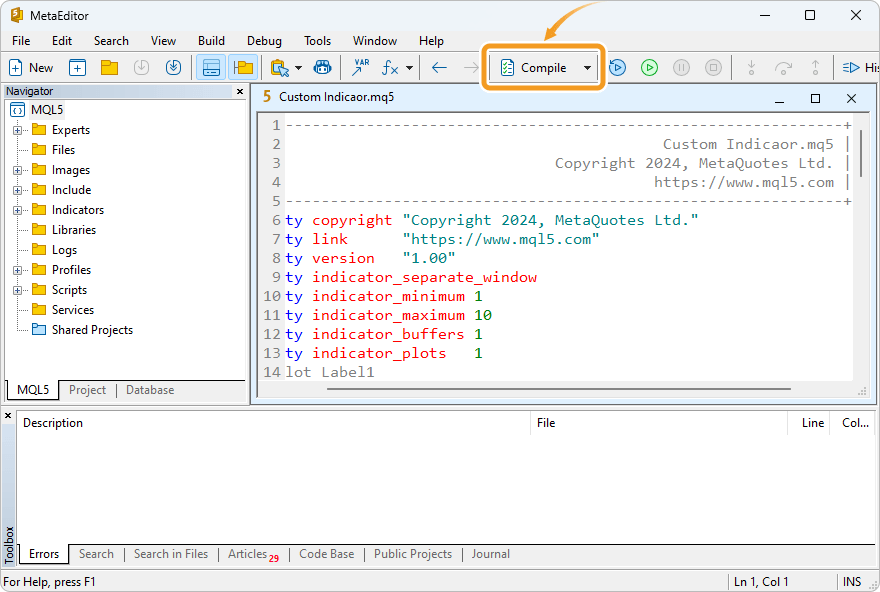
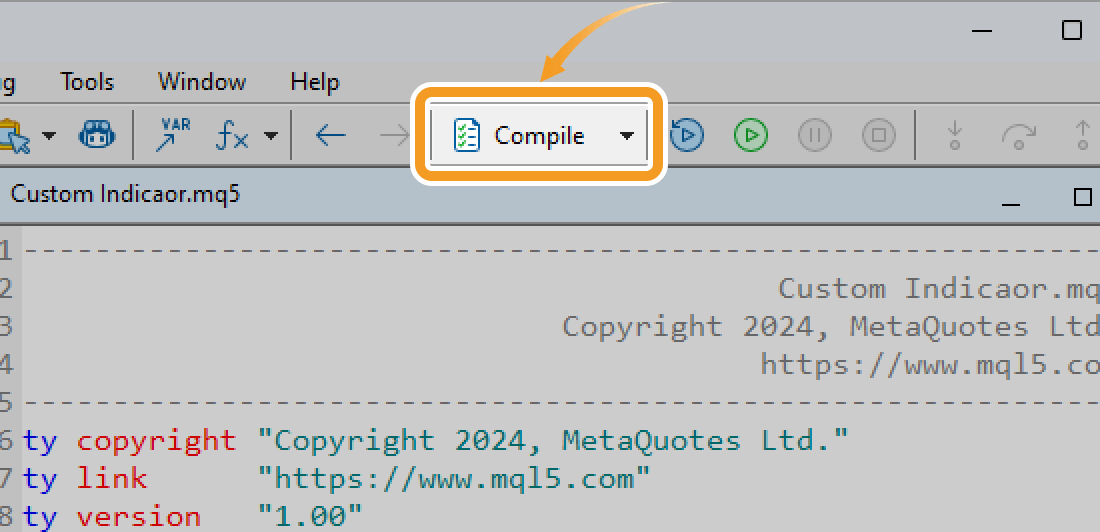
Write MQL5 program.

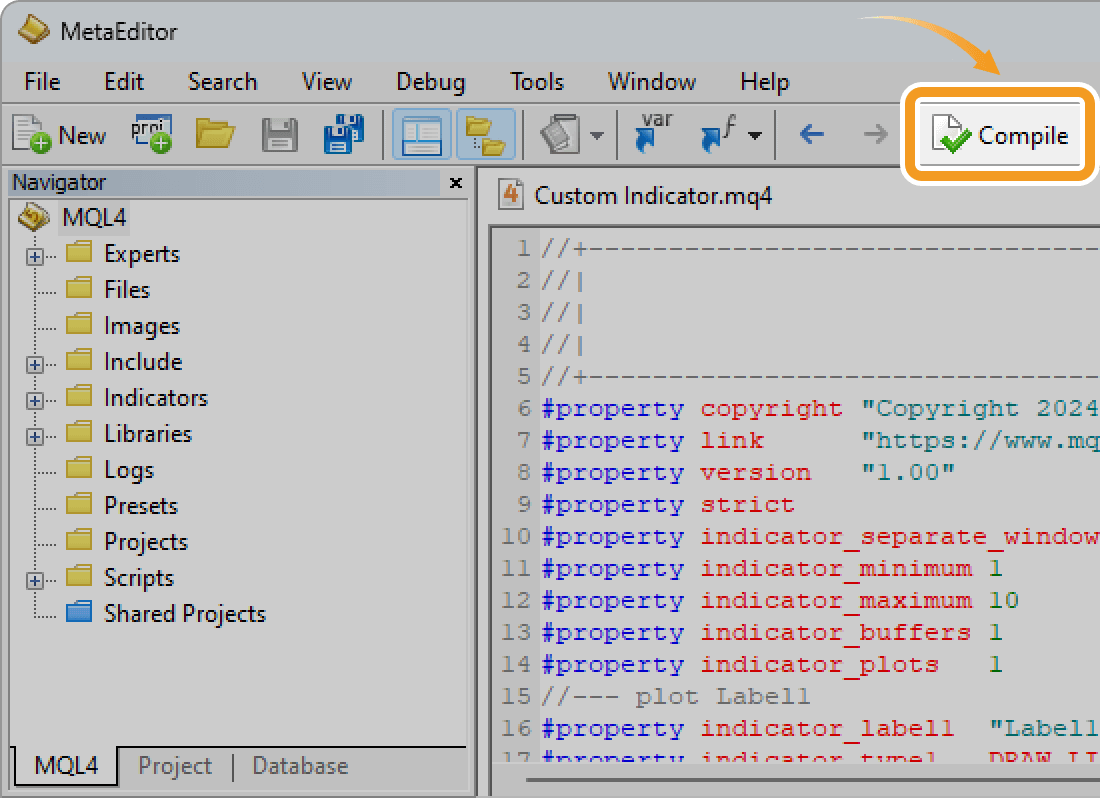
After writing the MQL5 program, click the "Compile" button on the menu.
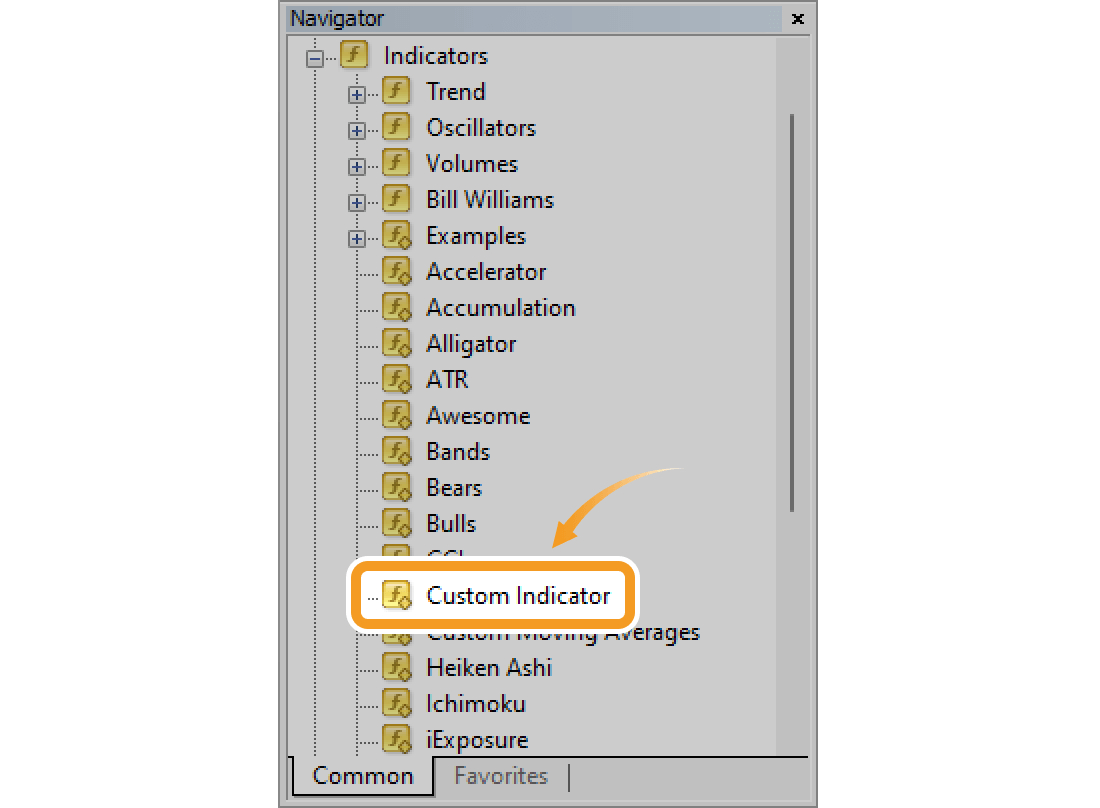
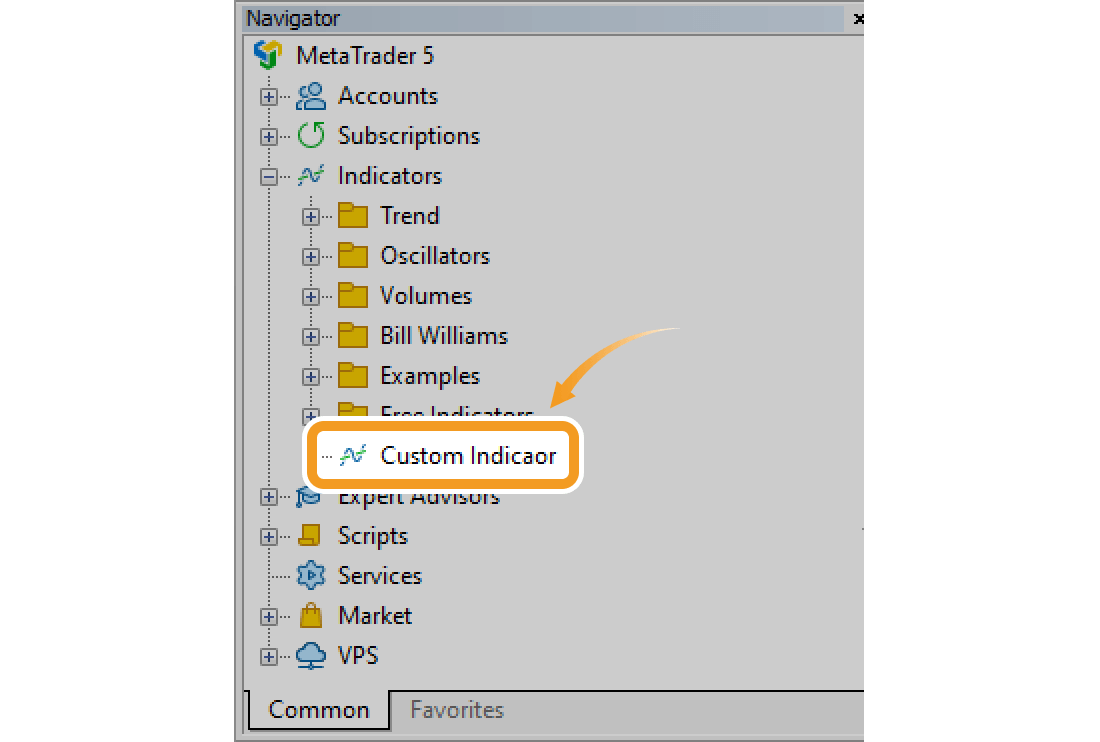
After the compilation, the indicator created will appear in the designated folder in the Navigator.
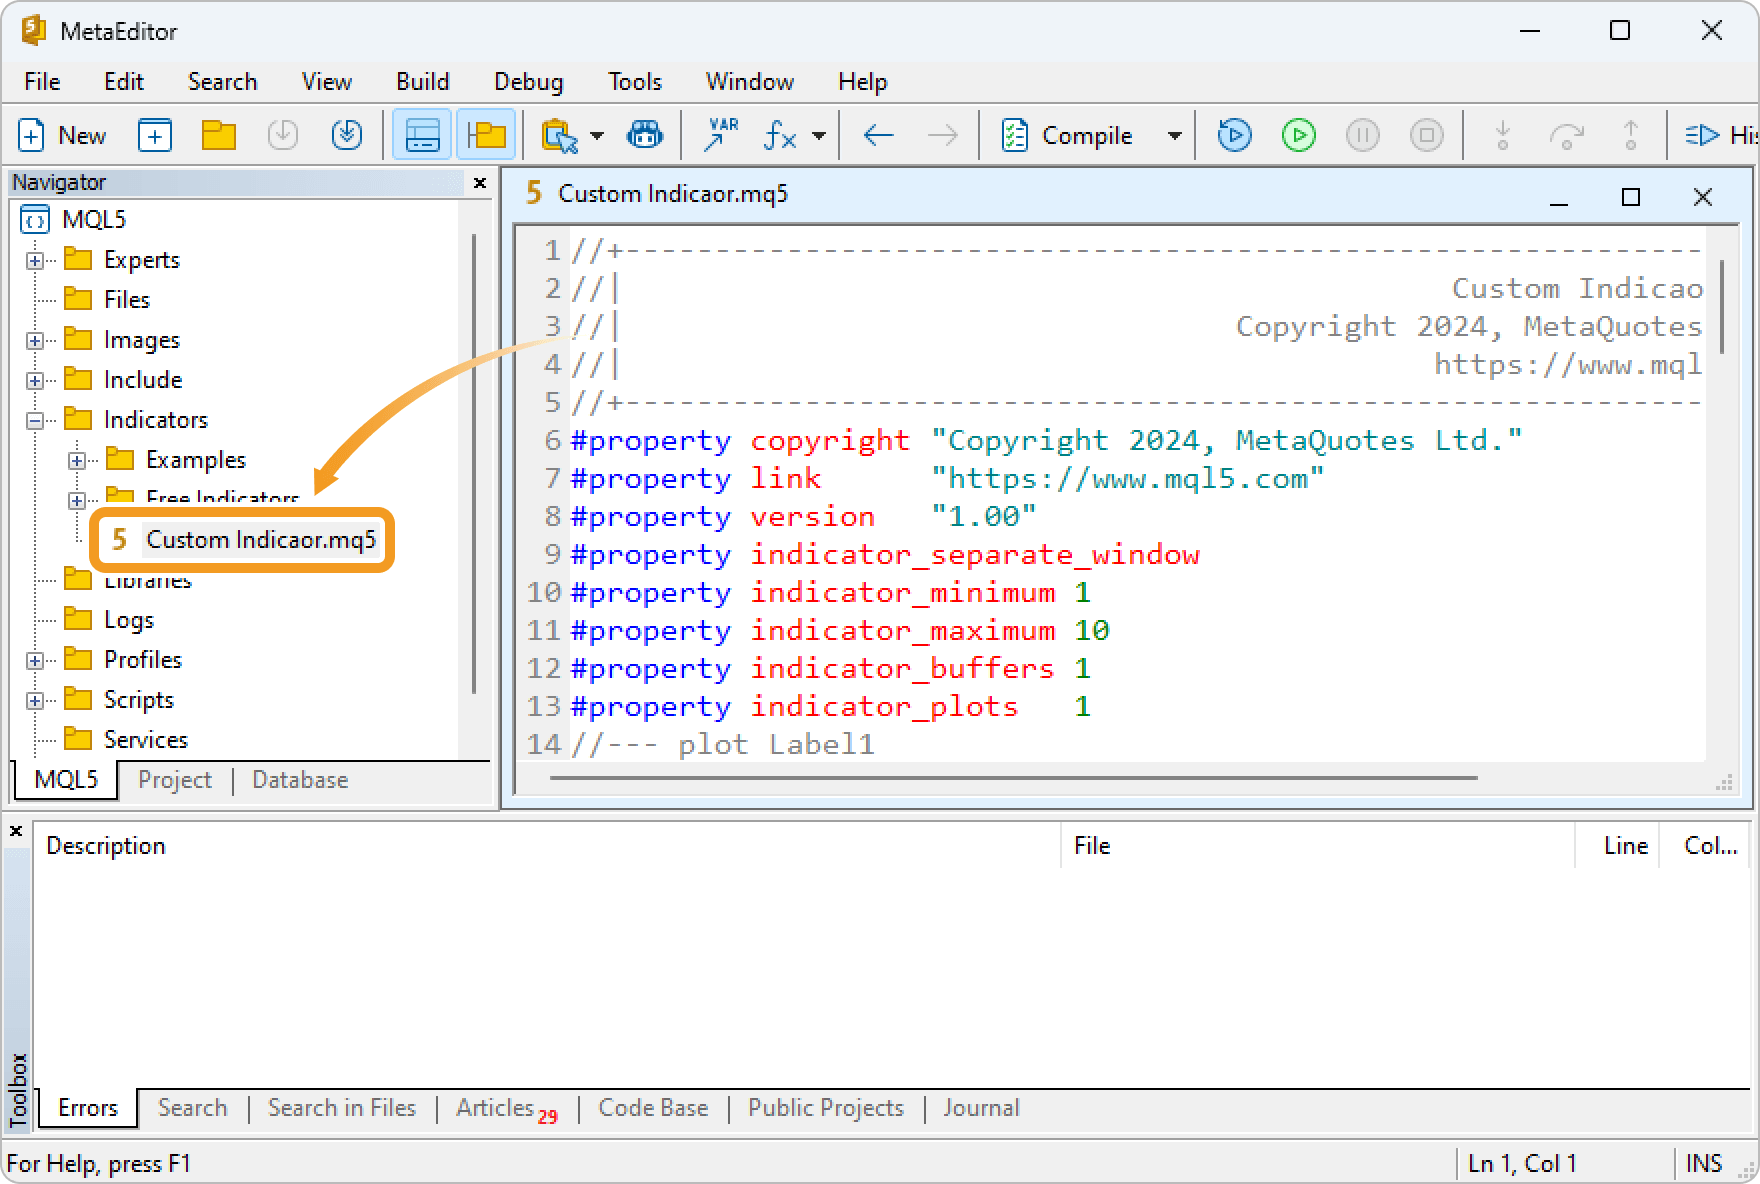

Close the MetaEditor and go back to MT5. Check that the indicator created is in the Navigator on MT5.
Was this article helpful?
0 out of 0 people found this article helpful.
Thank you for your feedback.