


MT4/MT5: Backtest Expert Advisor (EA)
EA, indicators & objects (PC)
EA, indicators & objects (PC)

This article was :
published
updated
You can perform backtests on Expert Advisors (EA) using MetaTrader4 (MT4) / MetaTrader5 (MT5)'s Strategy Tester feature. The backtest uses historical data from MT4/MT5 to simulate the EA's performance.
Here we will look at how to perform Expert Advisor (EA) backtests on MT4/MT5.
Switch between MT4/MT5 tabs to check the steps for each.
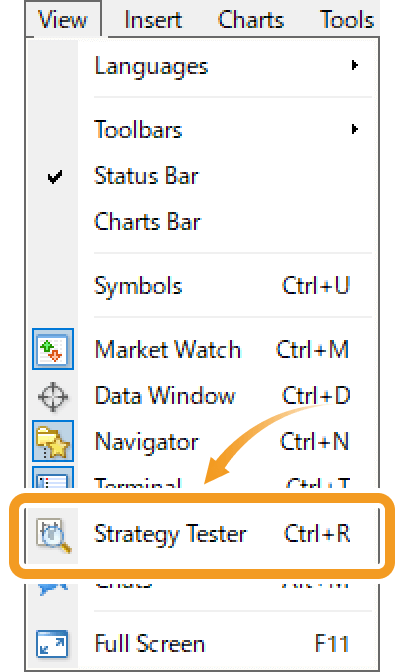
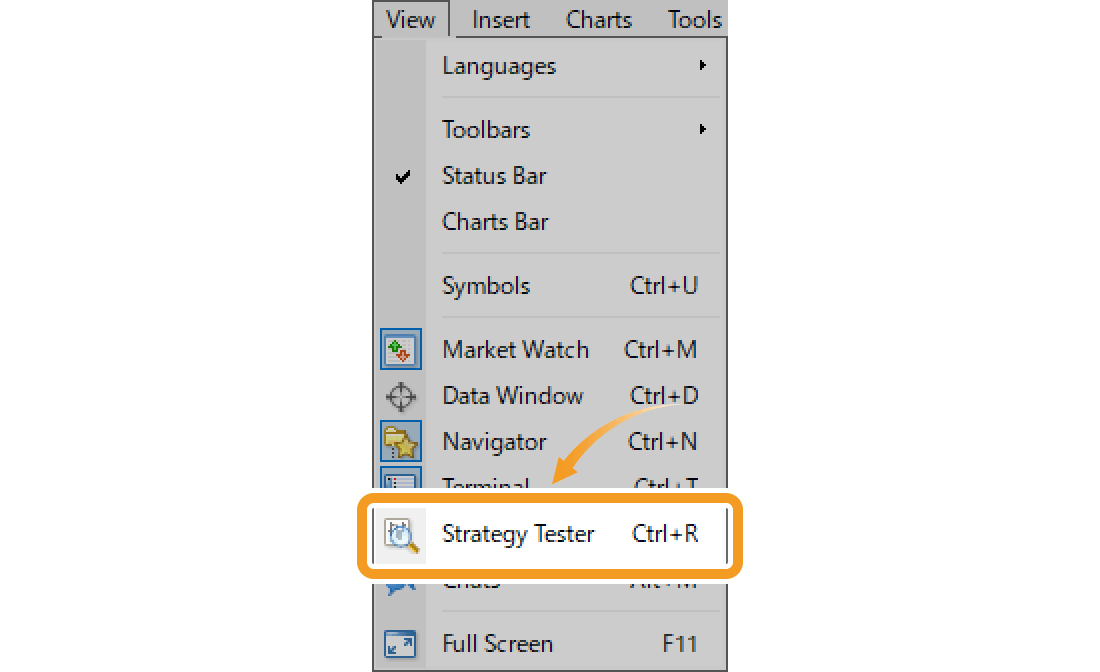
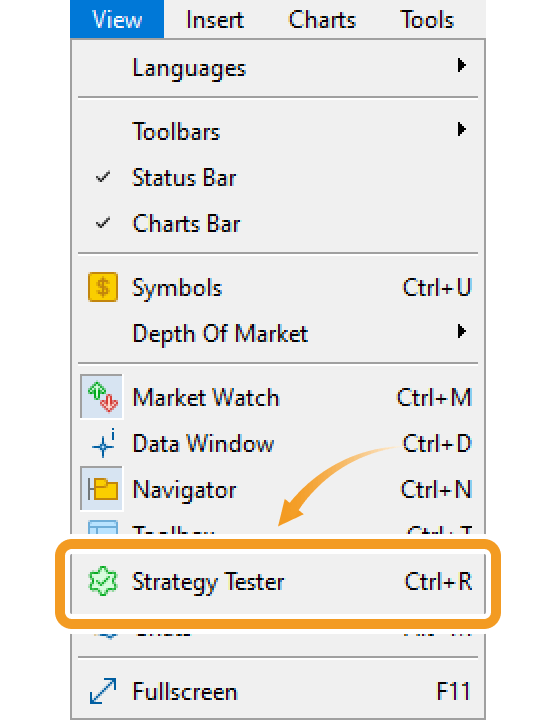
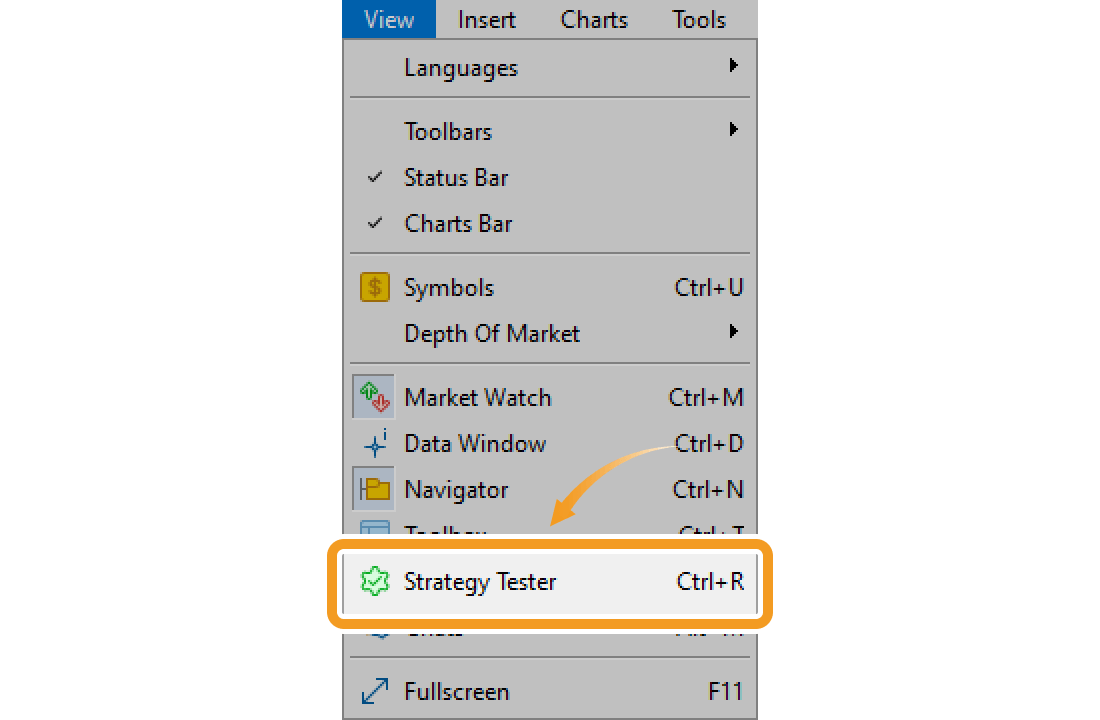
Click "View" in the menu and select "Strategy Tester".
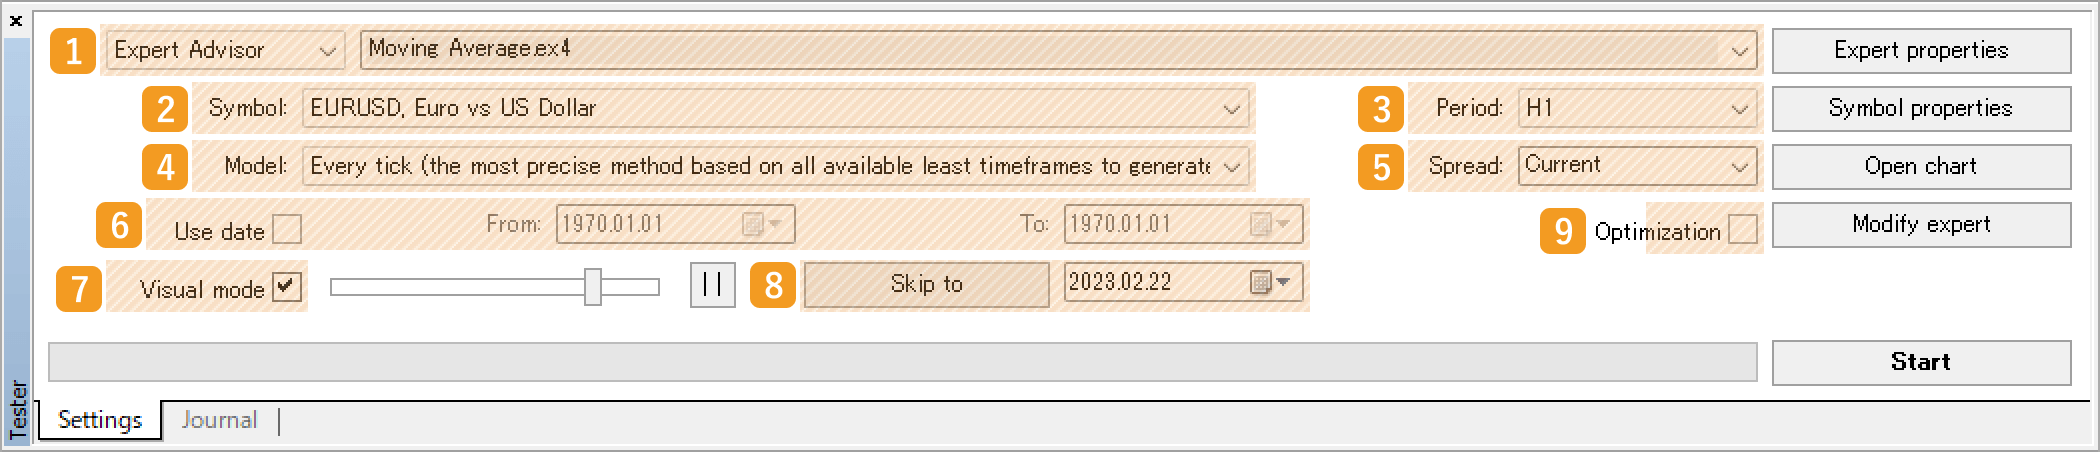
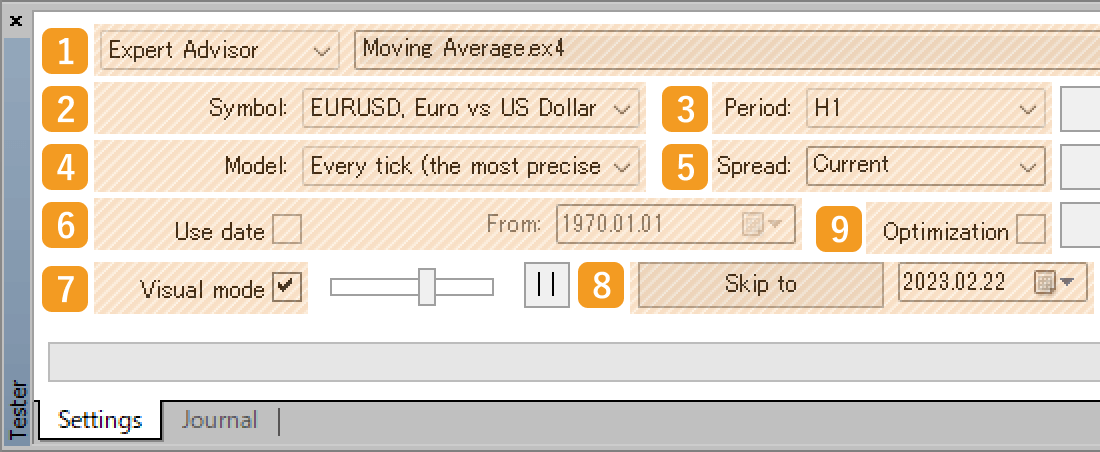
The "Settings" tab will open. Set the conditions for backtesting.
|
Number |
Item name |
Descriptions |
|---|---|---|
|
1 |
Expert Advisor |
Select "Expert Advisor" from the pull-down list on the left and choose an Expert Advisor (EA) to backtest from the list on the right. |
|
2 |
Symbol |
Select the symbol. |
|
3 |
Period |
Select the period (timeframe). |
|
4 |
Model |
Select the historical data model to be used for backtesting. Every tick: the most precise method, but takes time. Control points: a very crude method based on the nearest less timeframe. Open prices only: fastest method, but only for open prices. |
|
5 |
Spread |
Select the spread for backtesting. The spread is in points and can be manually specified as well. |
|
6 |
Use date |
Select the period for backtesting. |
|
7 |
Visual mode |
Check this box to use the visual mode. When it is checked, a chart window will open at the start of the backtest, allowing you to follow the past price movements and watch the Expert Advisor (EA) make trades chronologically. The playback speed can be adjusted using the bar next to the checkbox. Use the button next to the bar to pause the test. |
|
8 |
Skip to |
Click this under the visual mode to skip to a specified date. A date earlier than the testing period can't be specified. |
|
9 |
Optimization |
Check this box to perform optimization. Leave it unchecked as this mode is usually not used. |
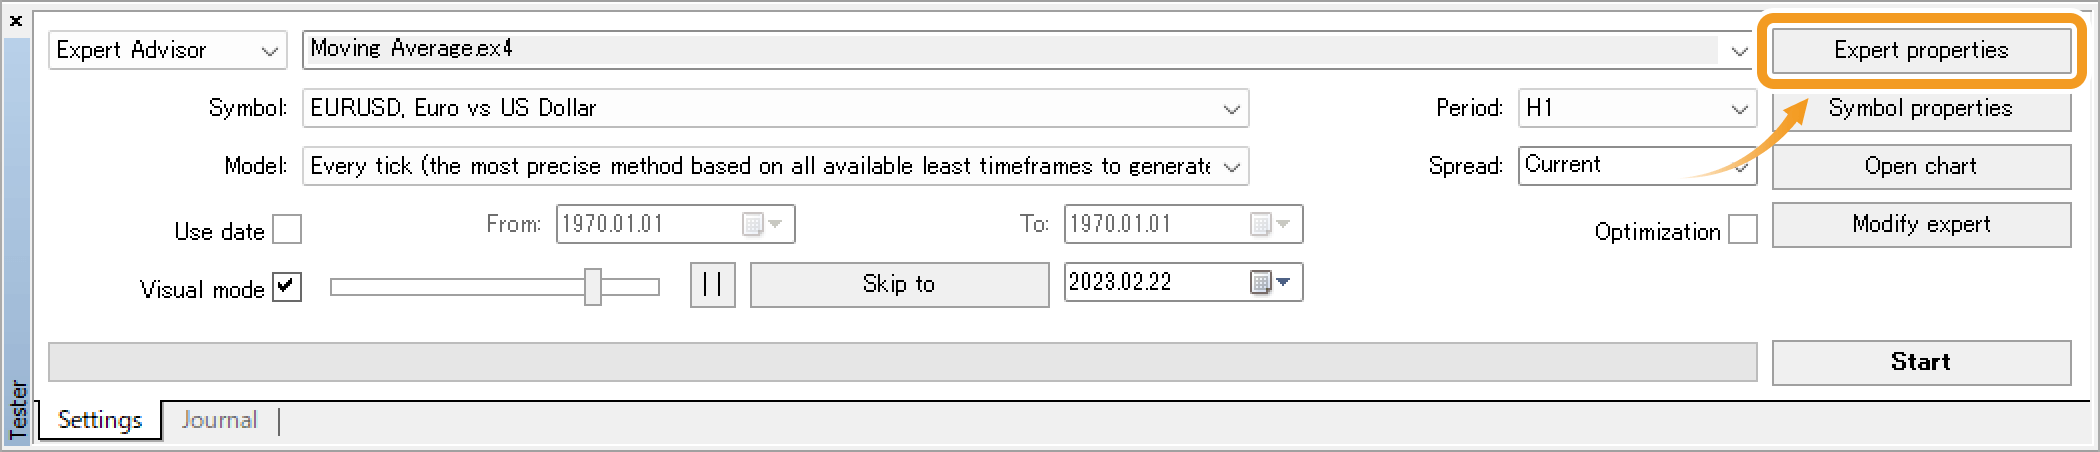
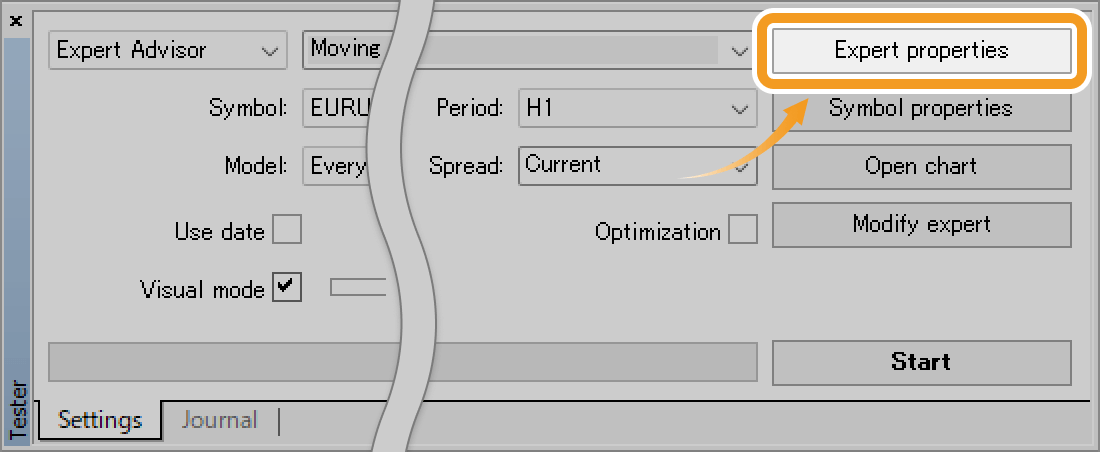
To set the parameters for deposits and Expert Advisors, click "Expert properties".
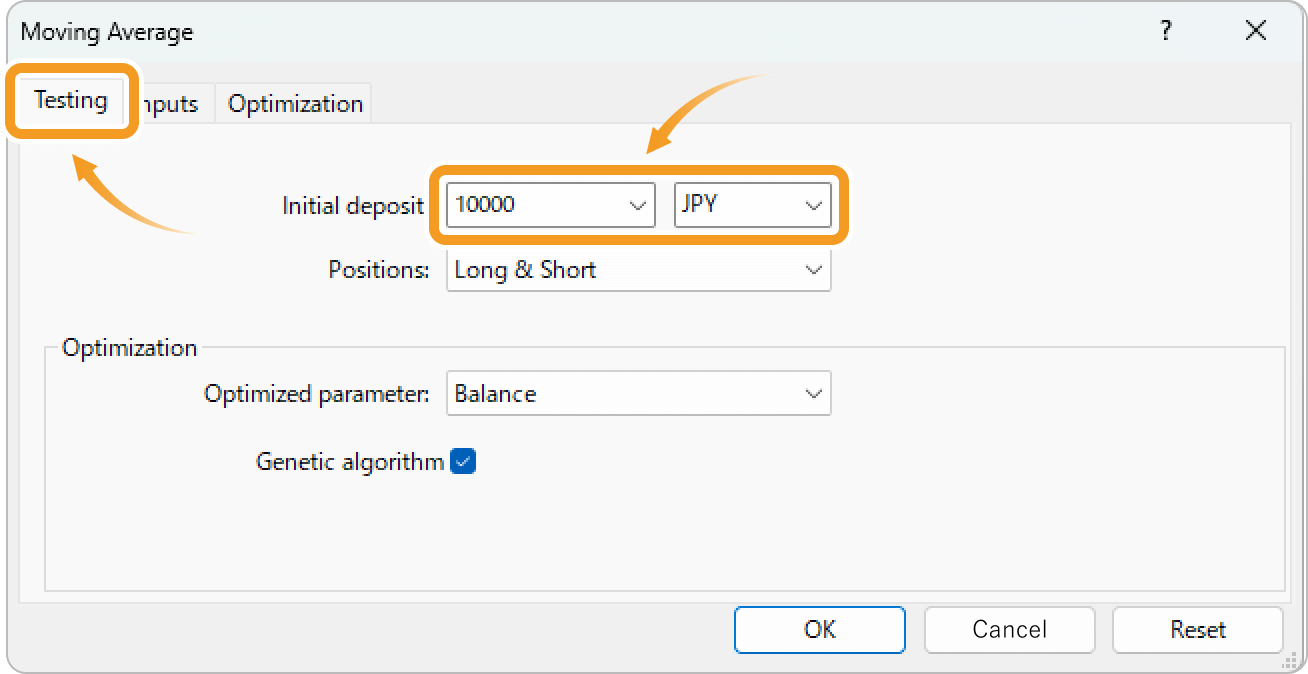
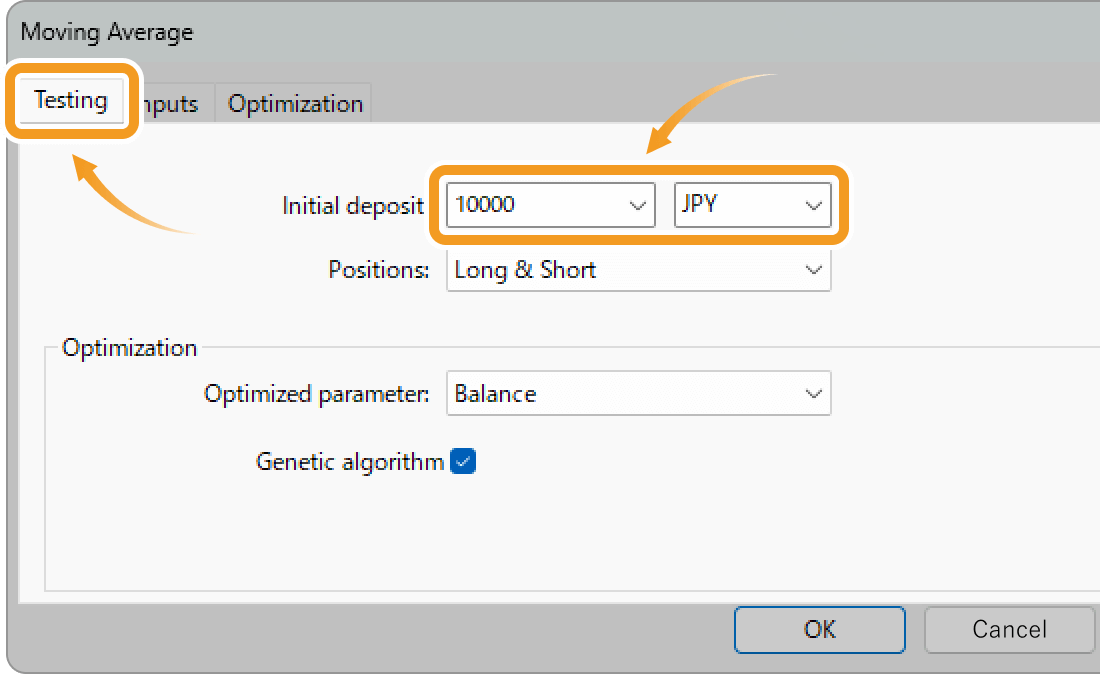
On the "Testing" tab, set the initial deposit and currency to use for backtesting. If you want to use the currency that is not listed in the pull-down menu, type it in the field like "JPY".
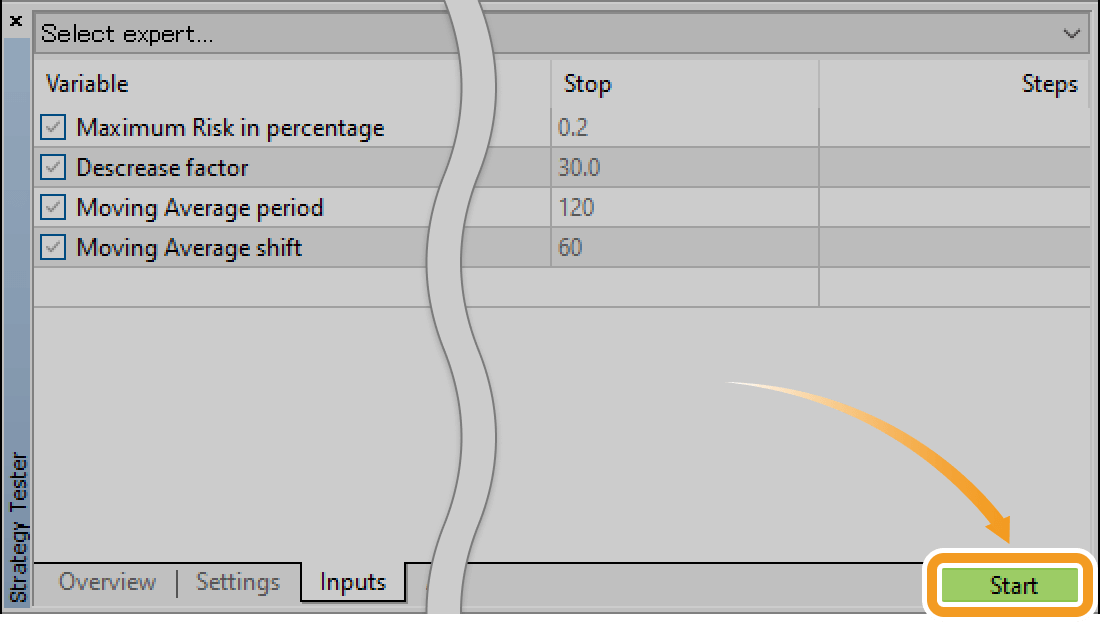
Click the "Inputs" tab and configure the "Value" fields for the Expert Advisor (EA). You don't have to edit the "Start", "Step", and "Stop" fields as they are used for the optimization feature.
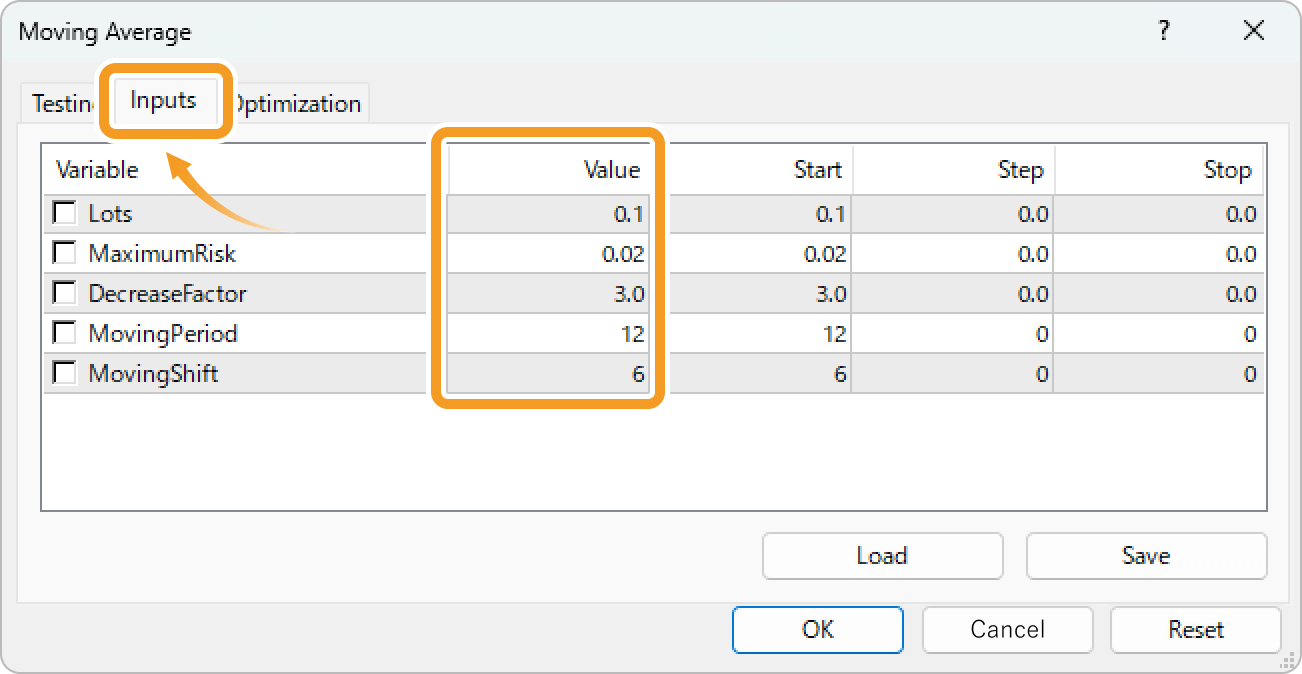
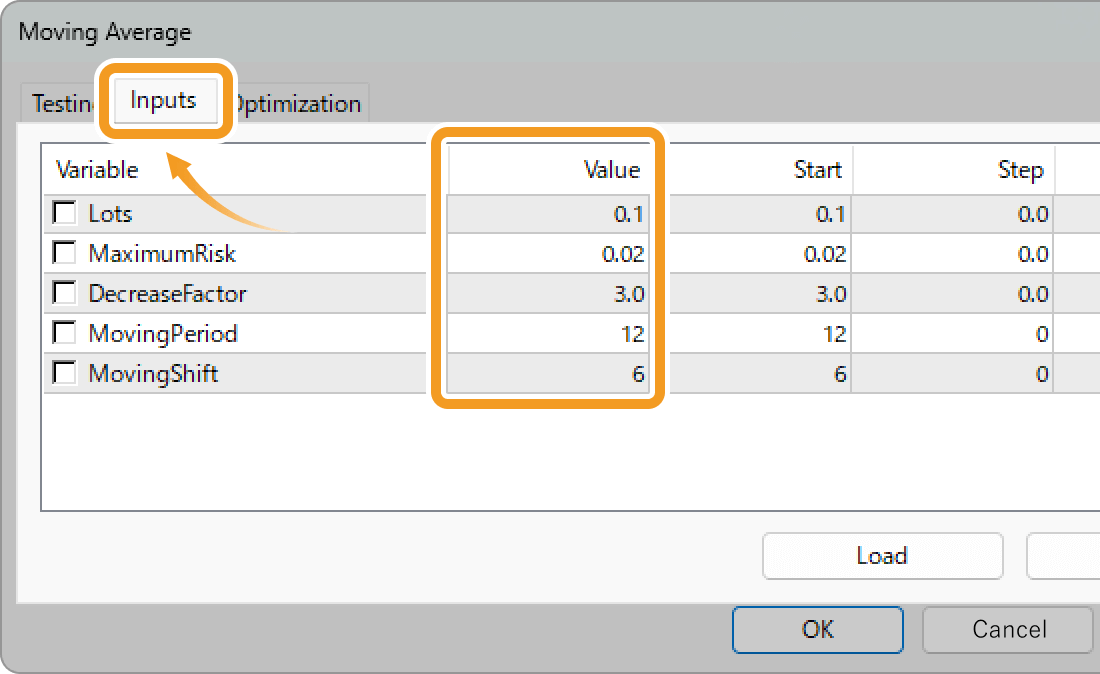
The default "Value" in the "Inputs" tab is set by the EA but can be customized to suit your preferences. The adjustable parameters vary depending on the Expert Advisor (EA) but often include settings such as Take Profit (T/P), Stop Loss (S/L), trade timing, and other technical indicators.
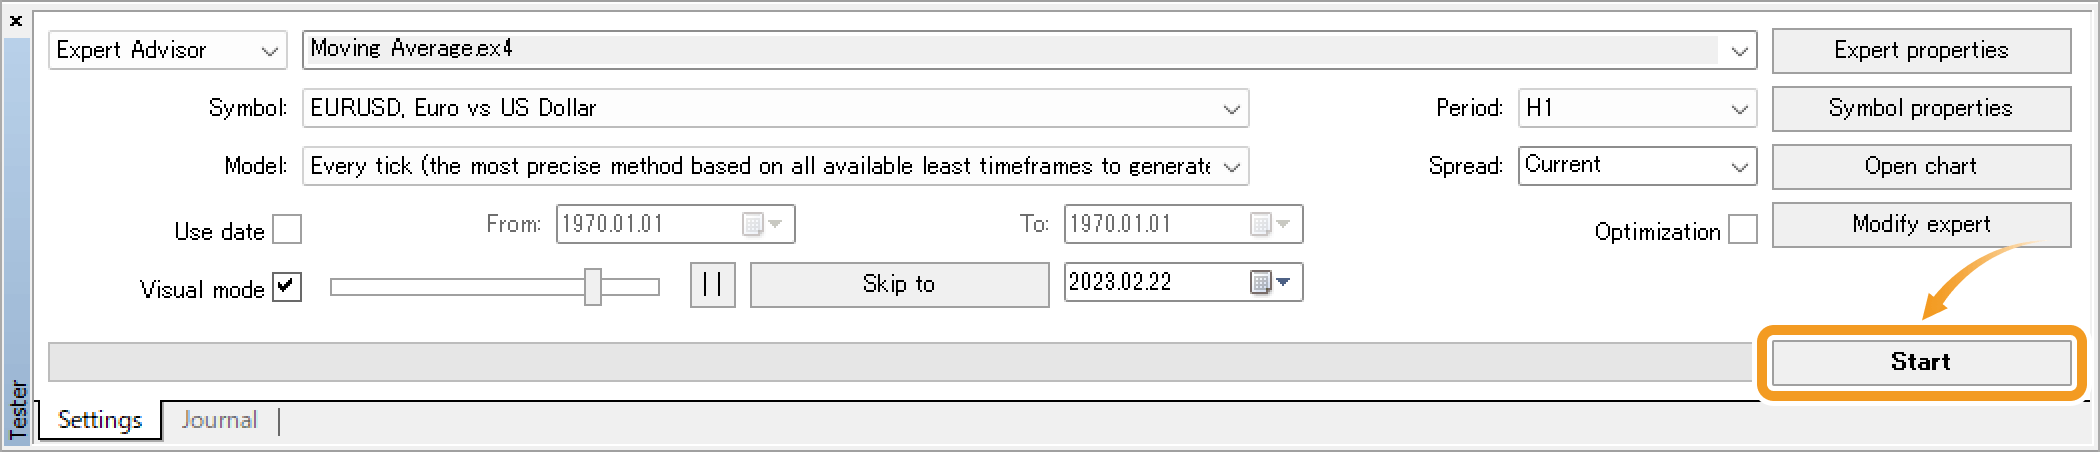
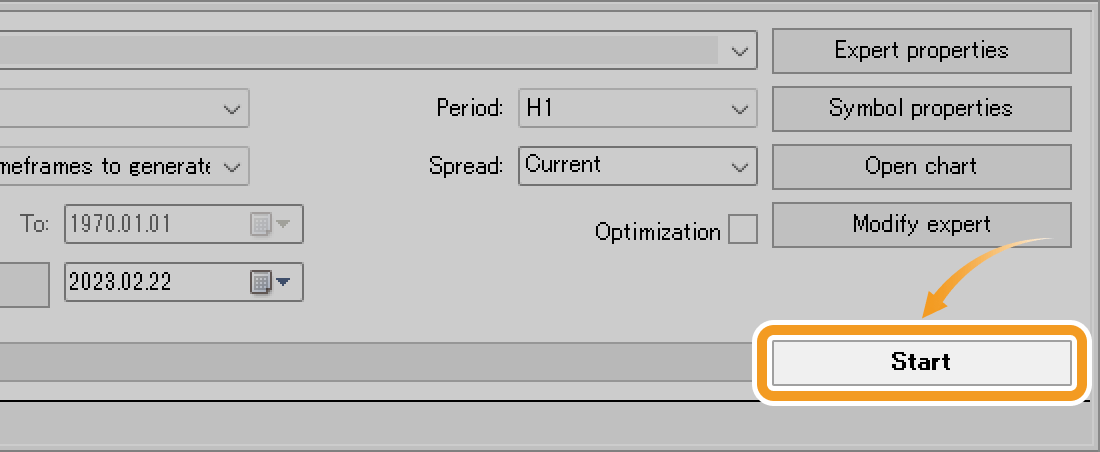
Click "Start" to start backtesting. Depending on the settings, this may take some time.
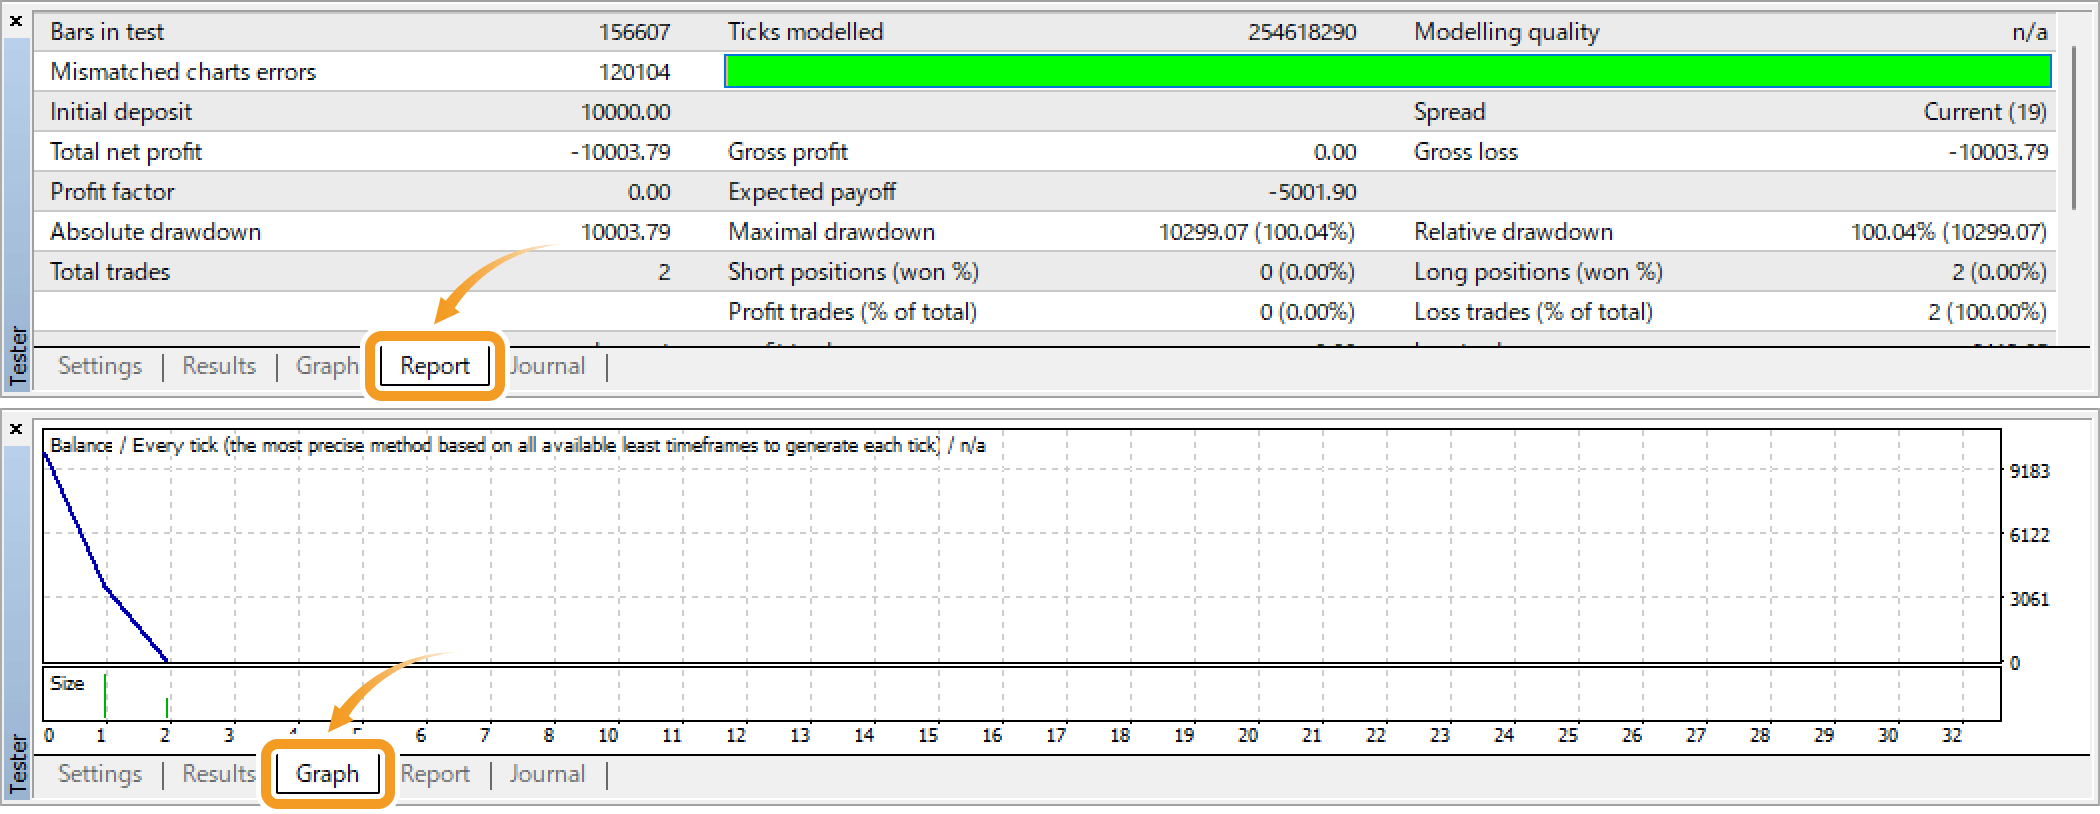
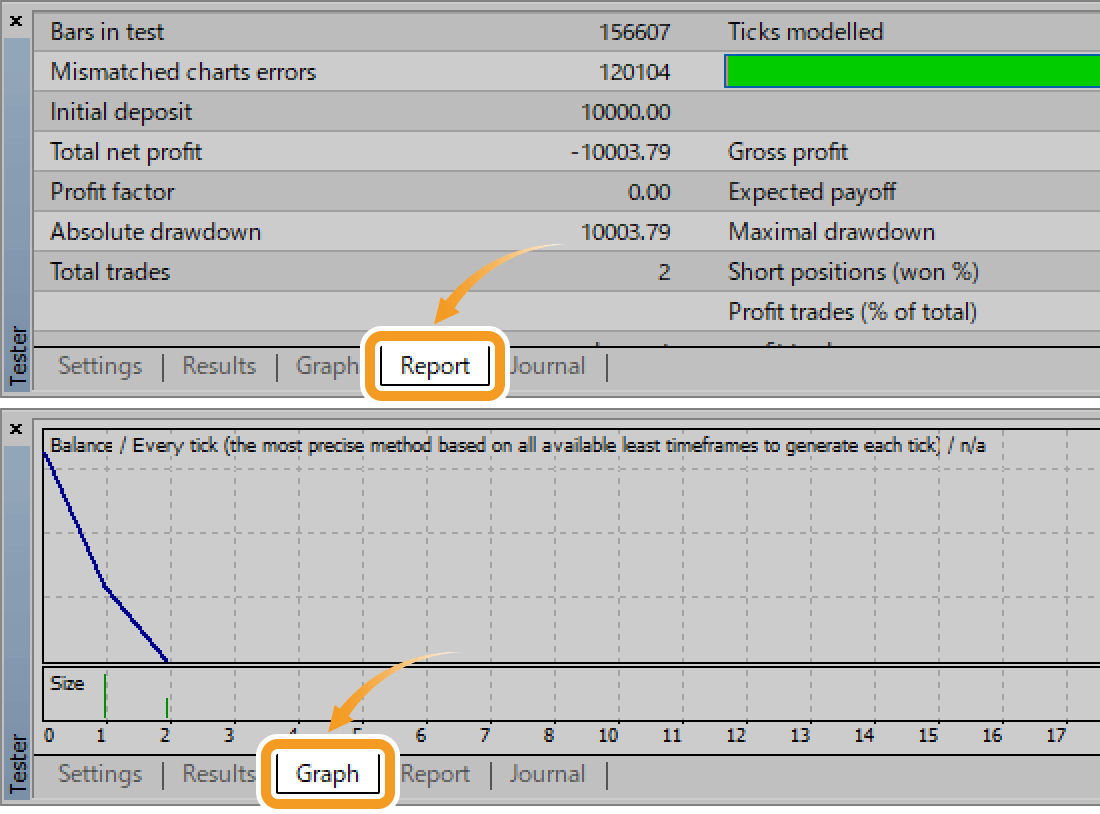
The backtest result will be in the "Report" tab. Also, the "Graph" tab shows the change in the account balance and equity.
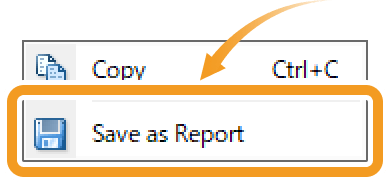
The backtest result can be saved in the HTML format by right-clicking on the report and selecting "Save as Result".
Related article: Save Expert Advisor (EA) testing report

Click "View" in the menu and select "Strategy Tester". (Shortcut keys : "Ctrl"+"R")
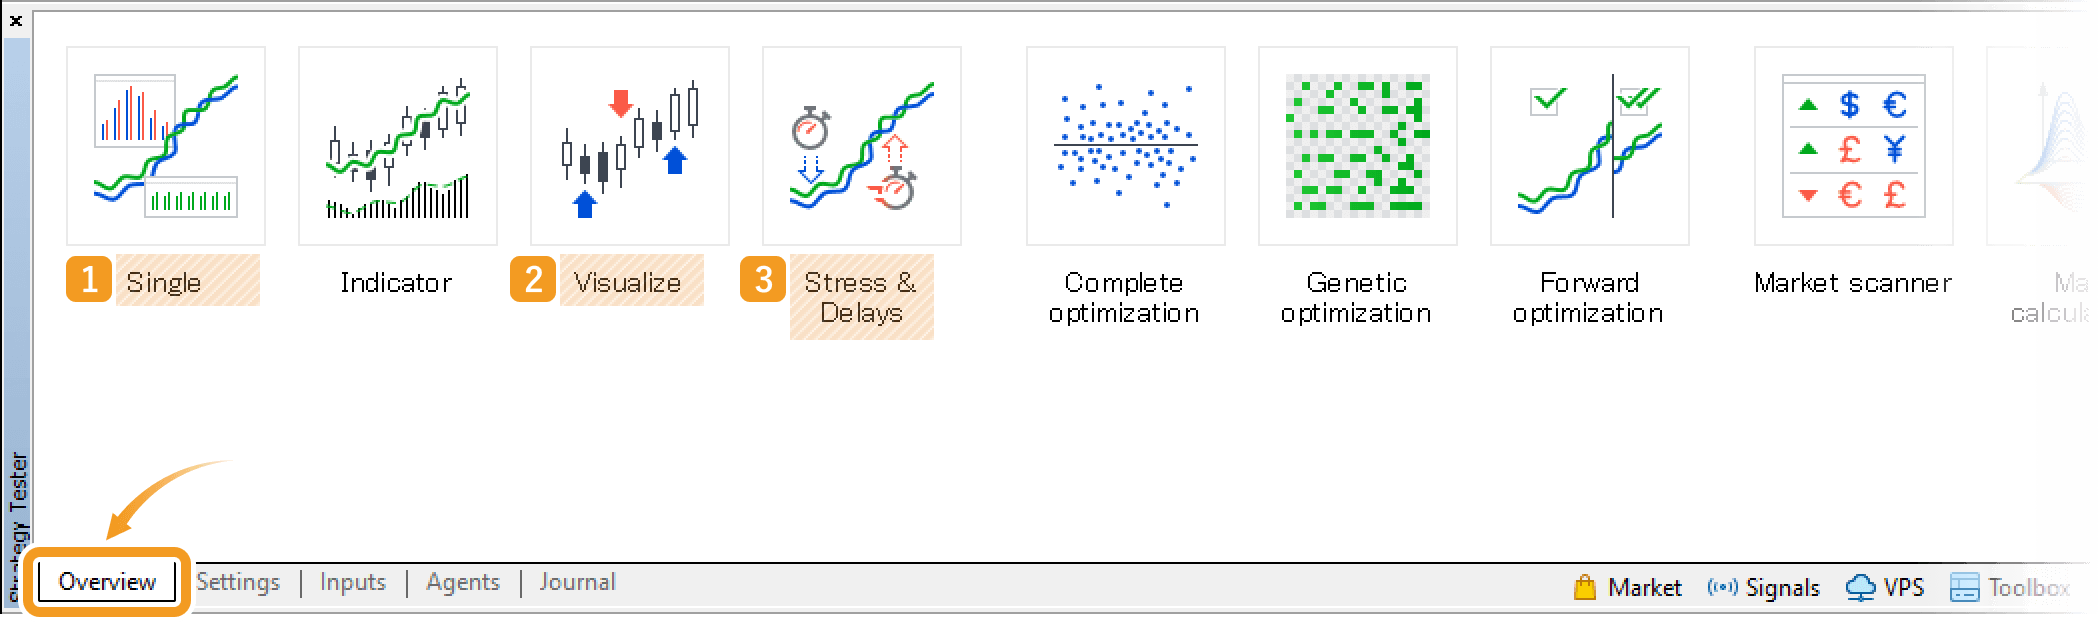
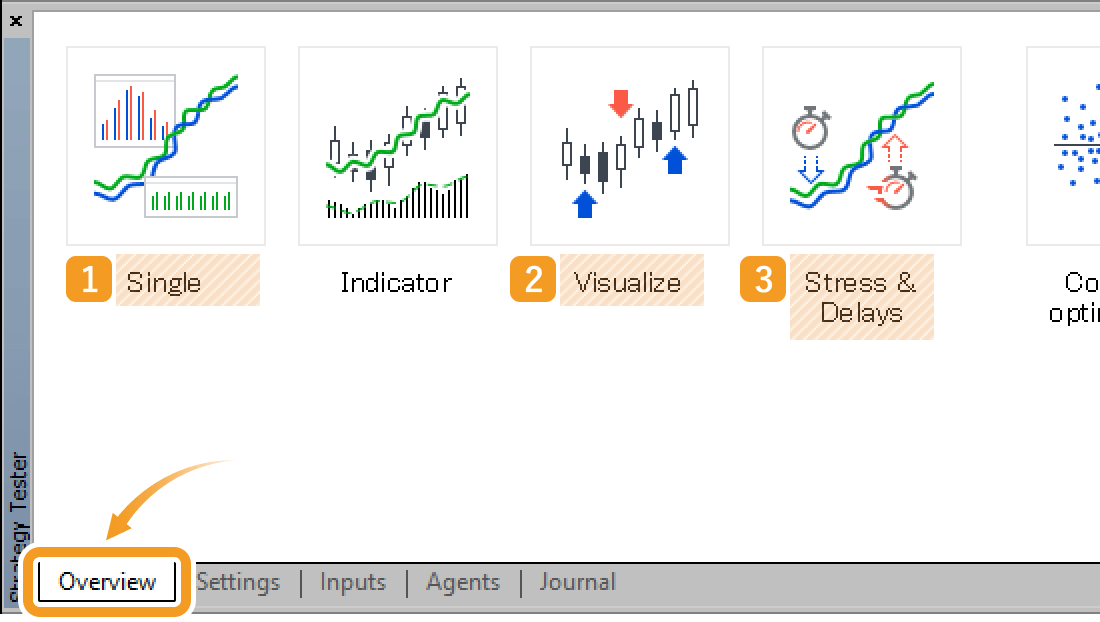
The "Overview" tab of the Strategy Tester will open. Select "Single", "Visualize", or "Stress & Delays".
|
Number |
Item name |
Descriptions |
|---|---|---|
|
1 |
Single |
Backtest the Expert Advisor (EA) with basic settings. |
|
2 |
Visualize |
Use the visual mode to perform backtesting while displaying trades on the chart. |
|
3 |
Stress & Delays |
Perform backtests by delaying execution and generating slippage. |
Default settings will change based on which icon you select. You can also change these settings individually from the "Settings" tab and recreate settings of other icons as well.
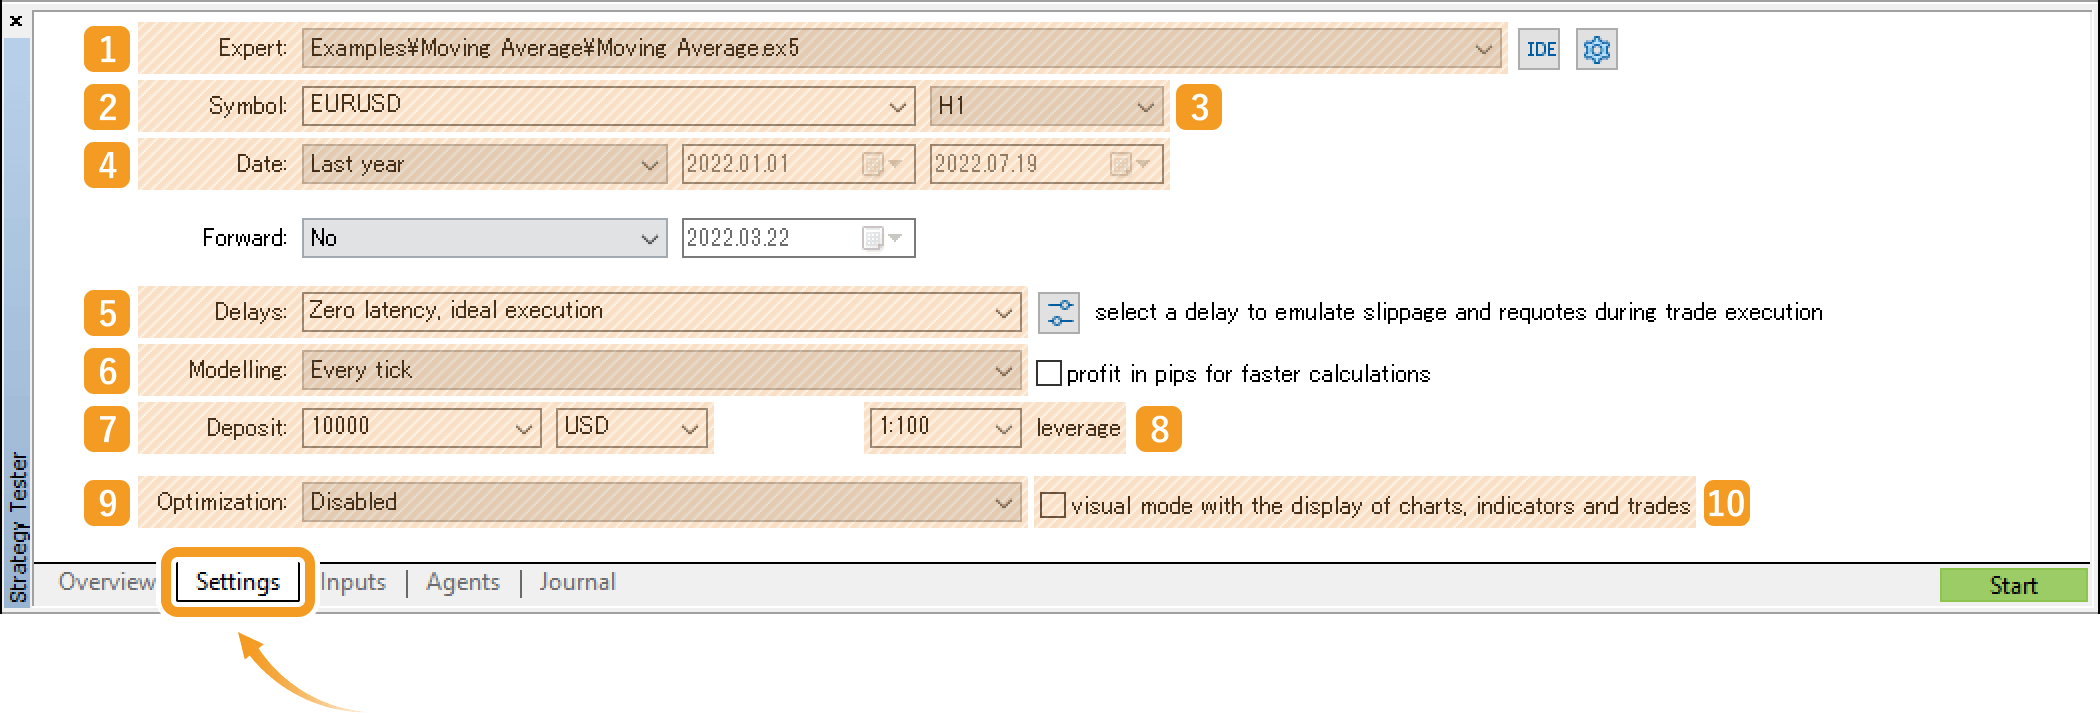
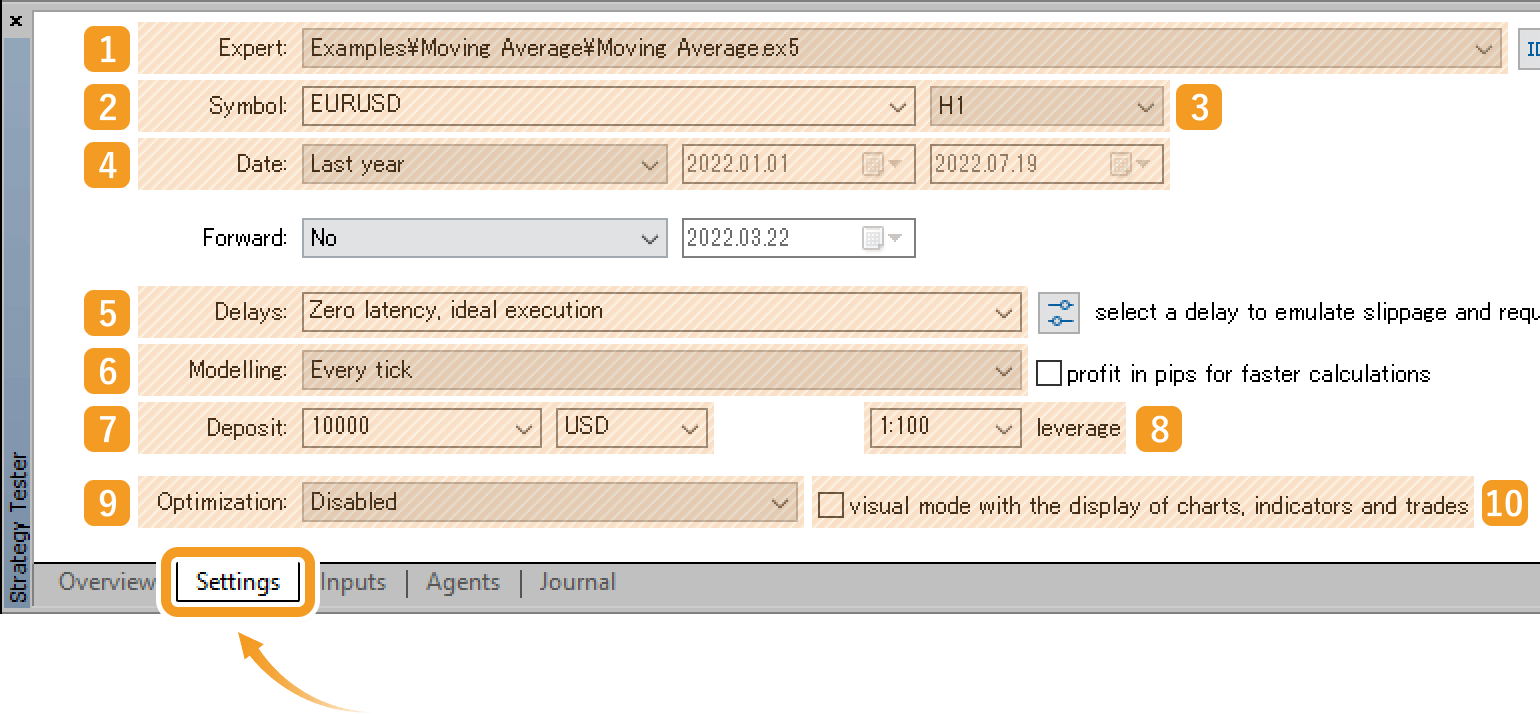
Click the "Settings" tab and set the conditions for backtesting.
|
Number |
Item name |
Descriptions |
|---|---|---|
|
1 |
Expert |
Select the Expert Advisor (EA) to backtest. |
|
2 |
Symbol |
Select the symbol. |
|
3 |
Timeframe |
Select the timeframe. |
|
4 |
Date |
Select the period for backtesting.
Entire history: Backtest for the entire period where historical data exists.
Last month: Backtest from one month before the current date.
Last year: Backtest from one year before the current date.
Custom period: Backtest for the specified period.
|
|
5 |
Delays |
Select the time to delay executions.
Zero latency, ideal execution: No delay.
〇 ms (last ping to your server is 〇 ms): Delay for the transmission time with the broker server as measured by your MT5.
1-1000 ms: Delay for a selected amount of seconds among 1, 5, 10, 20, 50, 100, 500, or 1000 milliseconds.
Random delay: Delay for a random amount of seconds.
Custom delay: Delay specified in milliseconds.
|
|
6 |
Modelling |
Select the historical data model to be used for backtesting.
Every tick: Use the ticks generated by MT5 based on 1-minute OHLC.
Every tick based on real ticks: Use the broker's real ticks for the logged-in account.
1 minute OHLC: Use the 1-minute Open, High, Low, and Close prices.
Open prices only: Use the open prices of the selected timeframe.
Math calculations: Select this option if you want to use the Strategy Tester for calculations. This is not for backtesting.
|
|
7 |
Deposit |
Select the initial account balance and currency. If you want to use the currency that is not listed in the pull-down menu, type it in the field like "JPY". |
|
8 |
Leverage |
Select the leverage. |
|
9 |
Optimization |
Select the optimization method. Leave the default "Disabled" as it is not used for normal backtesting. |
|
10 |
Visual mode with the display of charts, indicators, and trades |
Check this box if you use the visual mode. When it is checked, a chart window will open at the start of the backtest, allowing you to follow the past price movements and watch the Expert Advisor (EA) make trades chronologically. |
If you choose "Every tick" or "Every tick based on real ticks", the accuracy of the backtest will increase because these two contain the most amount of data, but it will take longer time. If you wish to perform a quick backtest with reduced accuracy, choose "1 minute OHLC" or "Open prices only" which contain fewer data.If you wish to analyze the Expert Advisor (EA) performance thoroughly, it is recommended to use "Every tick" or "Every tick based on real ticks".
Click the "Inputs" tab and set the values for the Expert Advisor (EA) parameters.
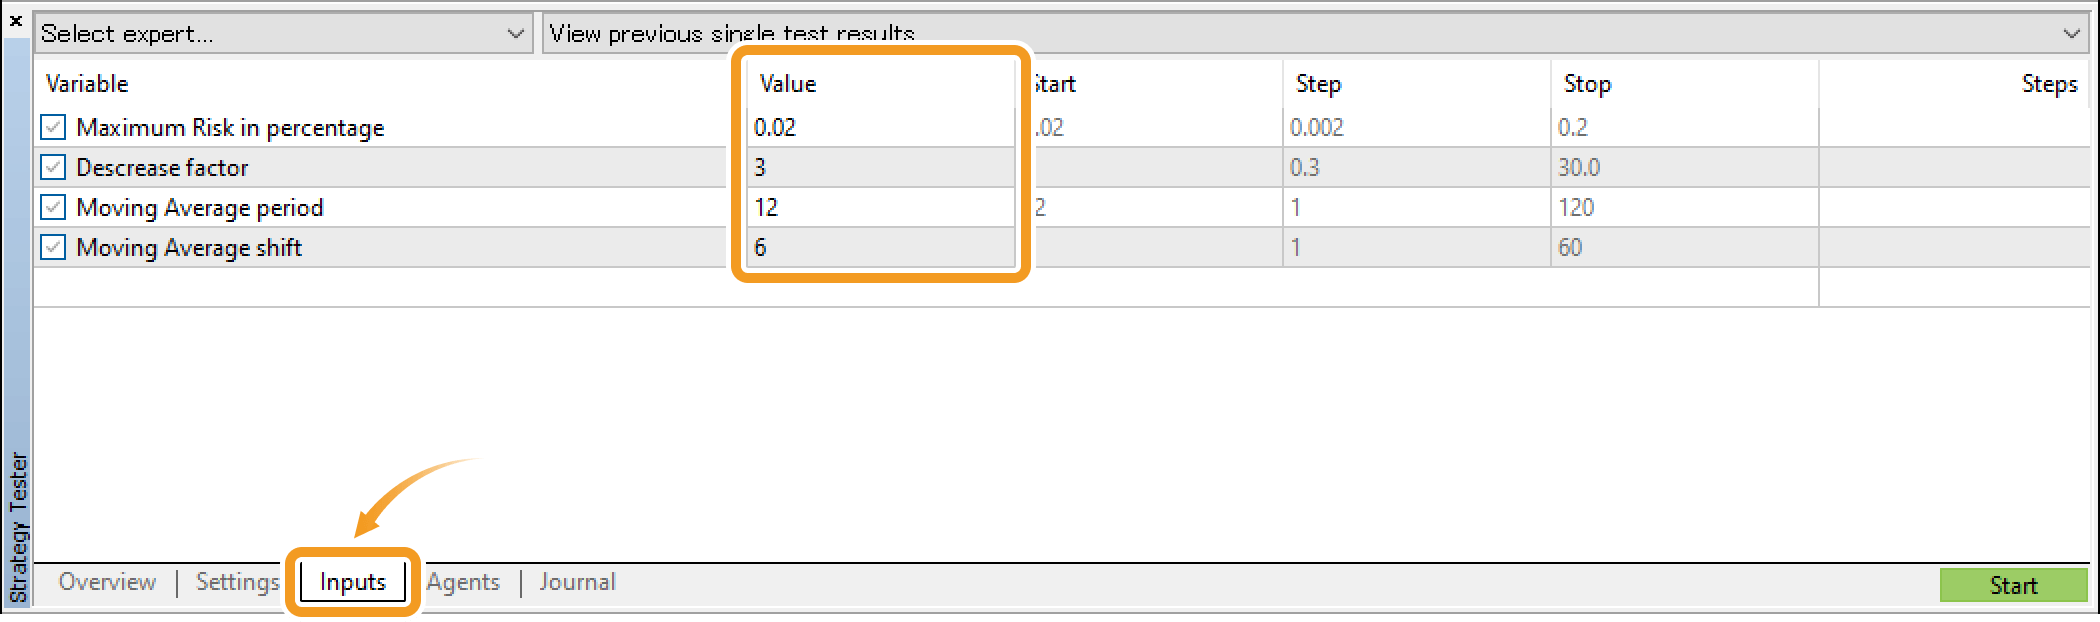
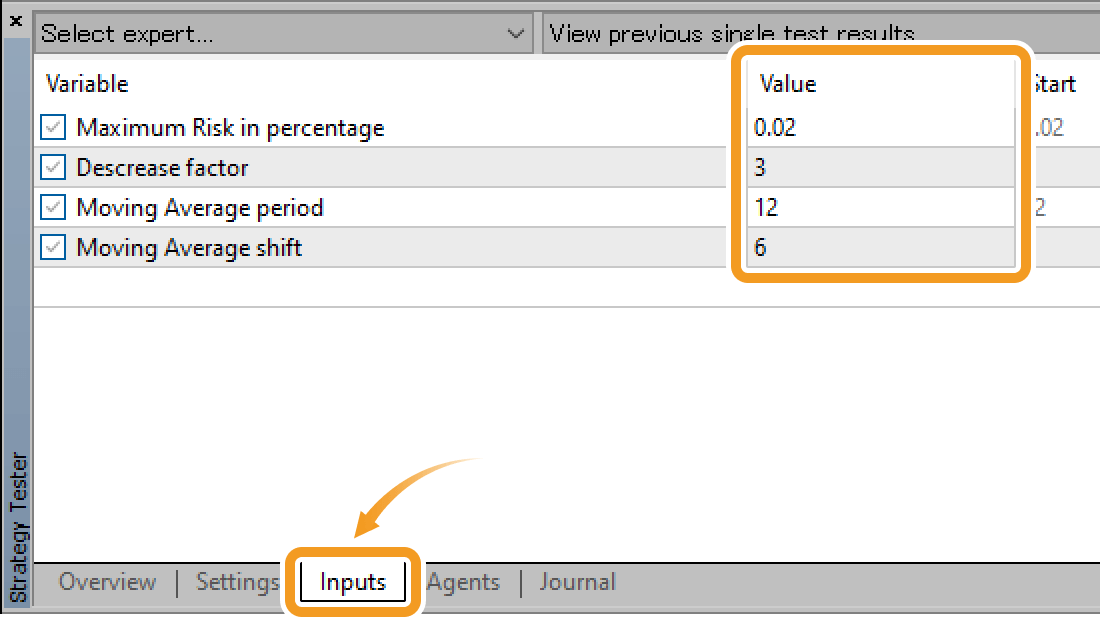
The default "Value" in the "Inputs" tab is set by the EA but can be customized to suit your preferences. The adjustable parameters vary depending on the Expert Advisor (EA) but often include settings such as Take Profit (T/P), Stop Loss (S/L), trade timing, and other technical indicators.
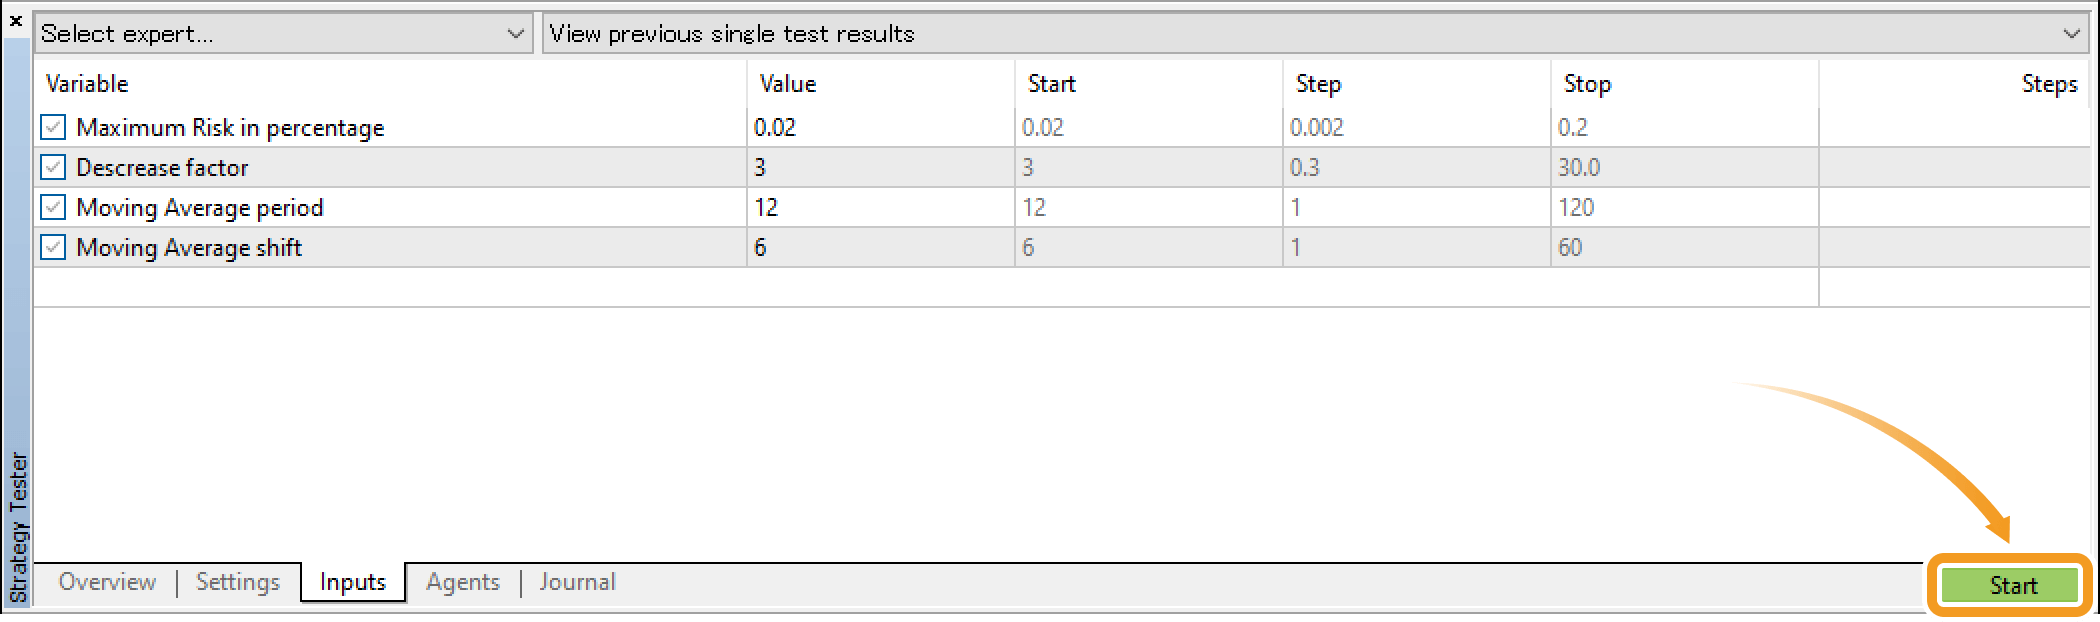
Click "Start" to start backtesting. Depending on the settings, this may take some time.
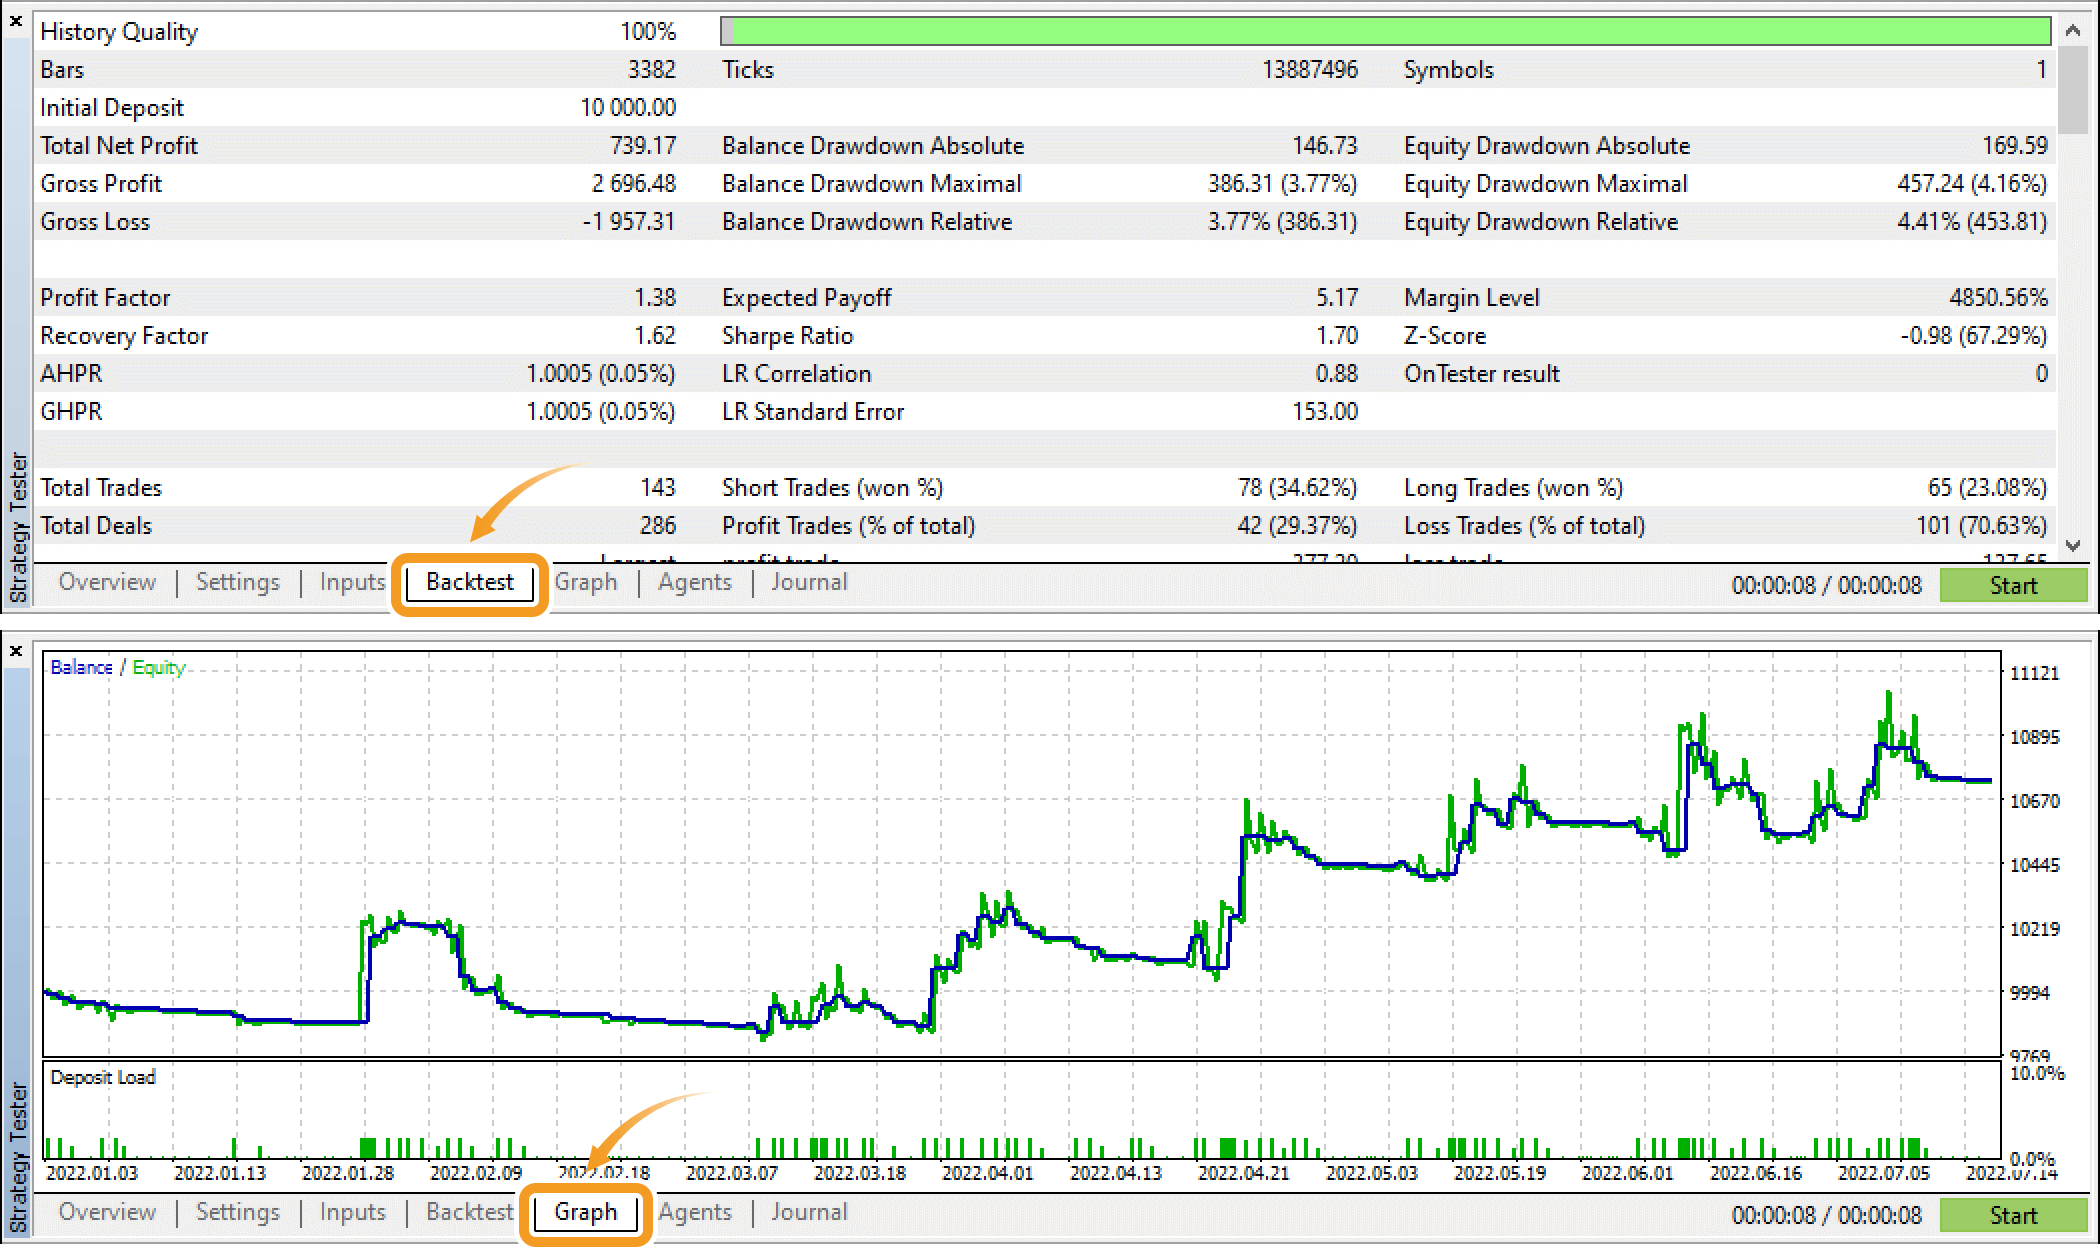
The backtest result will be in the "Backtest" tab. Also, the "Graph" tab shows the change in the account balance and equity, as the blue and green lines respectively.

The backtest result can be saved in two formats, "Open XML" and "HTML".
Related article: Save Expert Advisor (EA) testing report
Was this article helpful?
0 out of 0 people found this article helpful.
Thank you for your feedback.