


Set email alerts
Others (PC)
Others (PC)

This article was :
published
updated
On MetaTrader4 (MT4) / MetaTrader5 (MT5), you can send a notification to the registered email address when the conditions for an alert are met. Please note that the email notifications are only available when MT4/MT5 is running.
The email alerts are often used with Expert Advisors (EA) and indicators to keep you updated on your trades and opportunities while away from your PC. Besides EA and indicators, you can also set the custom rules to receive emails.
Here we will look at how to set up the alerts with email on MT4/MT5.
| Related articles: | Set alerts to run a program |
| Set sound alerts | |
| Set push notification alerts |
Switch between MT4/MT5 tabs to check the steps for each.
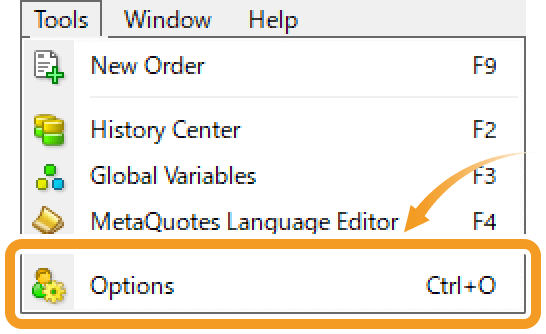
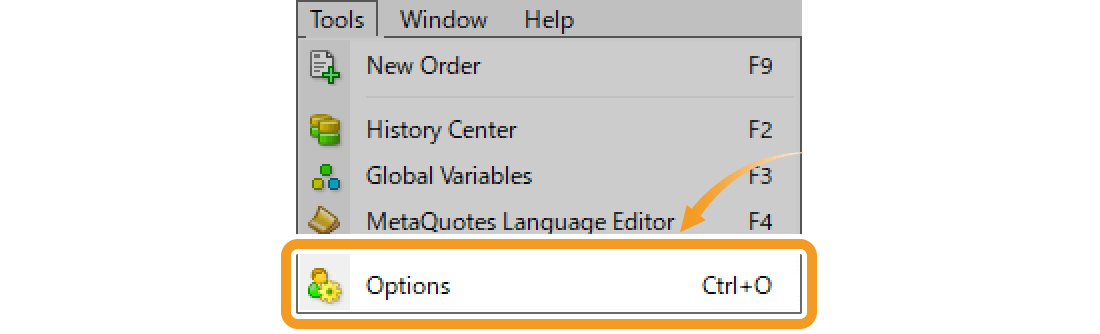
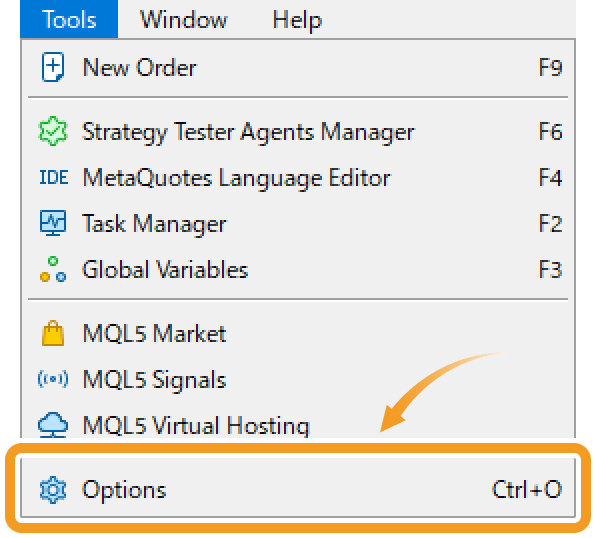
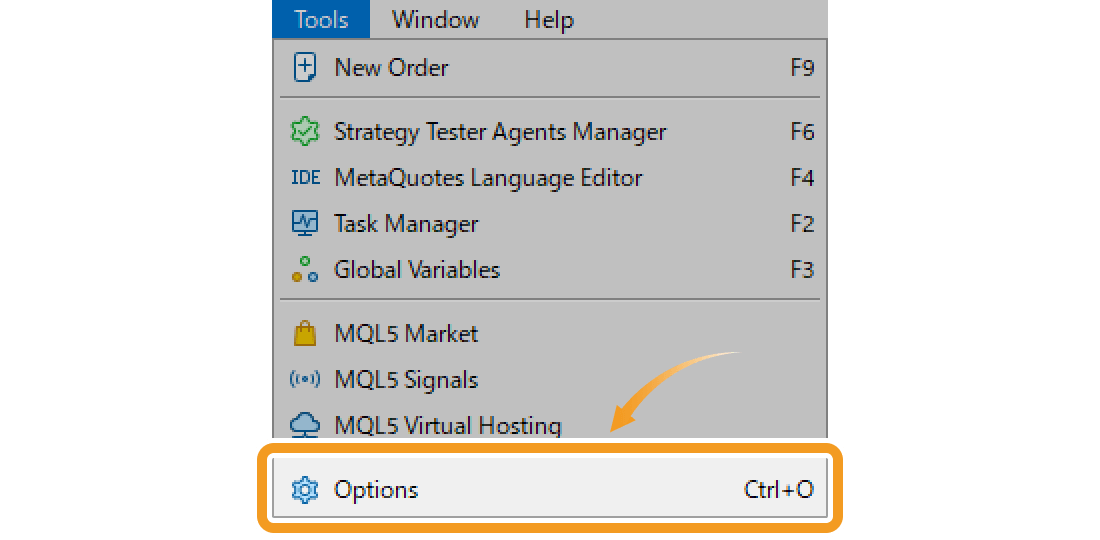
Click "Tools" in the menu and select "Options". (Shortcut keys: "Ctrl"+"O")
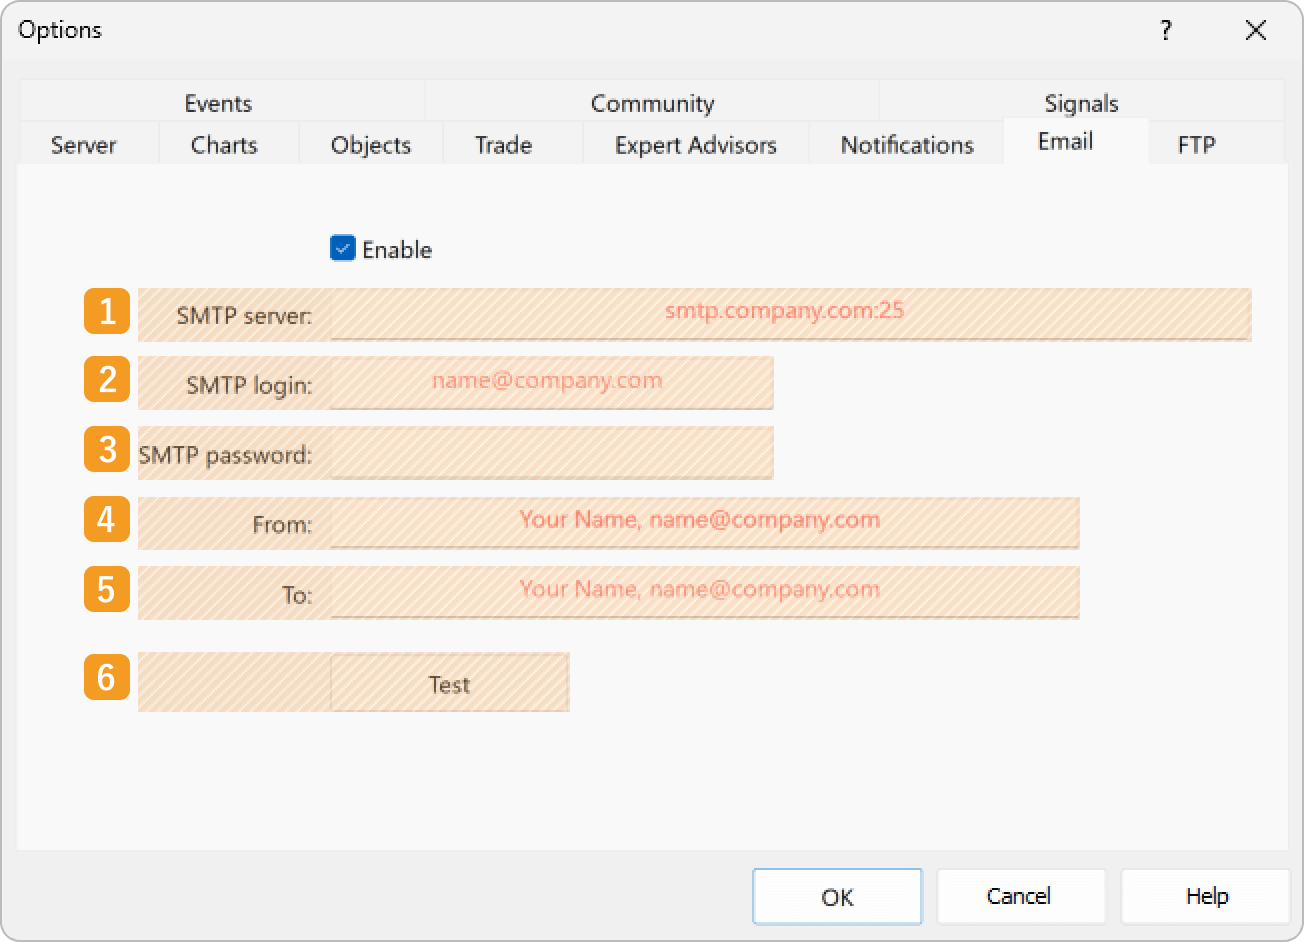
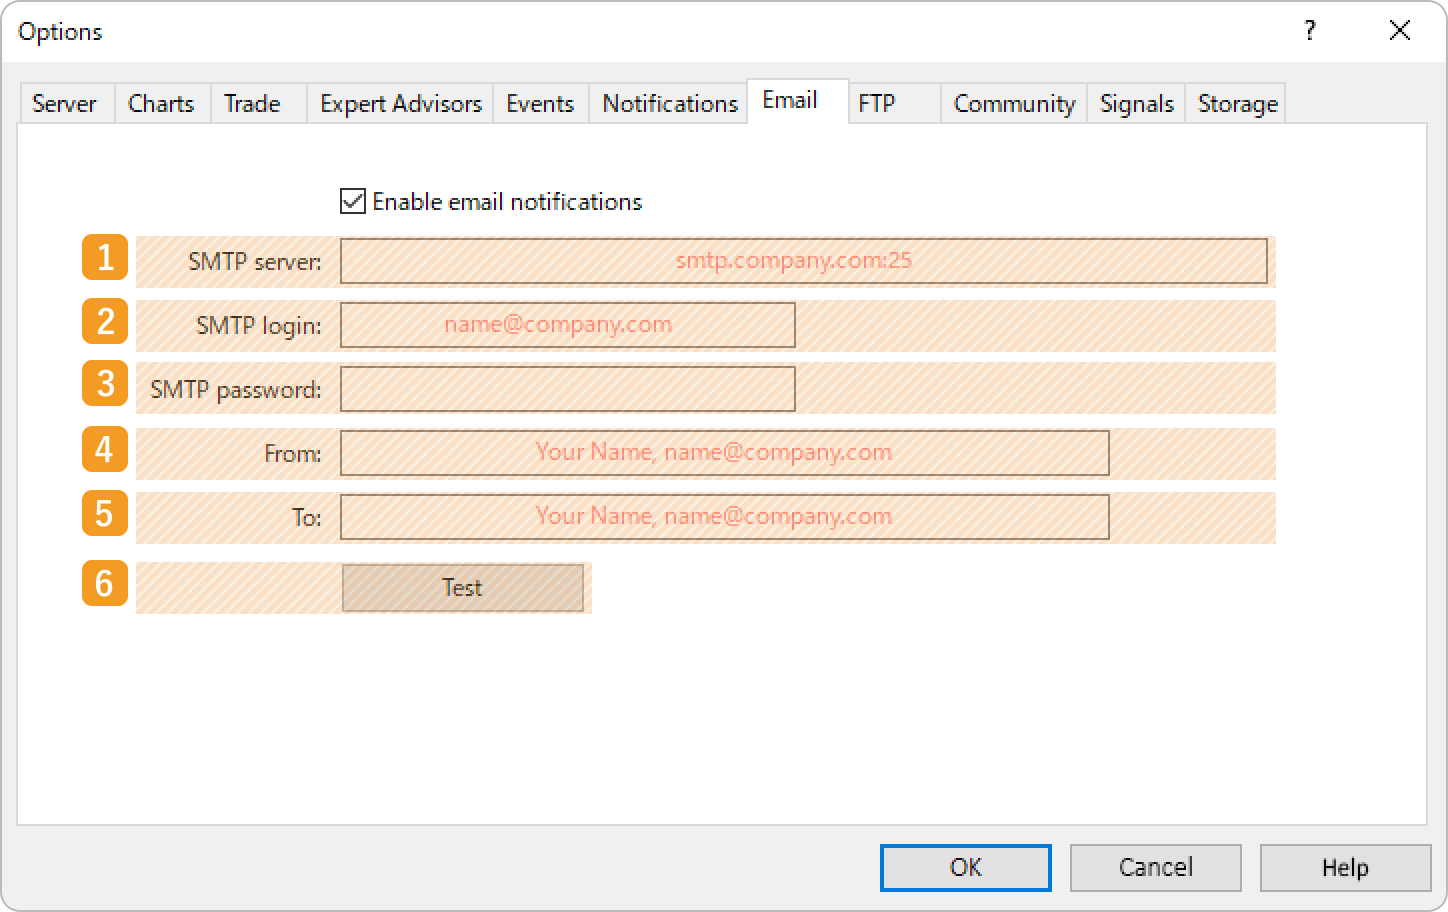
In the "Email" tab, check the "Enable" box. After entering the required information, click "OK".
|
Number |
Item name |
Descriptions |
|---|---|---|
|
1 |
SMTP server |
Enter the IP address and port number for the SMTP server of the sending email account. |
|
2 |
SMTP login |
Enter the login ID for the SMTP server of the sending email account. |
|
3 |
SMTP password |
Enter the password for the SMTP server of the sending email account. |
|
4 |
From |
Enter the email address of the sender. The addresses for "From" and "To" can be the same. |
|
5 |
To |
Enter the email address of the recipient. The addresses for "From" and "To" can be the same. |
|
6 |
Test |
After filling out all the information, you can send a test email by clicking "Test". |
When setting up email alerts using your SMTP server, the settings will depend on the service you use. Please follow the instructions provided by your email services to integrate it with the external service.
If you wish to use email notifications for the alert feature of Expert Advisor (EA) or indicators, you only need to complete step 1 and 2 and no further settings are required. An email will be sent when the conditions set on the EA/indicator side are met. To define the alert conditions yourself, you will need to follow step 3 onwards.
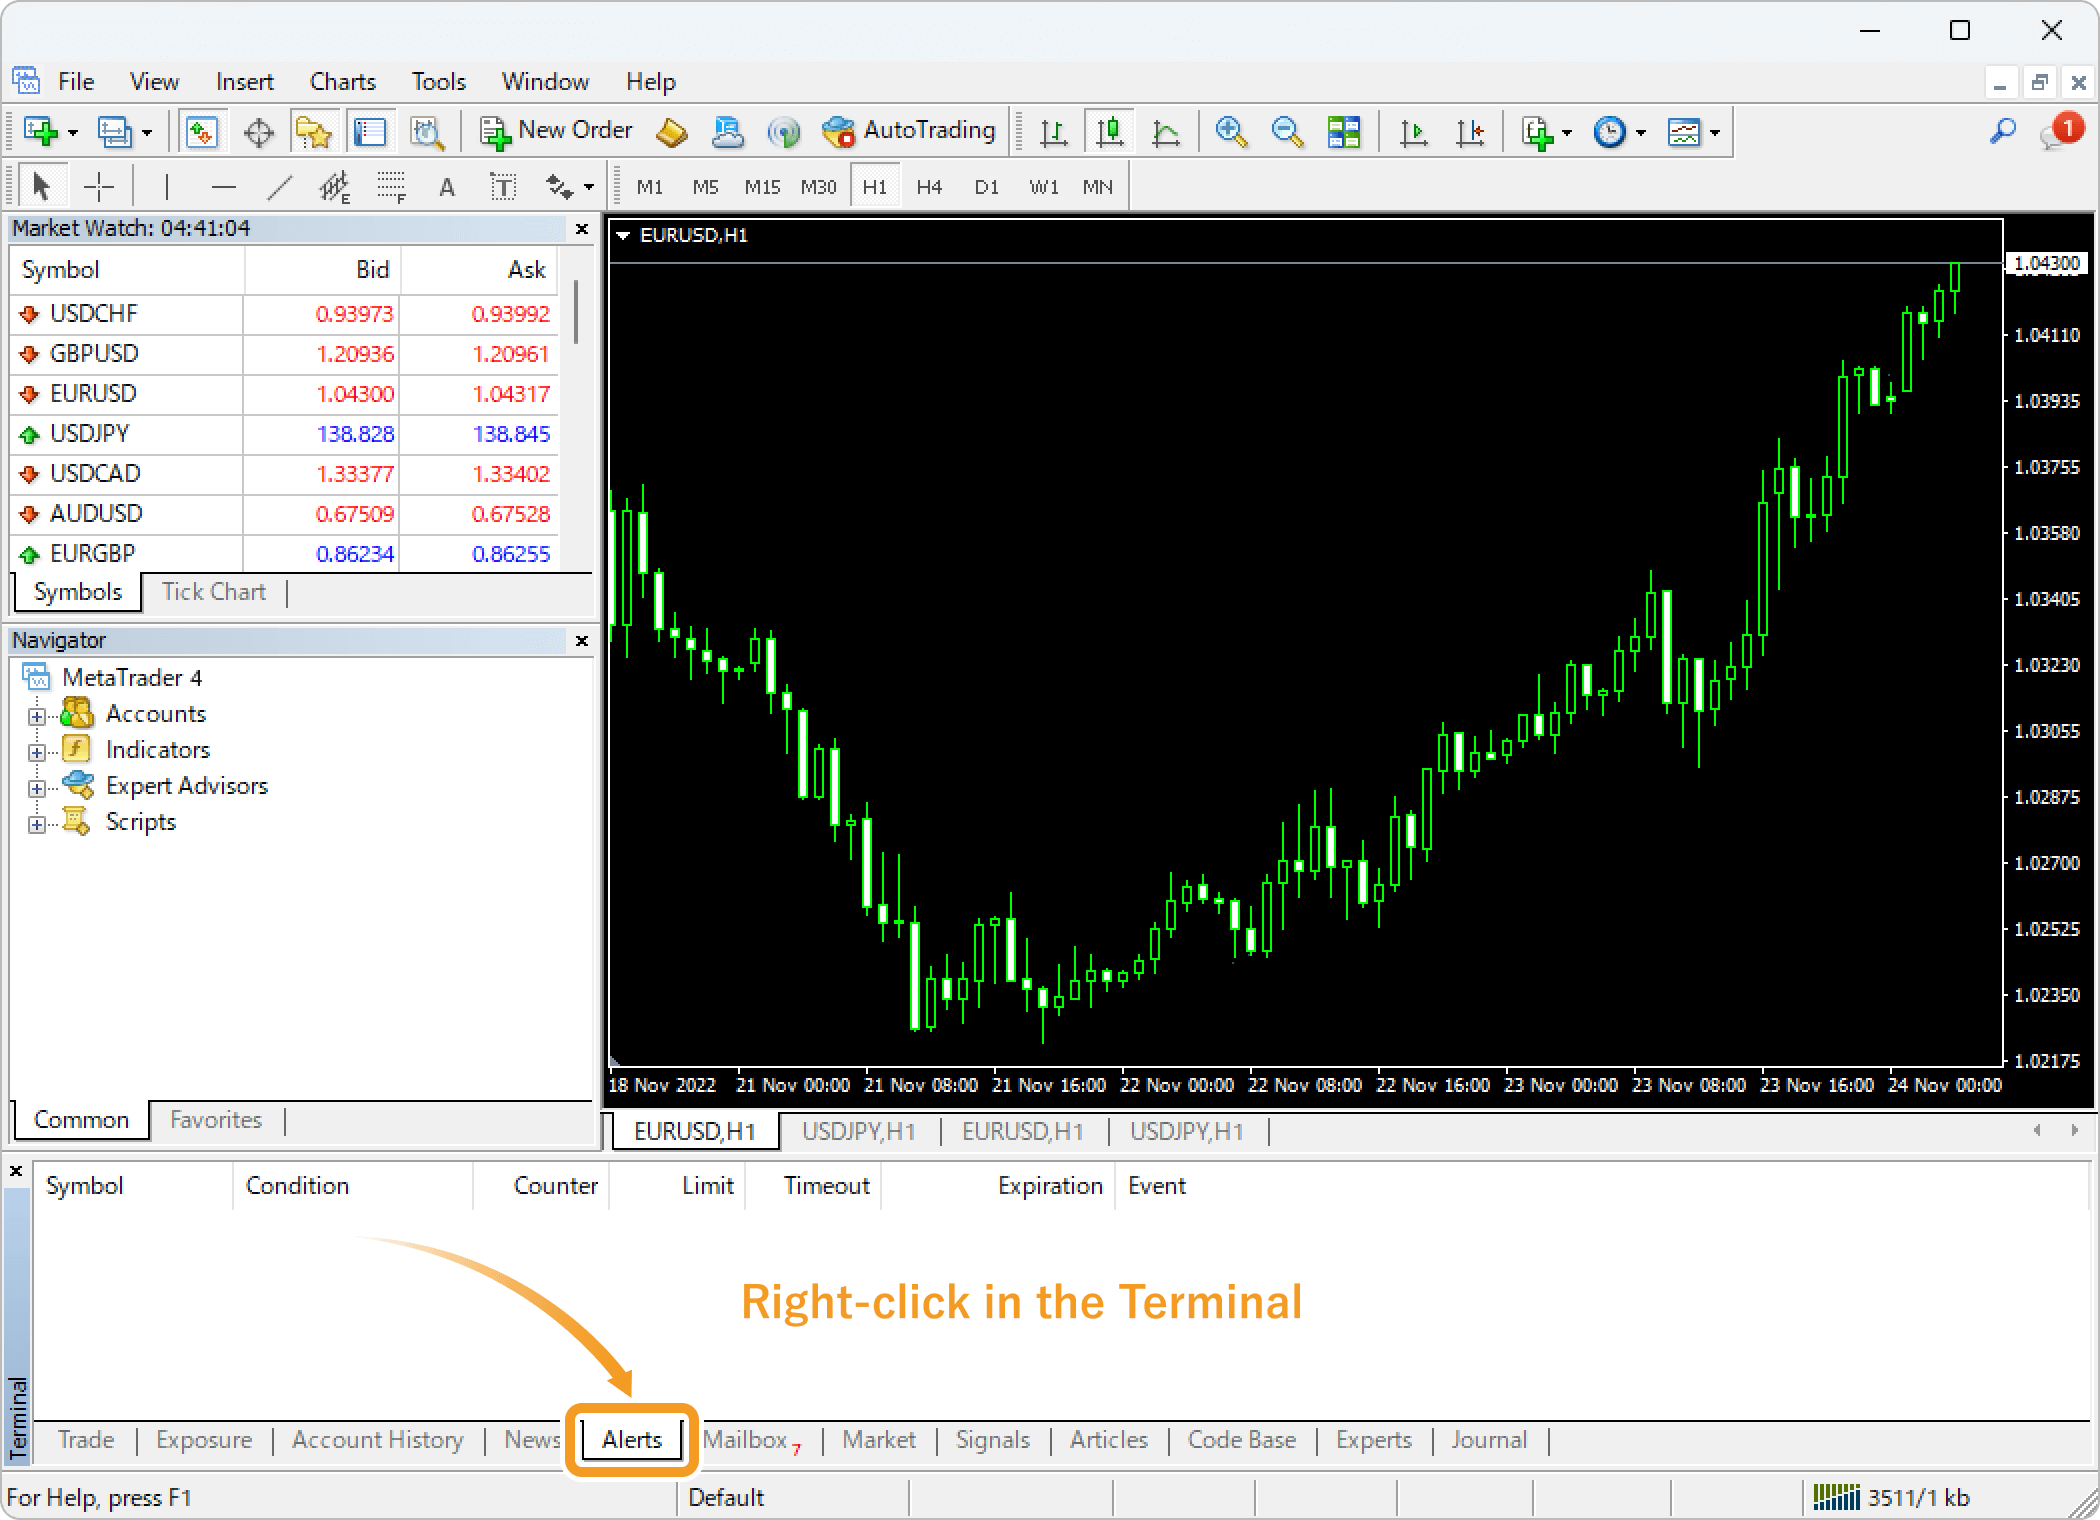
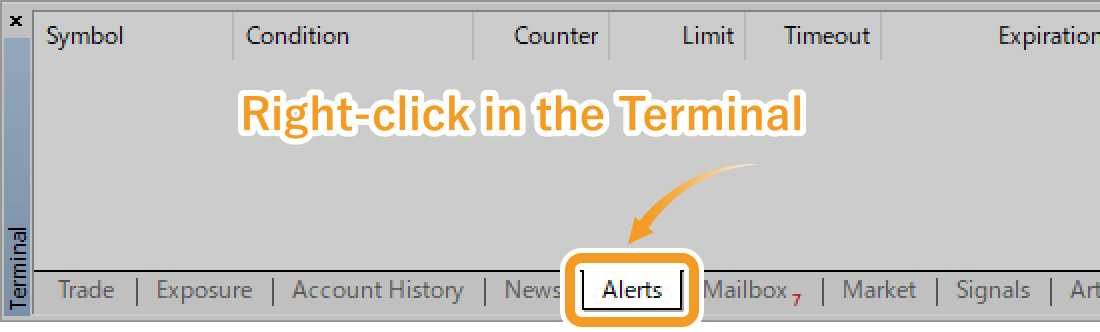
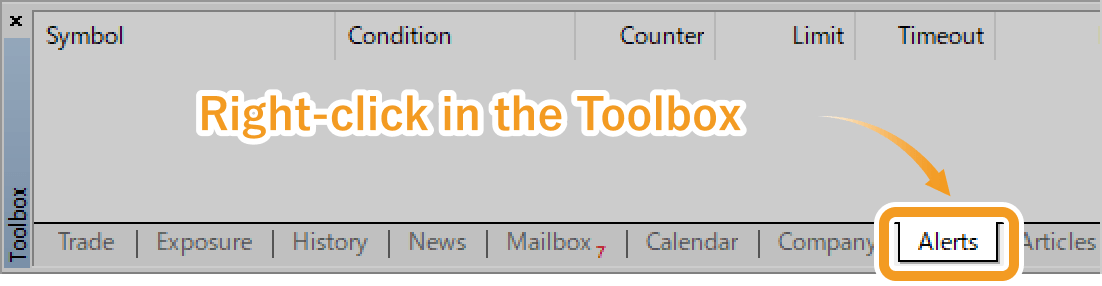
Click the "Alerts" tab of the Terminal and right-click in the tab.
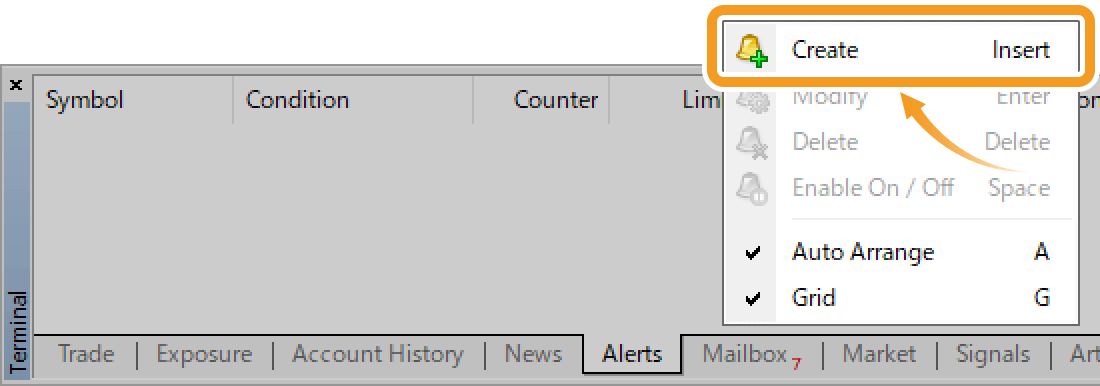
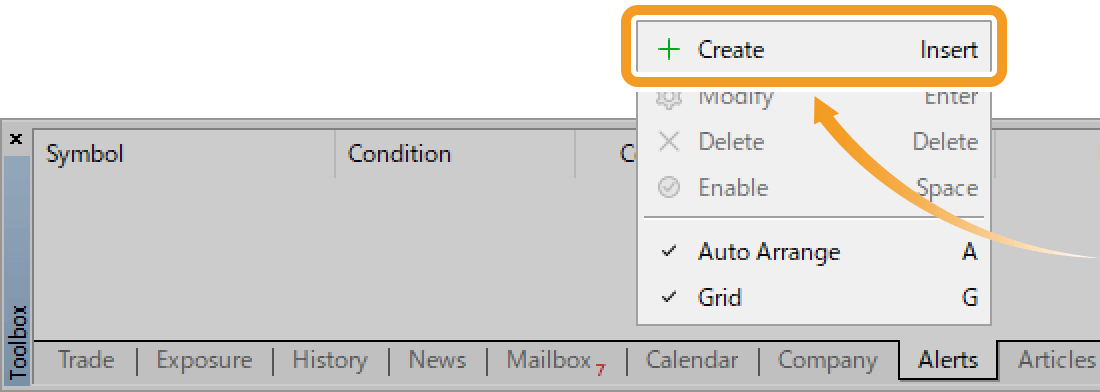
Select "Create" from the context menu.

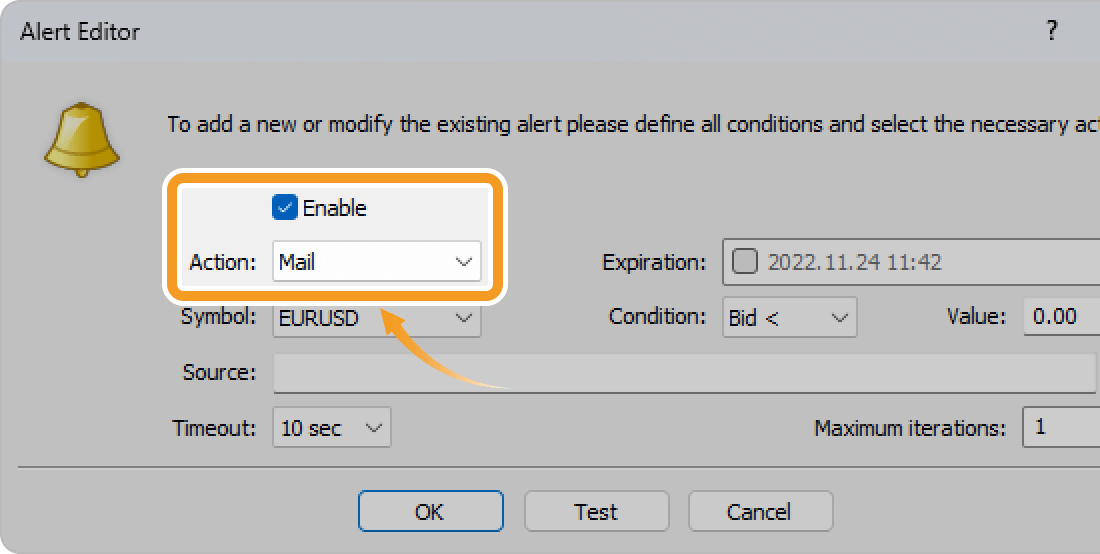
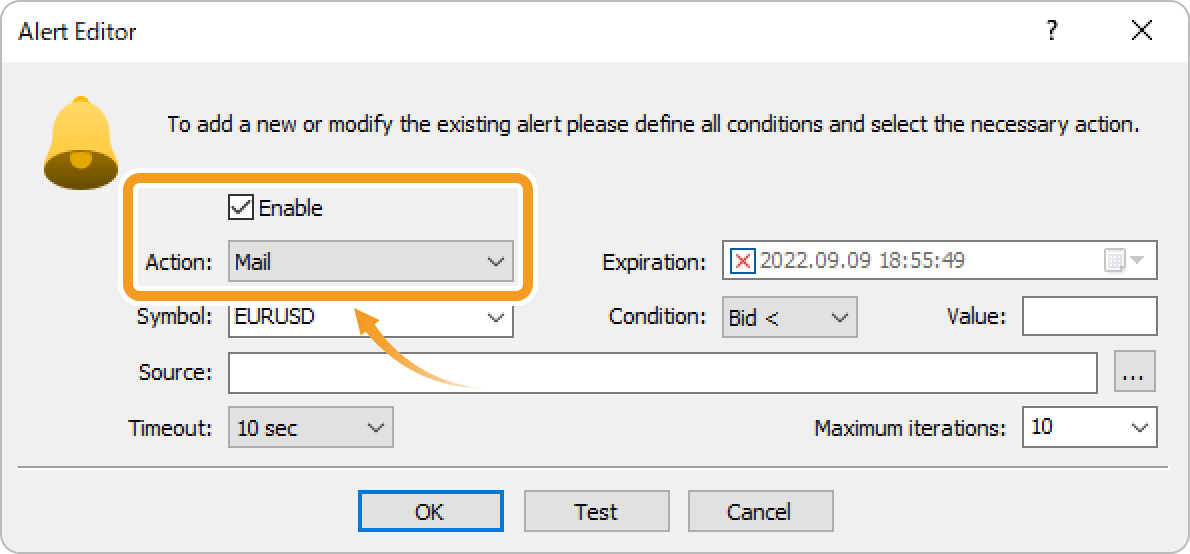
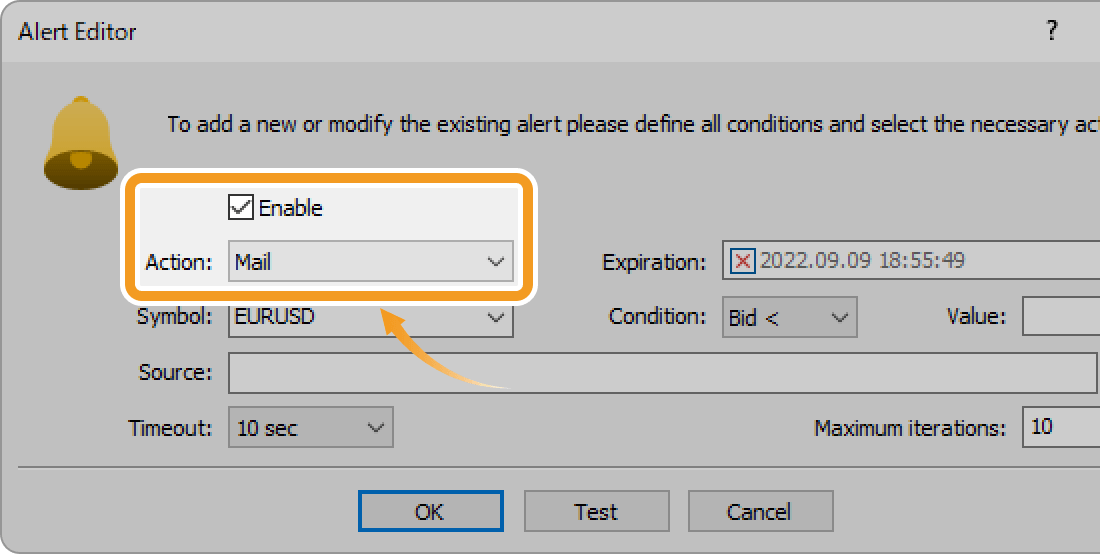
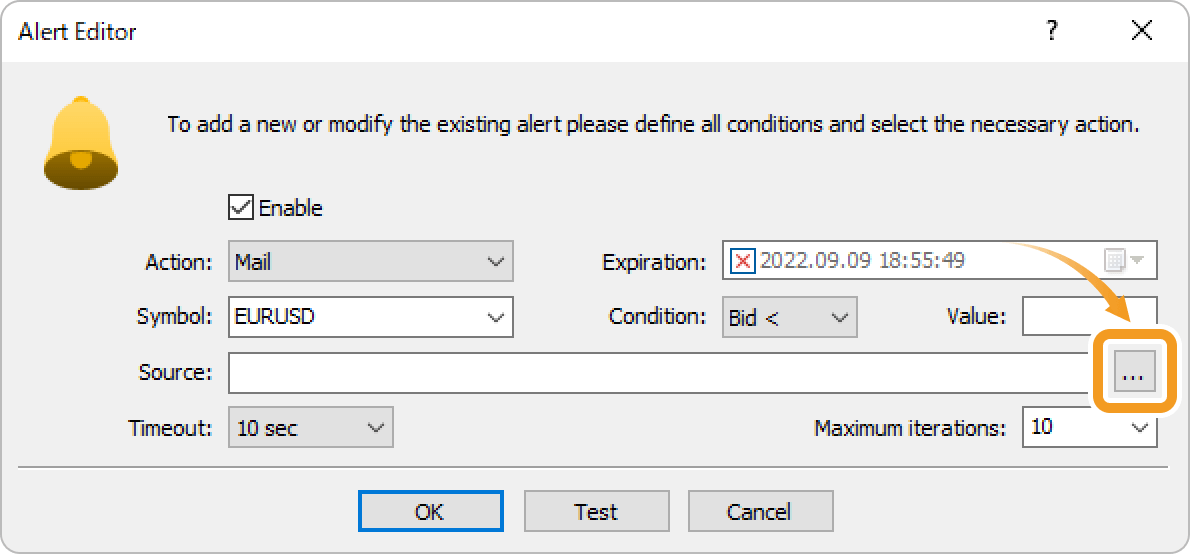
Check the "Enable" box and select "Mail" in the "Action" field.
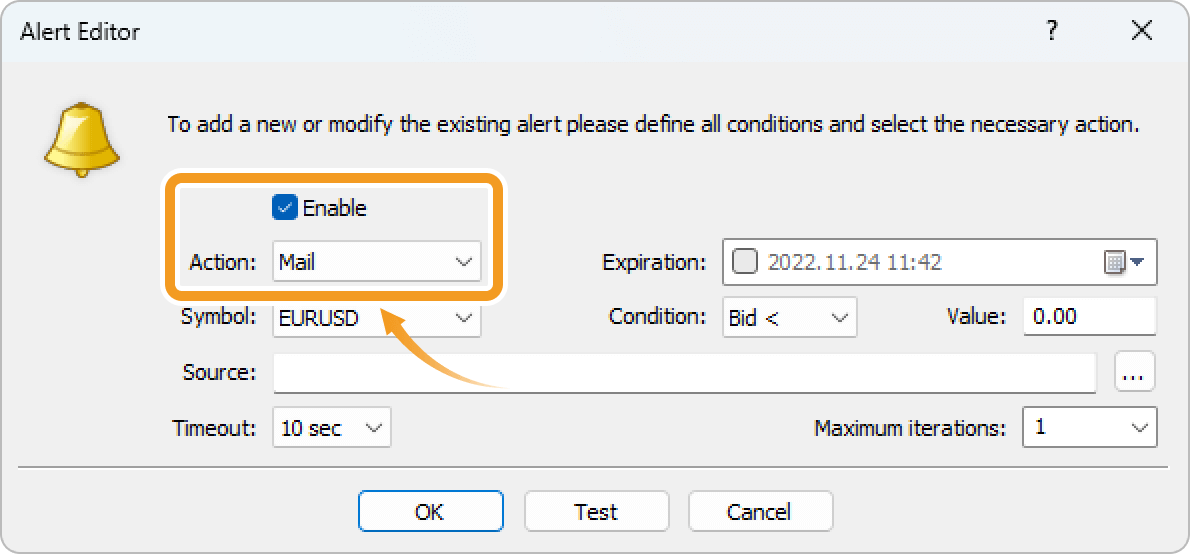
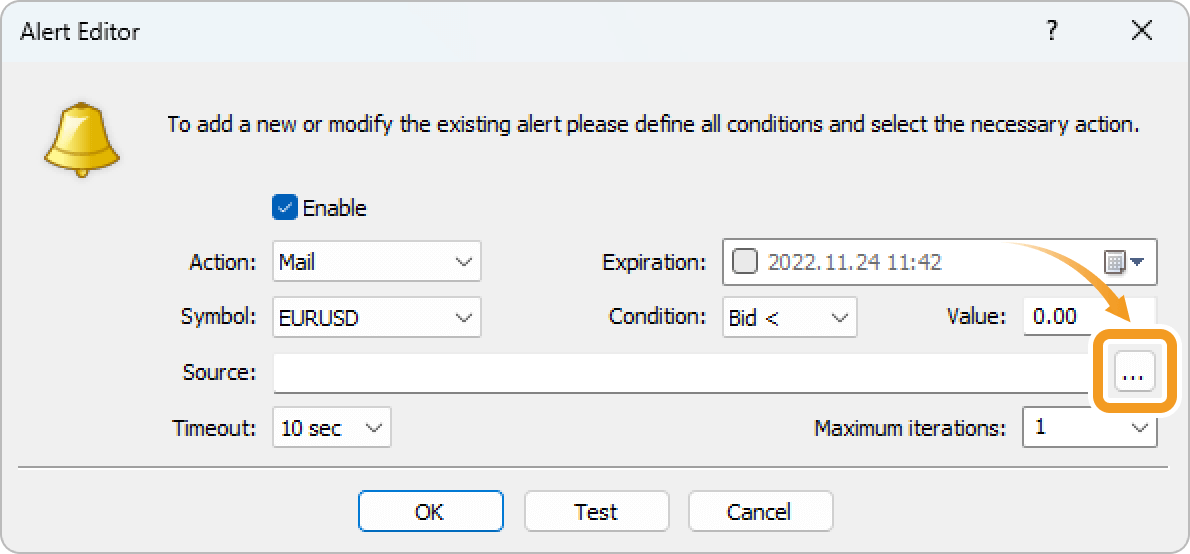
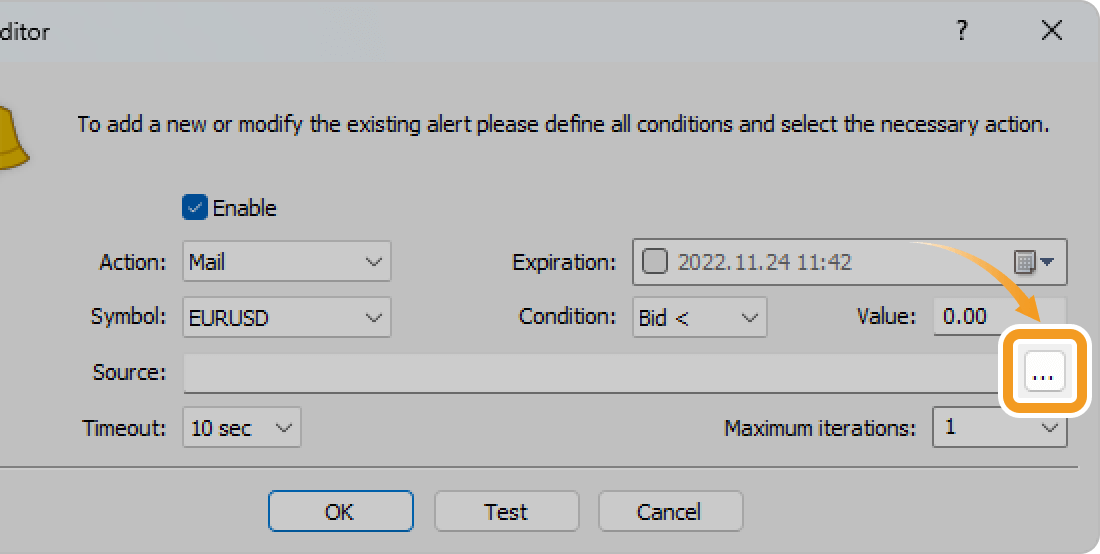
Click the "..." button to the right of the "Source" field.
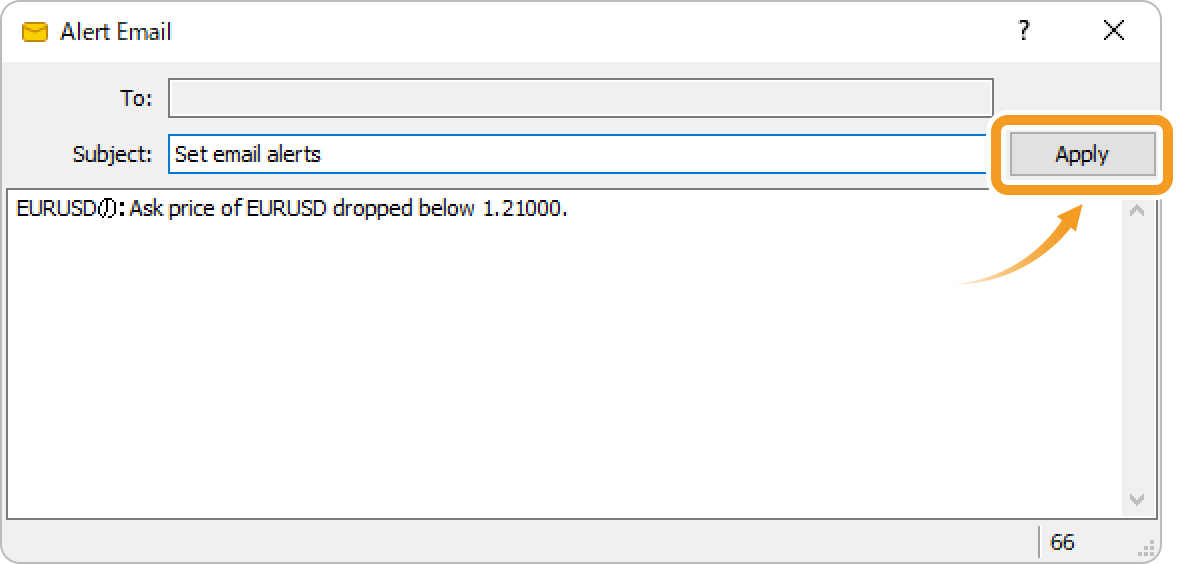
Enter the subject and body and click "Send".
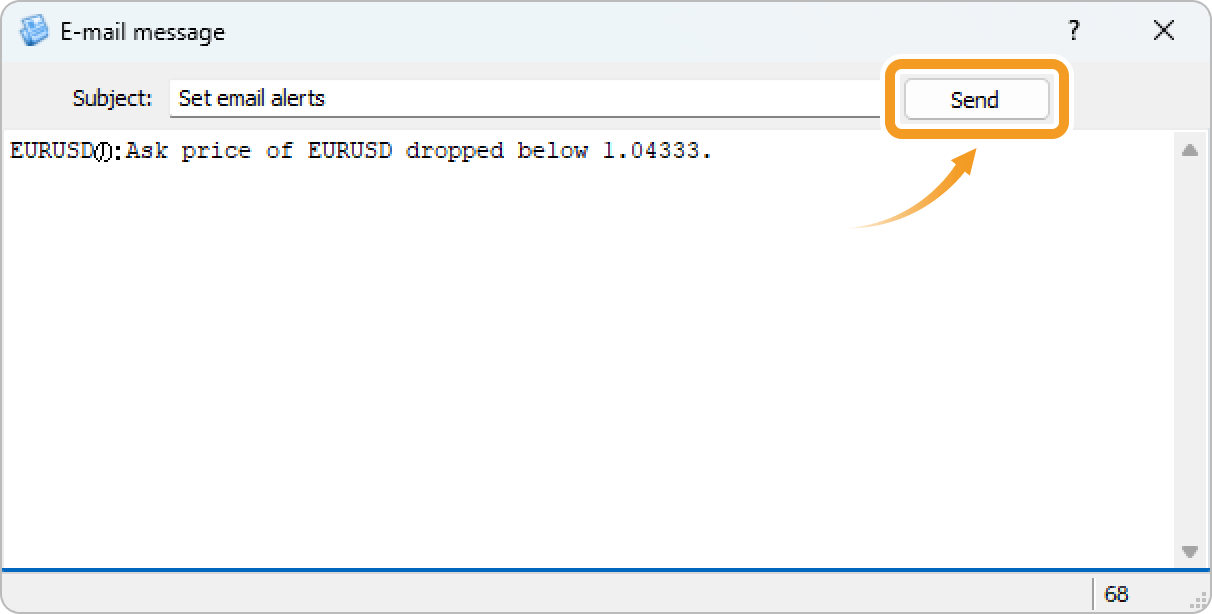
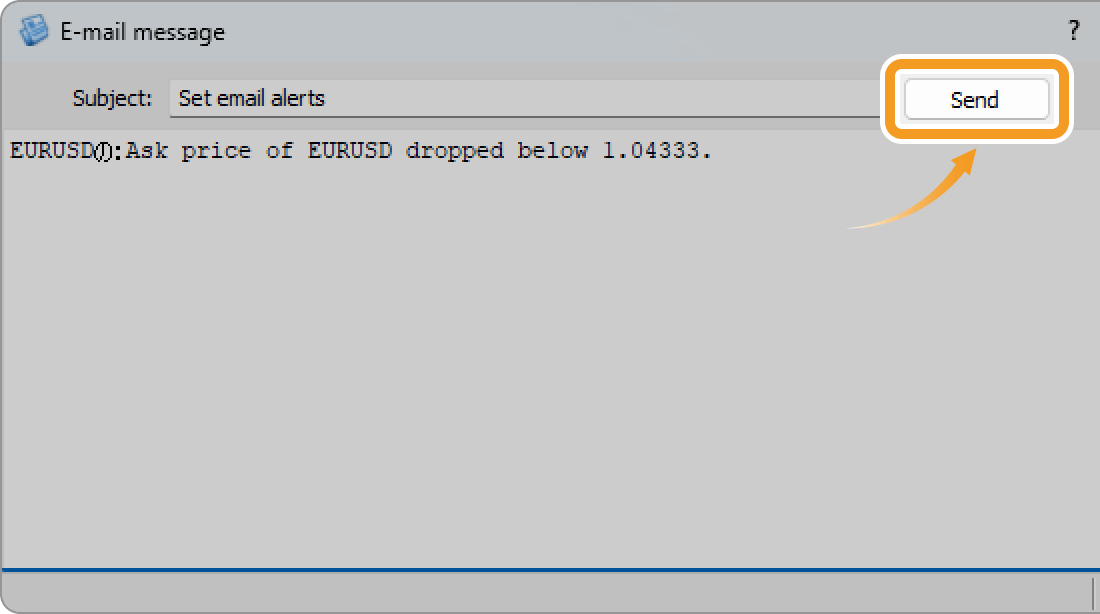
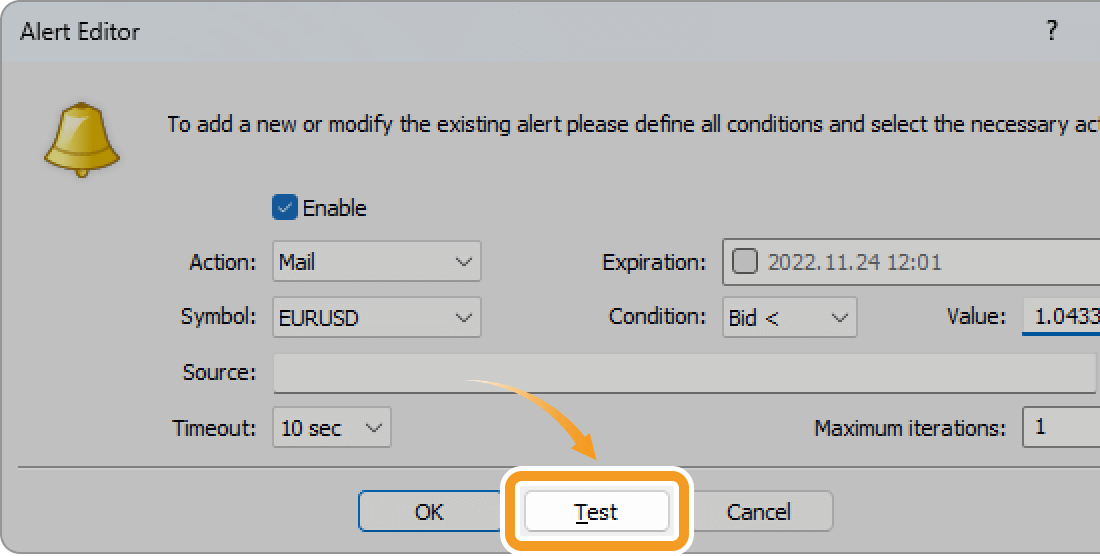
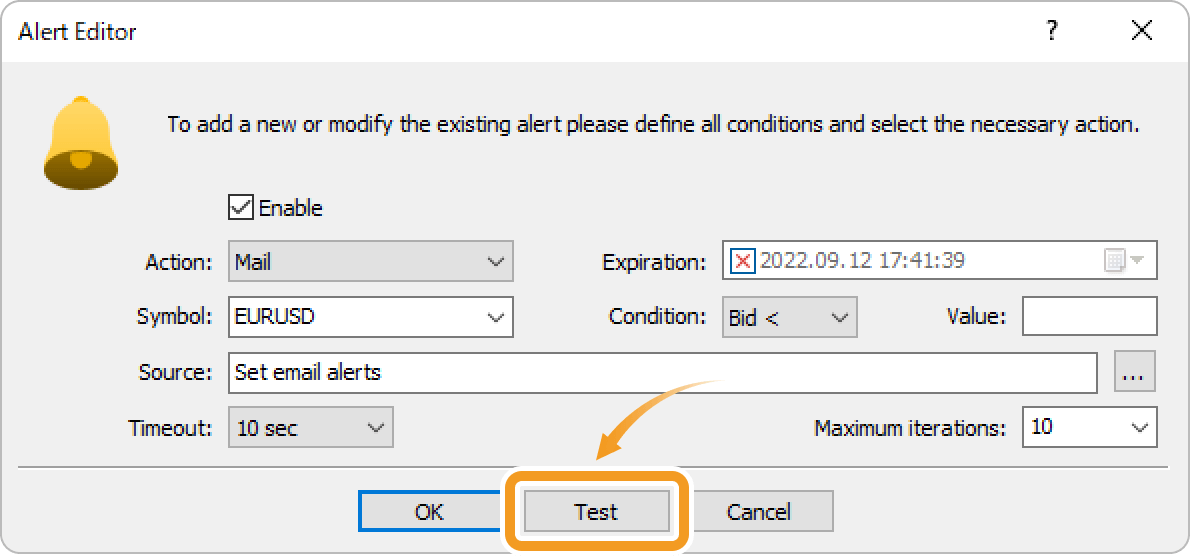
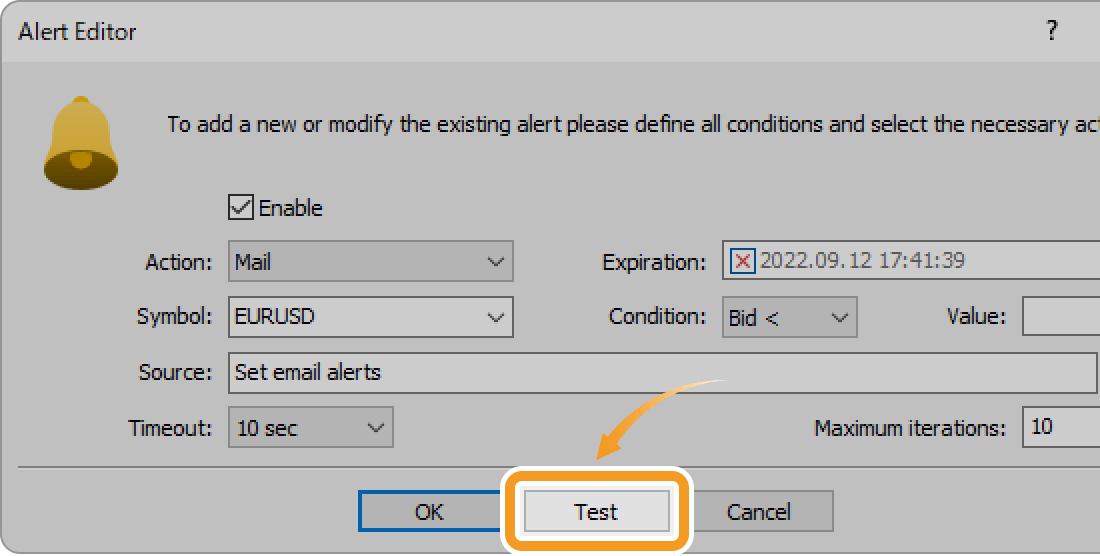
You can send a test email by clicking the "Test" button.
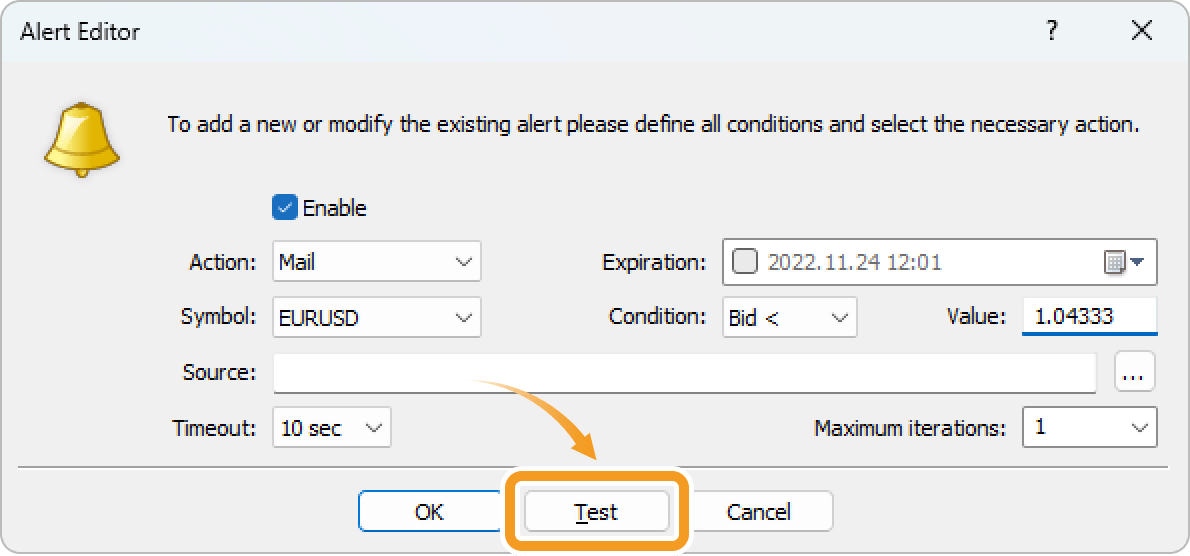
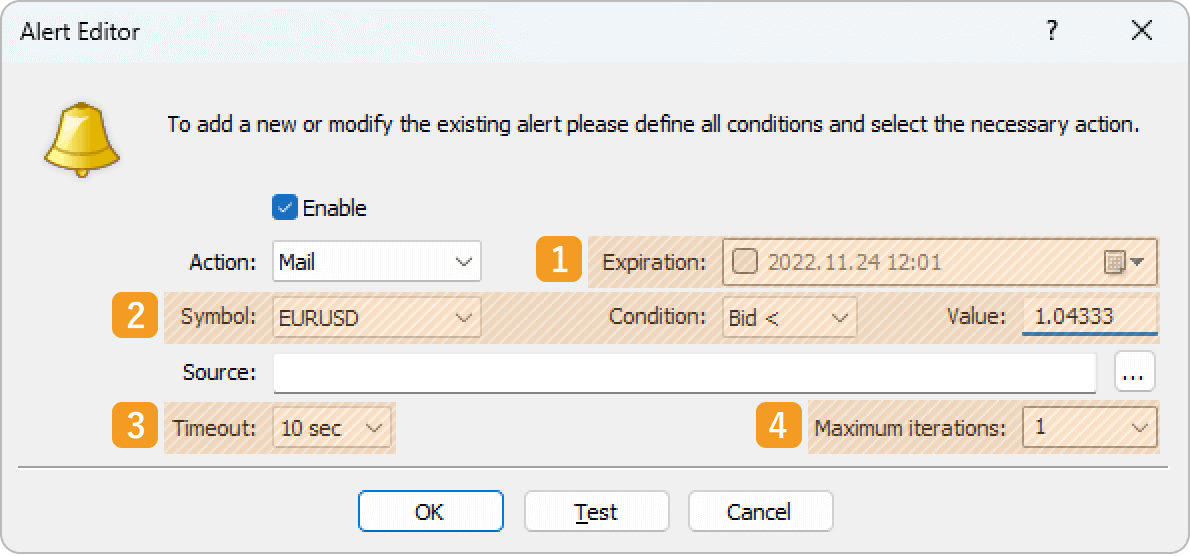
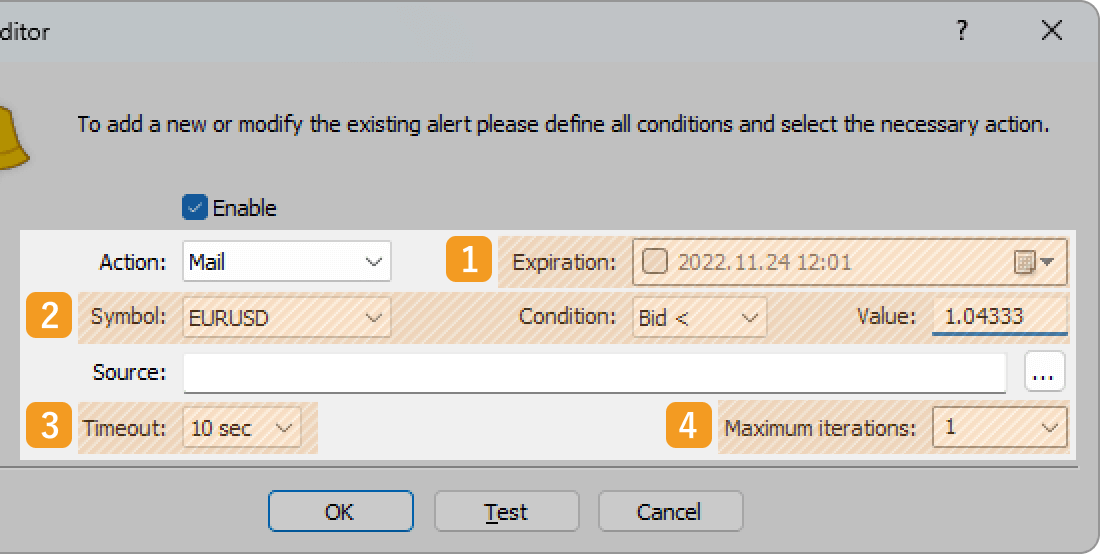
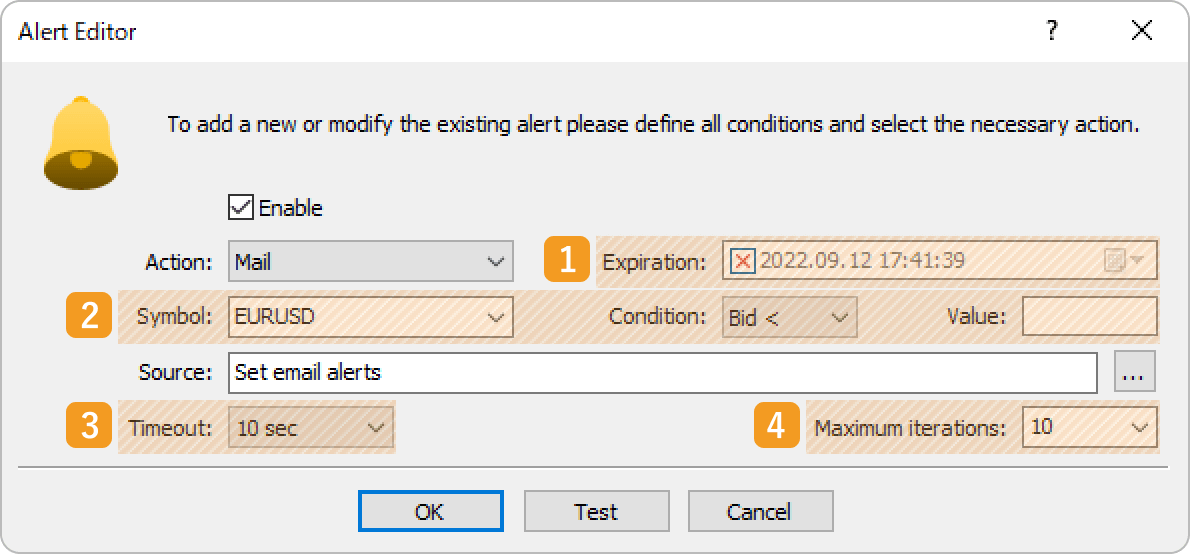
Configure the alert settings and click "OK".
|
Number |
Item name |
Descriptions |
|---|---|---|
|
1 |
Expiration |
Specify the expiration time for the alert. To set the expiration time, check the box and enter the date and time or choose them by clicking the calendar symbol. |
|
2 |
Symbol/Condition/Value |
Specify the symbol, condition, and price for the alert.
Bid <: Notify when the bid price of the symbol goes below the specified price.
Bid >: Notify when the bid price of the symbol goes above the specified price.
Ask <: Notify when the ask price of the symbol goes below the specified price.
Ask >: Notify when the ask price of the symbol goes above the specified price.
Time =: Notify at the specified time. Set the value as "HH:MM".
|
|
3 |
Timeout |
Set a time interval for the email alert to avoid repetitive triggers. For example, if the interval is set to 10 seconds, no additional emails will be sent within that period, even if the condition is met again. |
|
4 |
Maximum iterations |
Set the number of times to repeat the email notifications. Enter or select the number from the pull-down menu. |
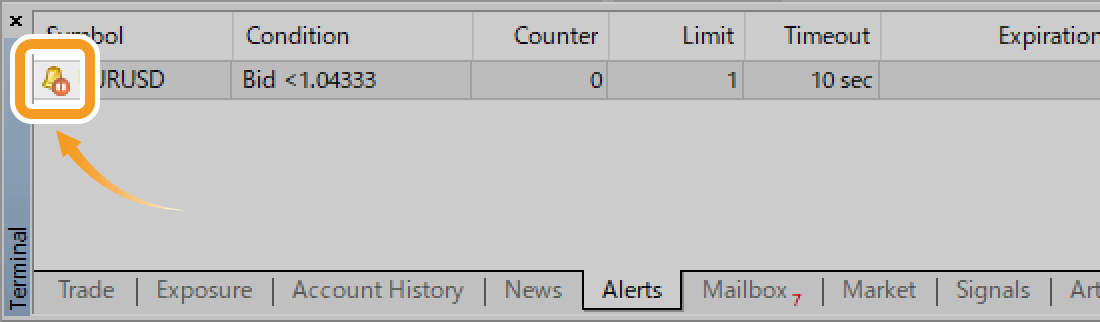
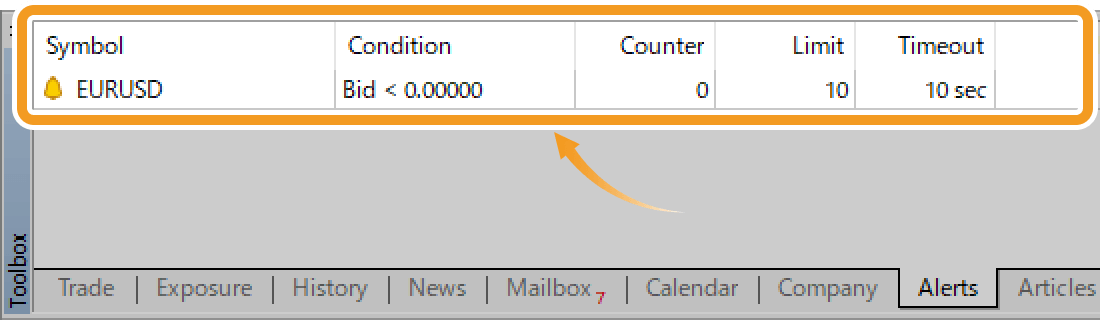
You will see the alert you have set in the "Alerts" tab.


Once the alert is finished, the pause icon will appear on the alert.

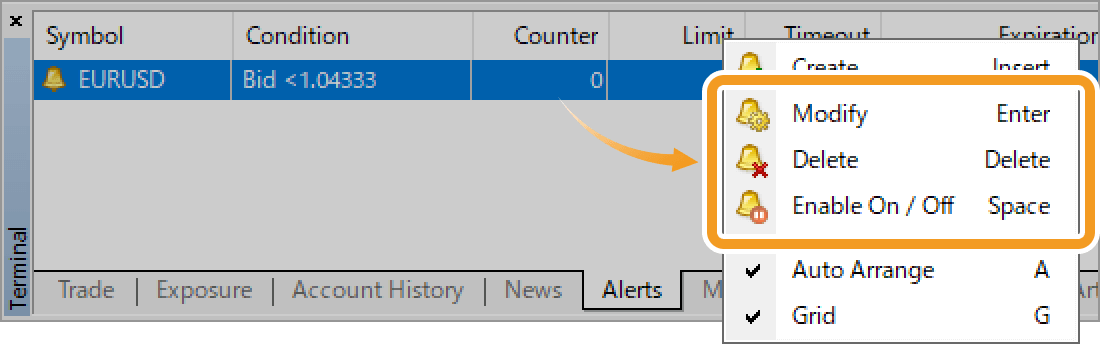
To edit the alert settings, right-click on the alert and select "Modify" in the context menu. You can also select "Delete" if you wish to remove the alert, or "Enable On / Off" to disable it temporarily.

Click "Tools" in the menu and select "Options". (Shortcut keys: "Ctrl"+"O")
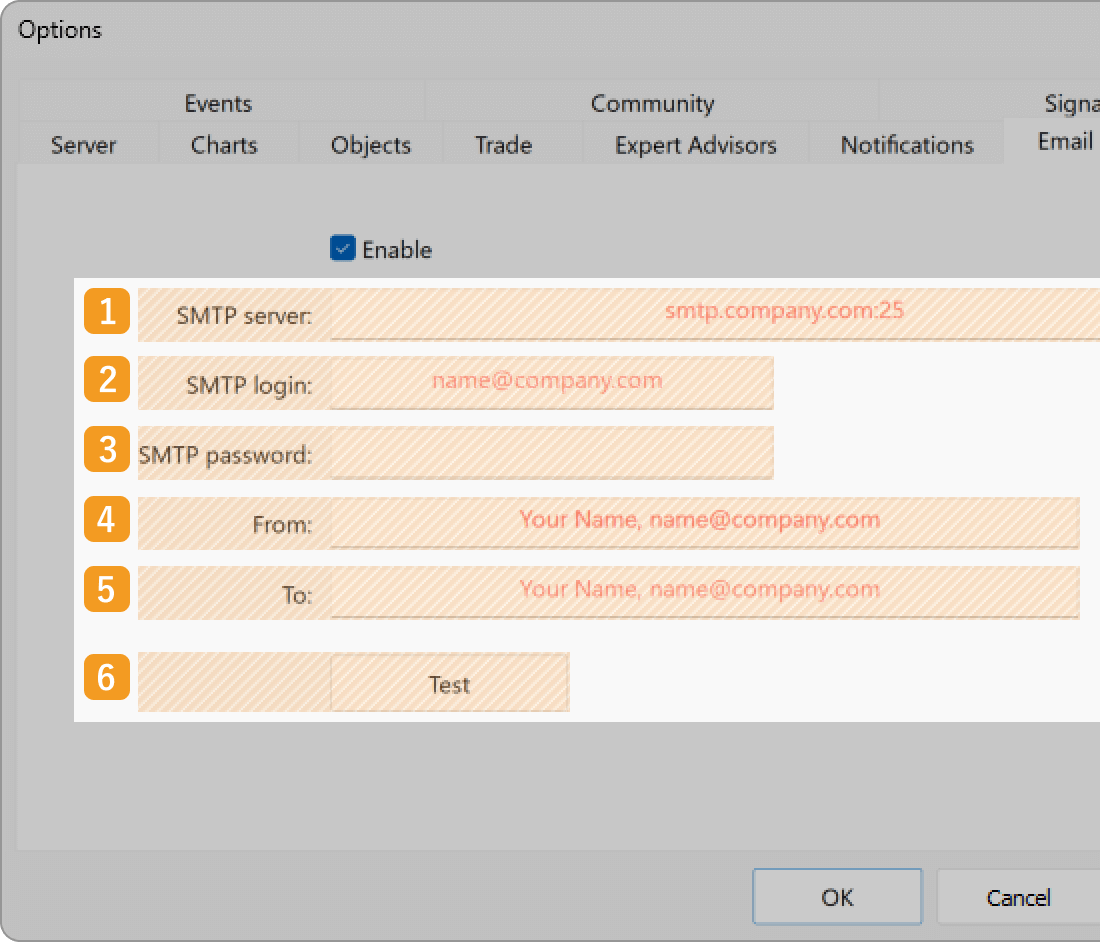
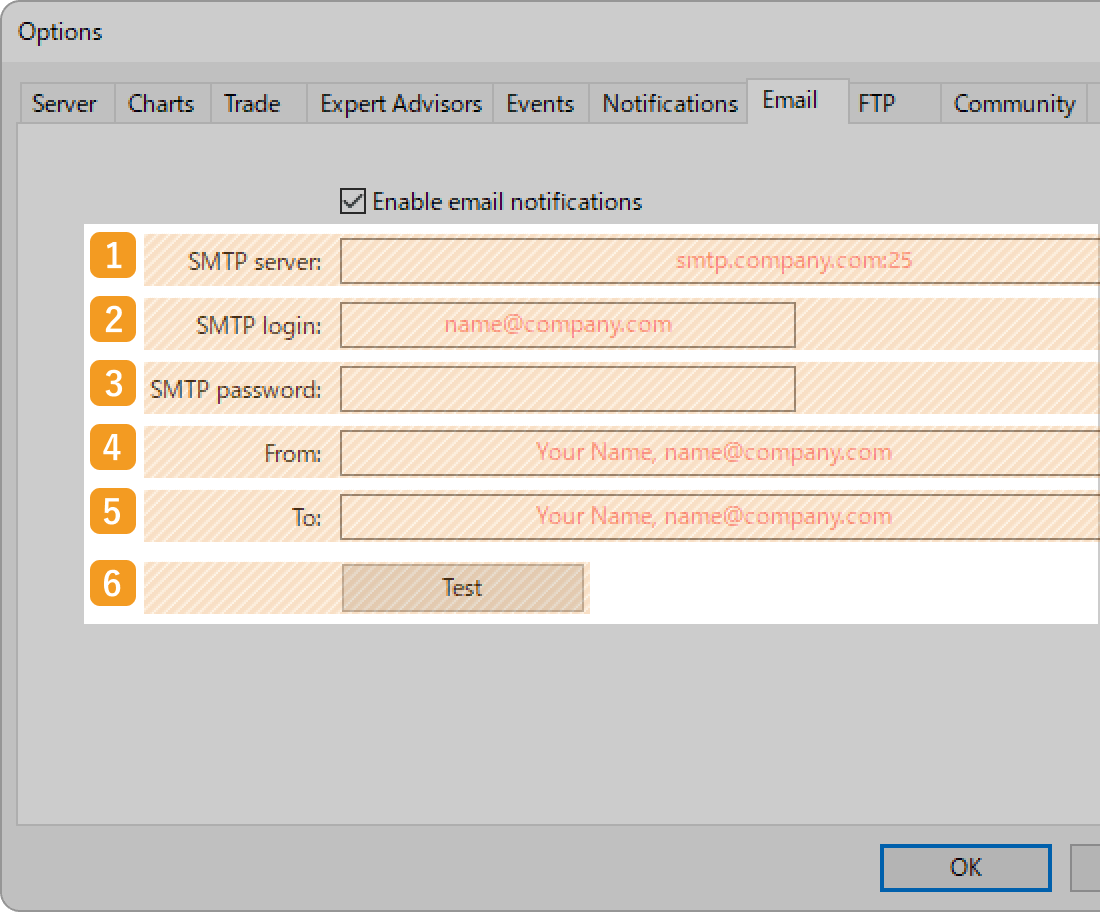
In the "Email" tab, check the "Enable email notifications" box and enter the account details for the SMTP server of the sender, the sending email address, and the receiving email address. Click "OK" to save the settings.
|
Number |
Item name |
Descriptions |
|---|---|---|
|
1 |
SMTP server |
Enter the IP address and port number for the SMTP server of the sending email account. |
|
2 |
SMTP login |
Enter the login ID for the SMTP server of the sending email account. |
|
3 |
SMTP password |
Enter the password for the SMTP server of the sending email account. |
|
4 |
From |
Enter the email address of the sender. The addresses for "From" and "To" can be the same. |
|
5 |
To |
Enter the email address of the recipient. The addresses in "From" and "To" can be the same. |
|
6 |
Test |
After filling out all the information, you can send a test email by clicking "Test". |
When setting up email alerts using your SMTP server, the settings will depend on the service you use. Please follow the instructions provided by your email services to integrate it with the external service.
If you wish to use email notifications for the alert feature of Expert Advisor (EA) or indicators, you only need to complete step 1 and 2 and no further settings are required. An email will be sent when the conditions set on the EA/indicator side are met. To define the alert conditions yourself, you will need to follow step 3 onwards.
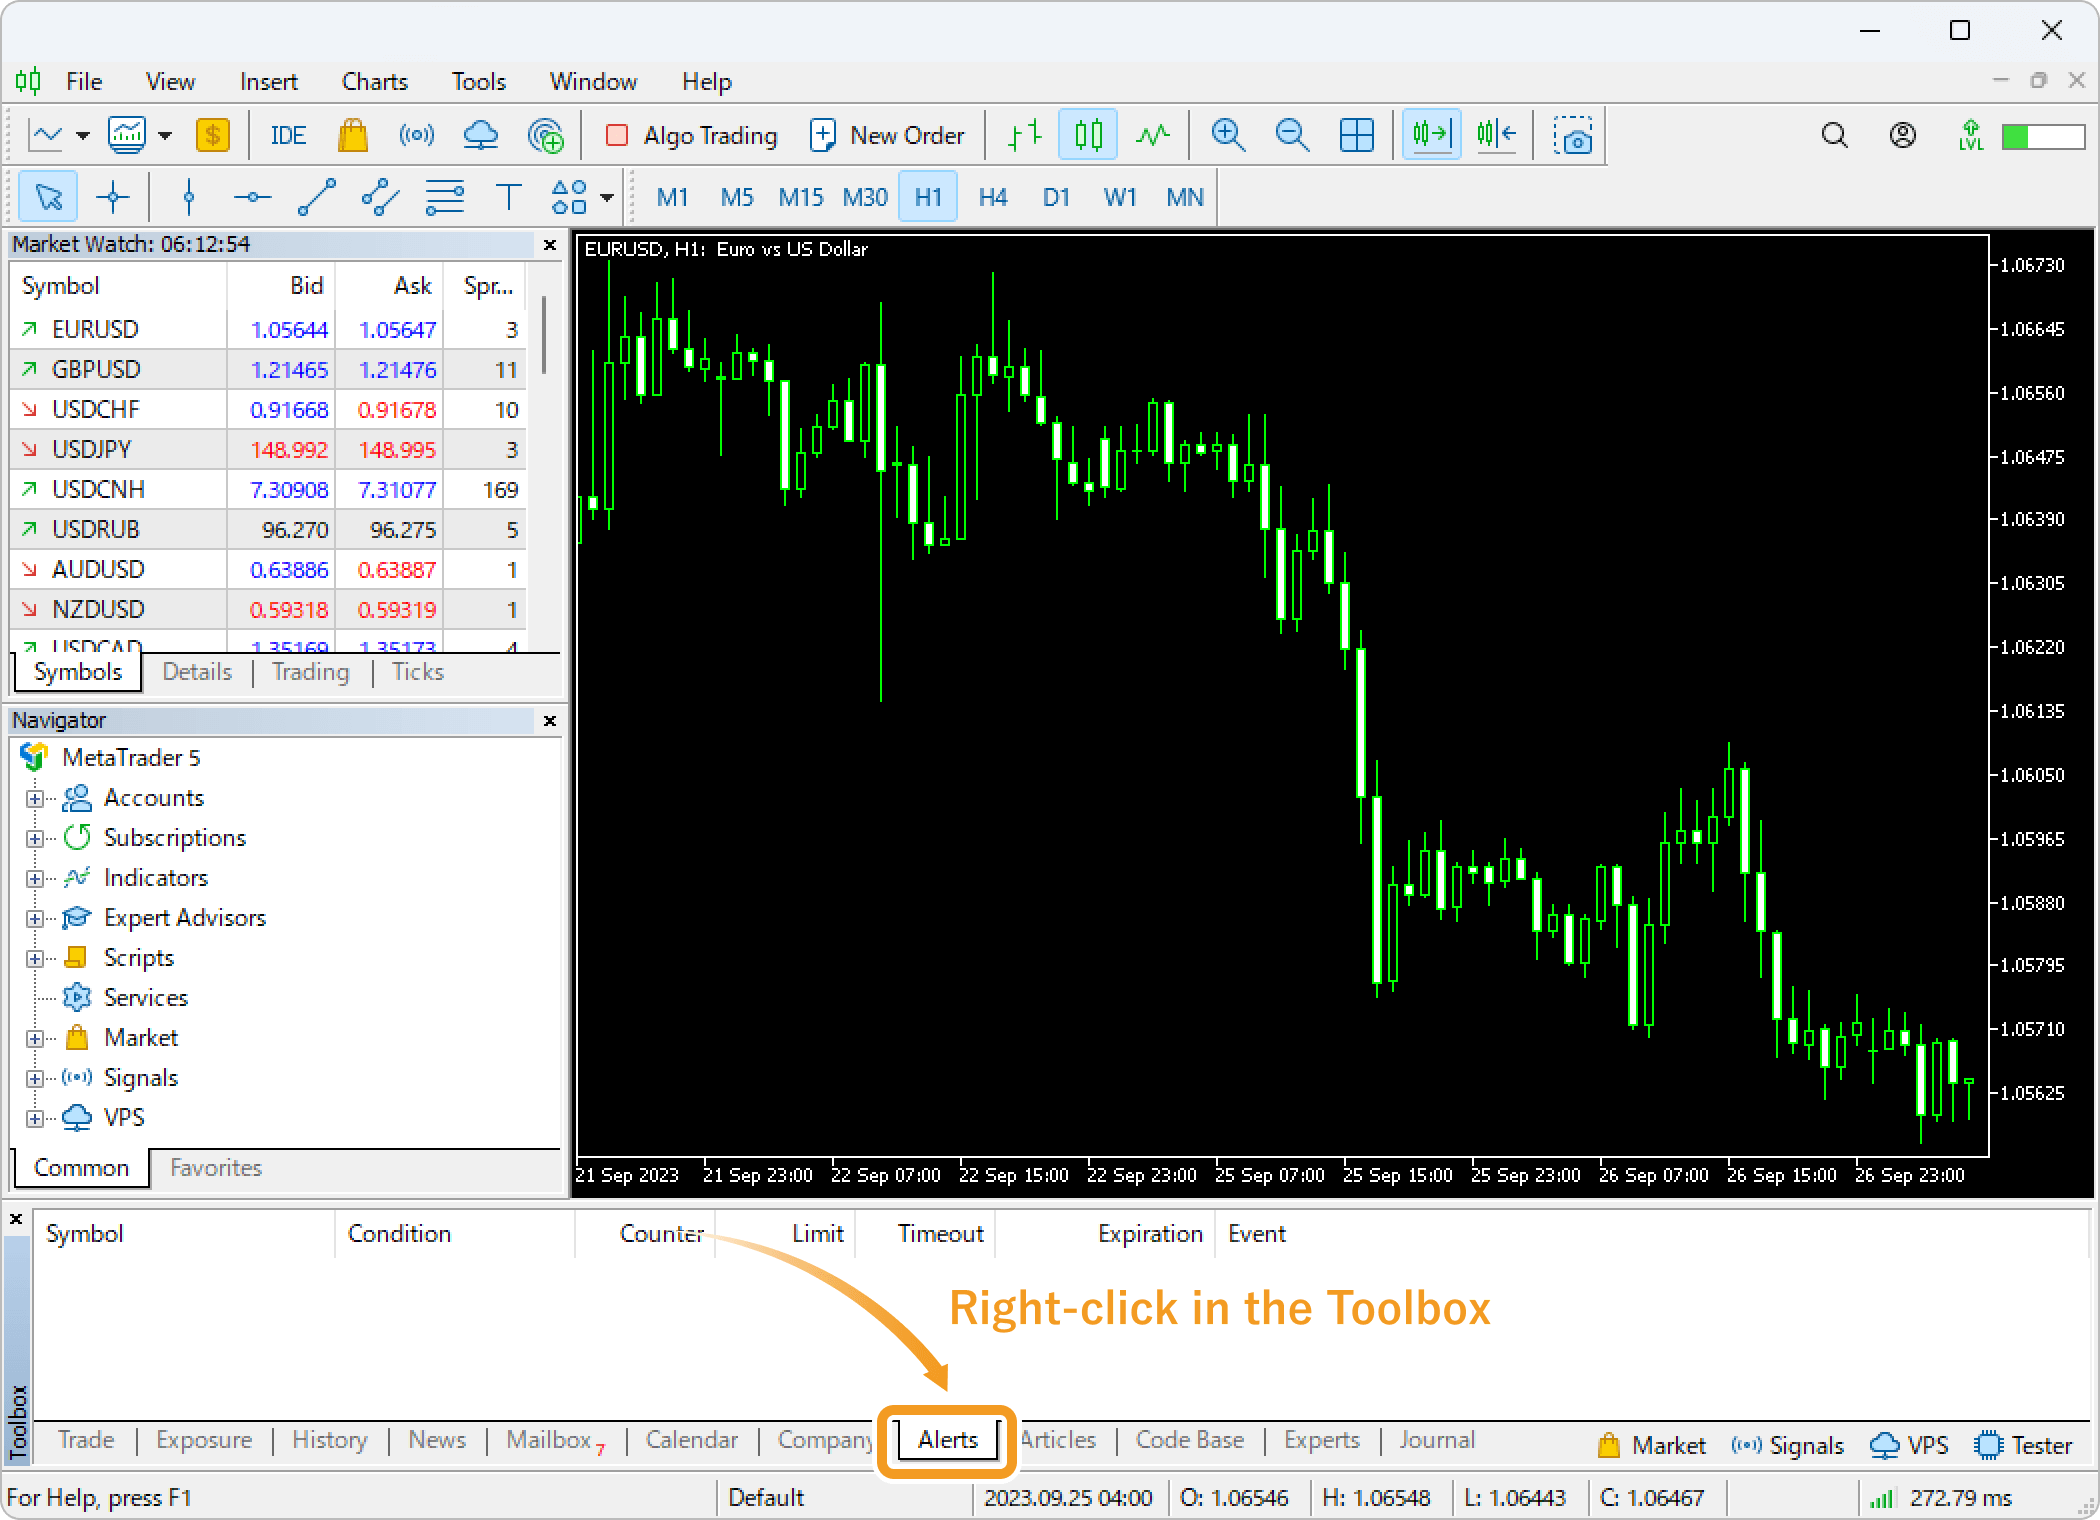
Click the "Alerts" tab of the Toolbox and right-click in the tab.
Select "Create" from the context menu.

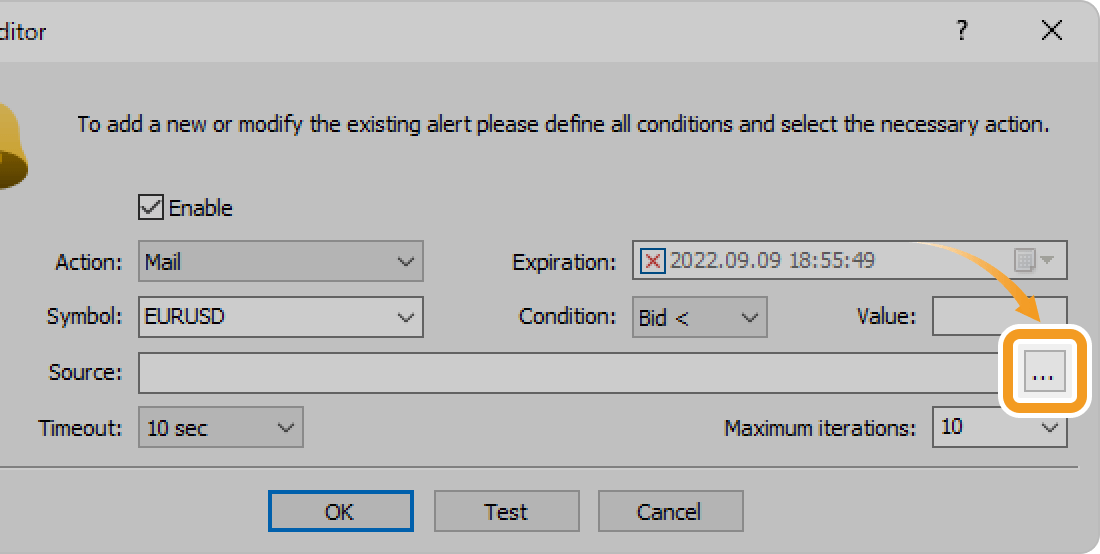
Check the "Enable" box and select "Mail" in the "Action" field.
Click the "..." button to the right of the "Source" field.
Enter the subject and body and click "Apply".
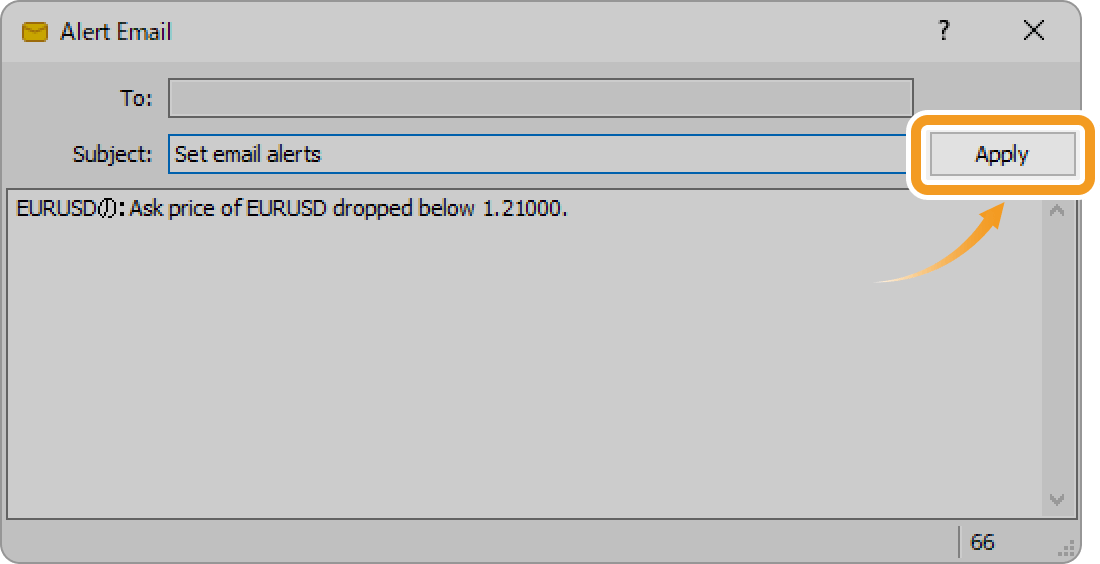
You can send a test email by clicking the "Test" button.
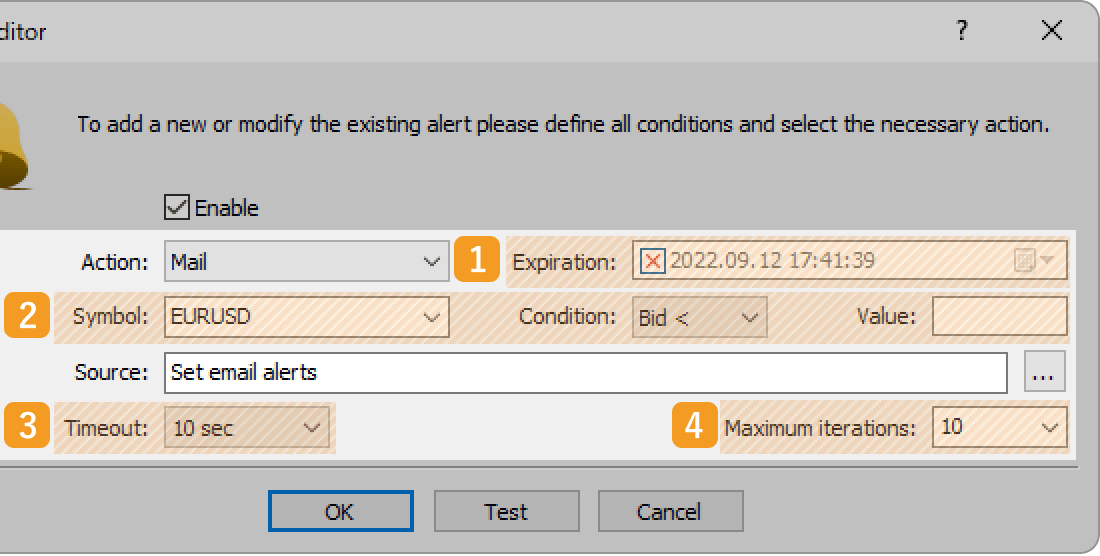
Configure the alert settings and click "OK".
|
Number |
Item name |
Descriptions |
|---|---|---|
|
1 |
Expiration |
Specify the expiration time for the alert. To set the expiration time, check the box and enter or select the date and time. If you don't want to set it, put an X mark in the box. |
|
2 |
Symbol/Condition/Value |
Specify the symbol, condition, and value for the alert. |
|
3 |
Timeout |
Set a time interval for the email alert to avoid repetitive triggers. For example, if the interval is set to 10 seconds, no additional emails will be sent within that period, even if the condition is met again. |
|
4 |
Maximum iterations |
Set the number of times to repeat the email notifications. Enter or select the number from the pull-down menu. |
You will see the alert you have set in the "Alerts" tab.

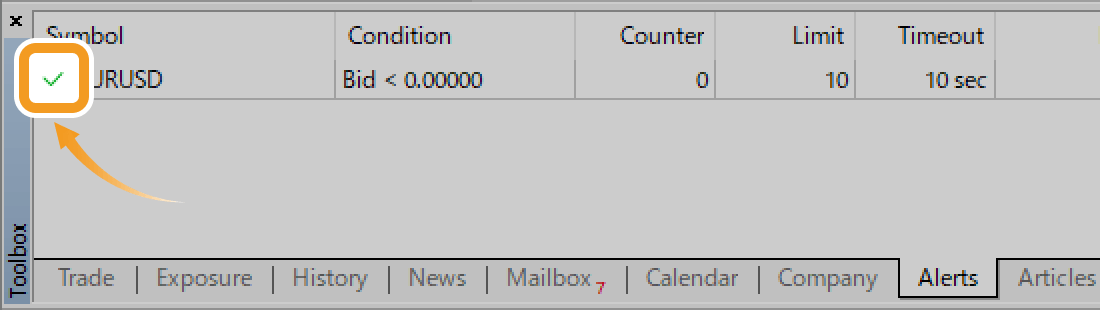
Once the alert is finished, the bell icon will change to a check mark.

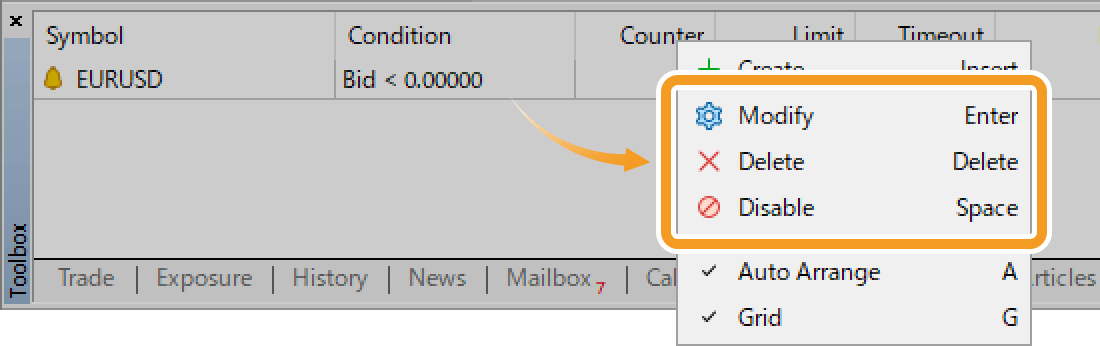
To edit the alert settings, right-click on the alert and select "Modify" in the context menu. You can also select "Delete" if you wish to remove the alert, or "Disable" to disable it temporarily.

Was this article helpful?
0 out of 0 people found this article helpful.
Thank you for your feedback.
